FAQs
The Handout Manager functionality in Pharmacy Manager helps you to manage your bagged prescriptions that are ready to hand out to patients in your pharmacy. You can also print multiple bag labels for your bagged prescriptions depending on their locations, for example, one on a shelf and the other in a fridge.
See Preparing for Handout Manager for all available guidance to help you prepare for Handout Manager.
To scan a barcode using the handheld device, press the orange button on the side and point the device at the barcode. You’ll see a red laser pointer, use this to direct the scanner to the correct barcode.
When logging into the Handheld device for the first time you may get a Google Chrome log in request, please select Use without an account. Continue to sign into the Handout Manager Handheld Device.
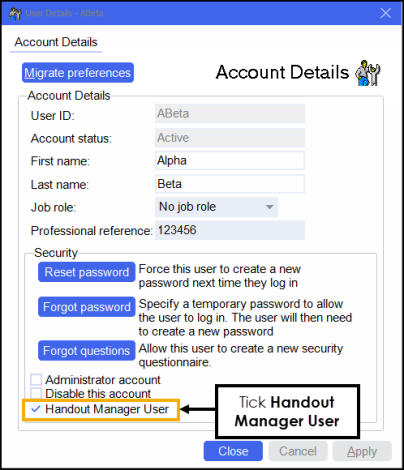
Have you checked if they are setup for Handout Manager? From User Details check that Handout Manager User is ticked.
Contact our Service Desk on 0330 303 3340 to log the incident. If urgent, use the uncollected bags screen to assign and handout bags.
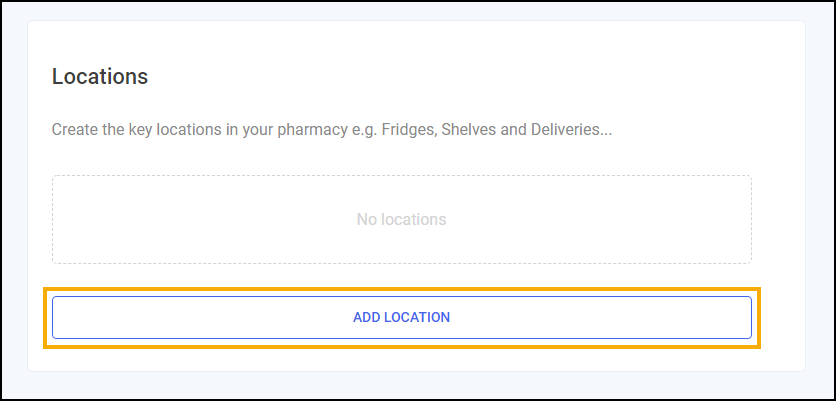
From Tools - Settings - Handout Manager, simply select ADD LOCATION.
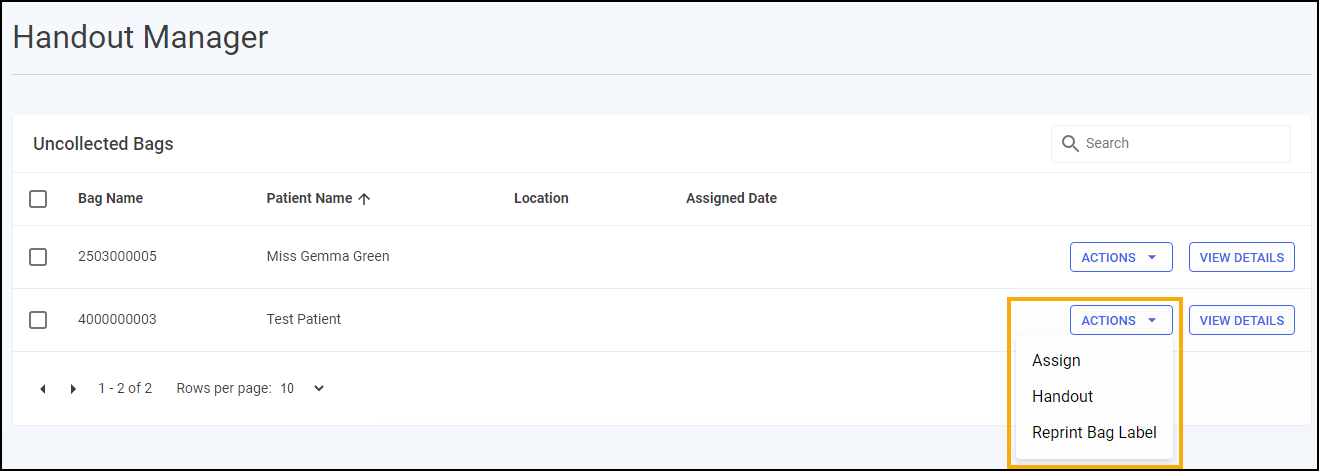
To reprint a bag label, from the Uncollected Bags screen, select ACTIONS - Reprint Bag Label.
You can easily move a bag to a new location, simply assign the bag to the new location and the latest location is used.
You can easily relocate a bag by assigning it to a new location via the Uncollected Bags screen or Handout Manager, the most recent location is always used.
In Pharmacy Manager, if a supply including an Owing (and associated bag) is manually marked as Collected, you have confirmed that the supply has left the pharmacy. Therefore the bag label will not then scan to a location. With Handout Manager enabled, all collections must be performed with the Handout Manager app, unless the scanner is unavailable for some reason.
From the Owings screen:
-
Select Prepare
 to prepare the owing and print the item label.
 -
Select Check to accuracy check the owing.

A bag label subsequently prints.
See Accuracy Checking Prescriptions (England) for details. -
You can now assign the bag to a location using Handout Manager.
See Assigning Bags to Locations for details.
 , on the Owings screen, if you are immediately handing out the owing to the patient.
 The Uncollected Bags screen displays all uncollected bags within Pharmacy Manager whether assigned to a location or not.
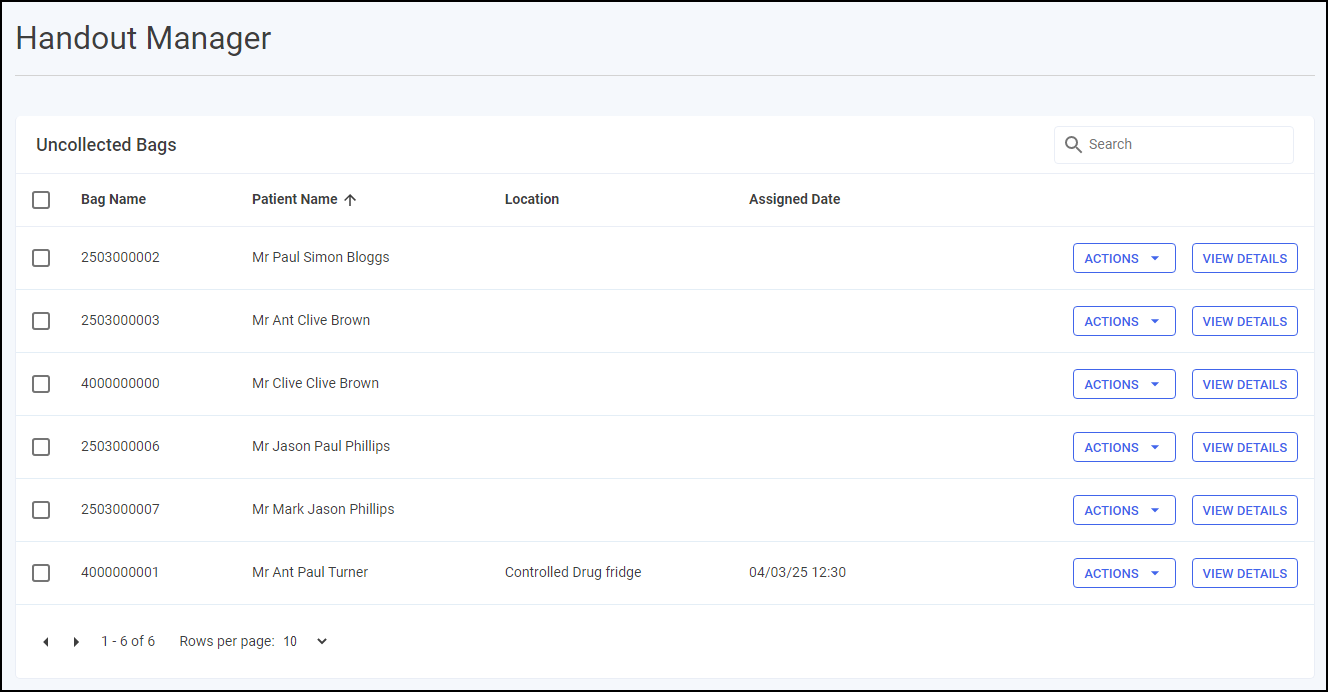
From here you can assign the bag to a location, handout a bag, or reprint a bag label.
If the prescription is not visible on the Uncollected Bags screen it may have been handed out, to check this from the eMessages screen, filter the list by Requires Claiming to view any prescriptions that have been handed out and are ready to be claimed for.
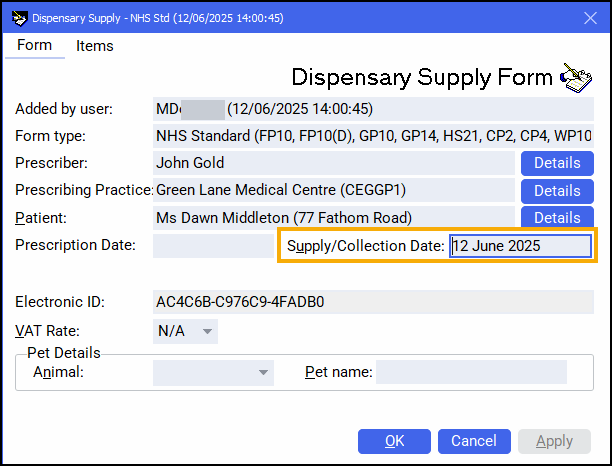
Additionally, from the Patient Details - History tab, highlight an item from the prescription and select Details.
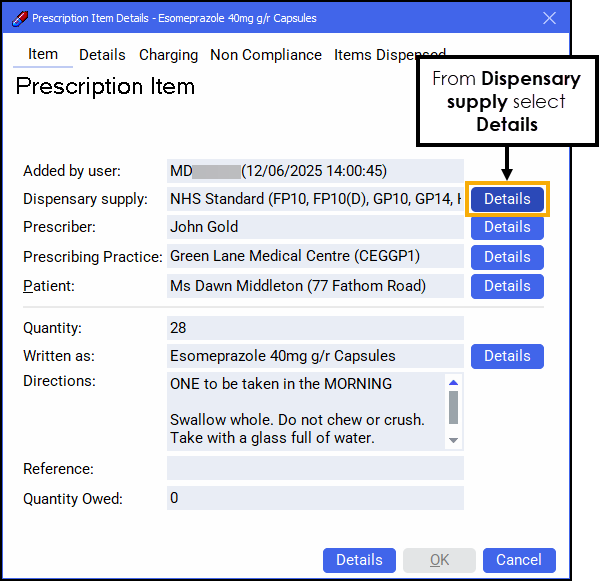
The Prescription Item Details screen displays, from Dispensary supply, select Details to display the Dispensary Supply screen and the Suuply/Collection Date of the item.
Yes, from the Settings screen on the device, select RESET DEVICE.
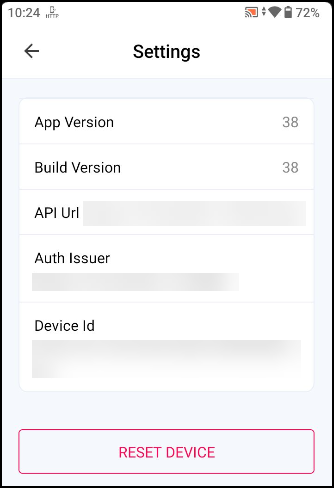
In order to use Handout Manager again the device needs to be re-registered with Pharmacy Manager. See Handout Manager Settings for details.
Accuracy Check in Pharmacy Manager enables you to confirm:
-
The items picked match the items on the selected prescription, and
-
The correct labels have been affixed to the correct items.
With Accuracy Check enabled, once you dispense a prescription, the item labels and a picking list print. It is at this point the patients display on the In Progress Prescriptions screen, to accuracy check the patient’s prescription items select either ACC CHECK next to the required patient or scan the QR code on the picking list.
See Preparing for Accuracy Check for all available guidance to help you prepare for Accuracy Check.
A maximum of four prescription items can be printed on one picking list label, after which additional labels are printed detailing 2 of n, 3 of n and so on.
Contact our Service Desk on 0330 303 3340 to log the incident. If urgent use another terminal or scanner from the Pharmacy.
You can easily filter prescriptions on the In Progress Prescriptions screen:
-
Search for specific patients - In Search enter the patient’s name or NHS number, the list updates as you type.
-
Sort prescriptions - Prescriptions sort by newest by default. Select a column header to sort ascending or descending as required.
-
Filter prescriptions - Select FILTER to open the filter screen on the right hand side. From here you can filter the prescriptions that show, for example to view prescriptions that require an accuracy check or are fully or partially owed.
Note - You can save frequently used filters.
Owings created on the Dispensary screen display on the Accuracy Check screen, however if you have fully dispensed an item and then find that you do not have it in stock you can create an owing from the Accuracy screen.
Select Options next to the item and select either Owe item to create a full owing, or if you have partial stock, select Part Owe Item and enter the quantity owed.
Bag labels print after completion of the Accuracy Check, and not at point of dispense.
| Scanning Error | Error Description |
|---|---|
| Scanning Error - The product you have scanned is not part of this prescription. Please select the correct item and try again. | You have scanned an incorrect item for the selected patient's picking list. |
| Scanning Error - The product and label you have scanned do not match. Please correct the error and try again. |
You have scanned an incorrect label for the scanned item. Label Scanned displays red until you scan the correct label:
|
| Scanning Error - There is an item in progress. You must scan the correct label to complete this item. | You previously scanned an item that is on this picking list, you must scan the matching label next. |
| Scanning Error - Please scan the pack, before scanning the label. | You have scanned a label without scanning an item first. Scan the item and then scan the matching label. |
| Scanning Error - The label that you have scanned has not been recognised. If this issue persists you can reprint the labels and try again or use the Manually Confirm Check option. | You have either scanned the label for a different patient or there is an issue with the label itself. Reprint the labels and try again or manually confirm the check, see Manual Confirmation for details. |
| Checking Error - The product and label you have scanned do not match. Please correct the error and try again. |
You have scanned an incorrect label for the scanned item. Label Scanned displays red until you scan the correct label:
|
Yes. For example, if Simador 20mg tablets are dispensed instead of the prescribed Simvastatin 20mg tablets, this passes the accuracy check.
It is recommended in the guidance issued by DHCW to capture your patient nominations on paper in the 12 weeks before GP go live.
However if you are confident in capturing them in Pharmacy Manager after your pharmacy goes live with EPS, prior to the GP go live, this is entirely your choice.
Your dispensing and labelling process is not changing, how the prescriptions arrive and how they are claimed is, you must collect the prescription in Pharmacy Manager prior to claiming.
If the overnight download occurs when a smartcard was not in use, the prescriptions display as Locked on the eMessages screen. To unlock prescriptions, ensure your smartcard is entered, highlight the prescriptions and select Unlock.
The configuration setting for Auto Clinical Check is in Tools - System Setting - Pharmacy Details - Automated Clinical Check.
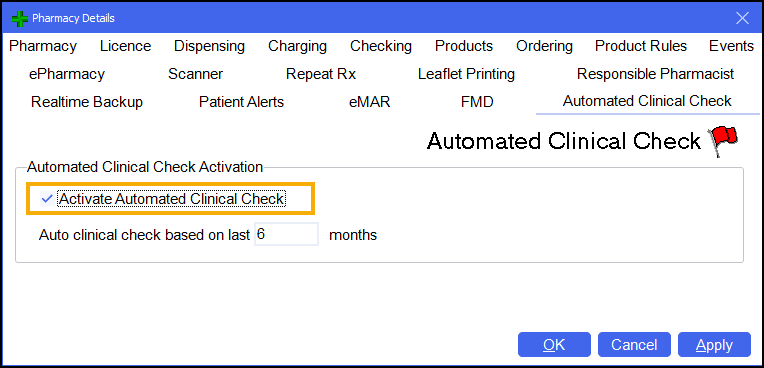
Auto clinical check takes place when a prescription is downloaded. The Pharmacy Manager business intelligence engine analyses the contents of the prescription message to determine whether it can be auto checked or not.
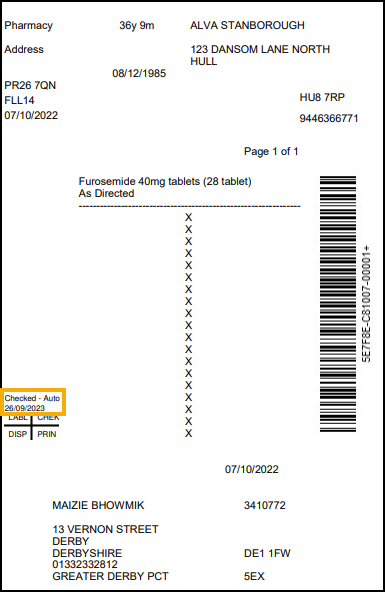
The clinical check status displays on the New Prescriptions screen. This is accessed either from the dashboard Dispensing Evolution has Begun tile, or from the eMessages screen, select New Dispensing - Take me there. Auto checked prescriptions display with a status of Checked - Auto, meaning that the dispenser can begin labelling straight away, allowing the pharmacist to focus on prescriptions with a status of Requires Check. You can quickly filter for auto checked prescriptions on the New Prescriptions screen.
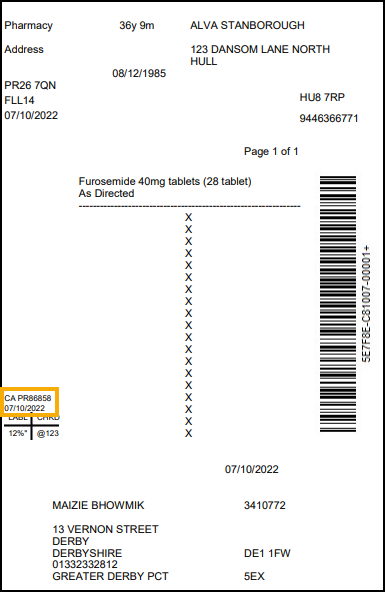
If you have the standalone Clinical Check module restricted to pharmacist access, when tokens are printed, any prescriptions that have been auto clinical checked print with Checked - Auto on them. These can be separated from those requiring a clinical check in order to begin labelling.
If a prescription has been manually checked within the past six months and there has been no change to the patient record (new conditions, sensitivities, allergies), the item, quantity or directions prescribed, then Pharmacy Manager marks the prescription as auto clinical checked.
Yes, if an auto check has taken place and you feel that a prescription needs manually checking, then on the New Prescriptions screen, select Actions next to the relevant prescription and then select Reset Clinical Check. The prescription reverts back to a status of Requires Check and you can perform a manual clinical check.
Prescriptions containing Schedule 2 or 3 Controlled Drugs or high-risk medication are never automatically clinically checked. Manual checks must always be performed for these items.
Yes, absolutely. The auto clinical check feature is designed to work with the recent dispensing innovations such as Fast Labelling. When a prescription has been auto checked, then on the dispensing page all the warnings and interactions are pre-confirmed, Fast Labelling pre-populates the items, directions and quantity, meaning that all the dispenser needs to do is select Finish  to print the labels if they are happy to proceed.
Yes, to increase the frequency of manual checks for eligible auto check prescriptions from once every six months, go to Tools - System Settings - Pharmacy Details - Automated Clinical Check, and change Auto clinical check based on last n months where n is the necessary frequency. The frequency can be set between one and six months.
The Fast Labelling logic is:
-
The Patient, Prescriber and Institution on a prescription must all fully match a local record.
-
The prescription cannot contain items that are virtual generics.
If both of the above criteria are met, the system automatically selects an item based on the following logic:
-
Has the patient had the items before in the last six months? If so, auto populate them with the last dispensed items.
-
If not, has ANY patient had the items in the last six months? If so, auto populate the last dispensed for item ANY patient.
-
If not, select the first matching DM+D item.
The rate at which prescriptions are fast labelled depends mostly on whether prescriptions are matched to a local record. Pharmacies with lots of regular patients can see up to 80-85% of prescriptions fast labelled. Pharmacies who add extra details in the address fields, which can affect the matching process, or those with a high patient turnover, may see lower numbers.
The Patient Medication History screen no longer displays when a prescription is fast labelled because the item and directions are populated as part of the fast labelling functionality. Fast Labelling eliminates the need for repeating from history.
In Tools - System Settings - Pharmacy Details - Electronic Messaging, enable Quantity Matching.
Also select Print one label per pack for both Labelling for multiple packs and Labelling for single pack size.
If the directions are completed in shorthand by the GP, they are auto populated in shorthand. This isn't ideal, however Trusted Directions addresses this. You can link the shorthand directions to whatever it is you'd like to display instead, and from then on, any time those particular shorthand directions are received on a prescription the trusted directions automatically apply. Although this takes time to setup, it provides longer term benefits. Alternatively, you can clinically check prescriptions up front and set the directions during that process. If you require specific directions for specific patients, these need to be updated on an adhoc basis.
Special container assistance prompts are not currently compatible with Fast Labelling.
Select the item on the Stock & Order Management - Ordering screen and then press Ctrl + PgUp on your keyboard to increase the order or press Ctrl + PgDn on your keyboard to decrease the order.
When you set up a wholesaler make sure to set the transmission type to Print a report that can be faxed.
How do I Add a Batch Number and Expiry Date? (1:23)
How do I Add a Patient Note or Custom Label? (3:09)
How do I Change the Stock Control Profile for an Item? (3:07)
This is maintained by the BSA & Community Pharmacy England (CPE), see https://www.nhsbsa.nhs.uk/pharmacies-gp-practices-and-appliance-contractors/dispensing-contractors-information/new-medicine-service-nms-drug-lists for details.
Claim Deferred status is indicated when a non- tariff special item prescription has been collected but the invoice information is missing.
How do I endorse a prescription with a status of claim deferred? (3:03)
How do I create an Audit Grid on Dispensing Tokens? - England only (3:22)
Regular items (as opposed to one-off items) are those that the patient will receive each month/ prescription period. Highlight an item, right click and select either Normal, Regular or Generate Repeat:
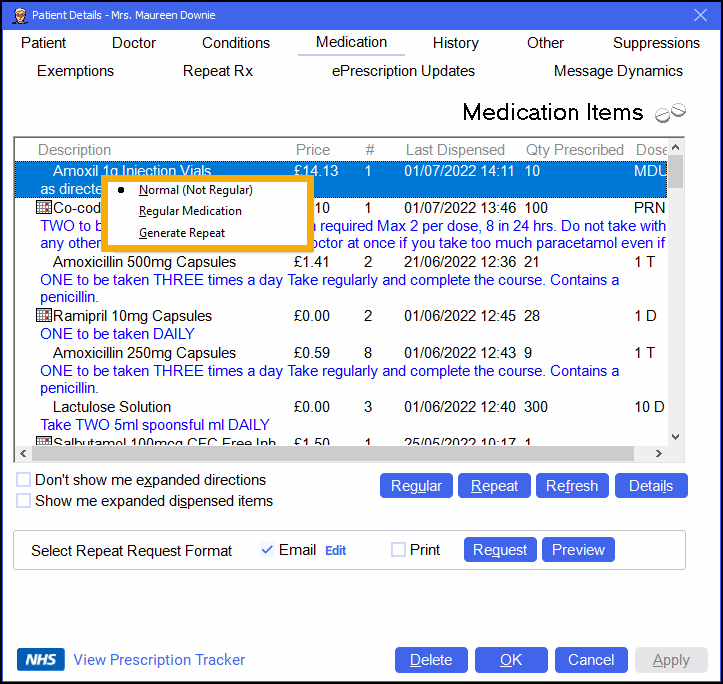
When you choose to dispense from the patient's history, all items marked as regular will be highlighted and when you select Repeat these items will automatically be added for dispensing.
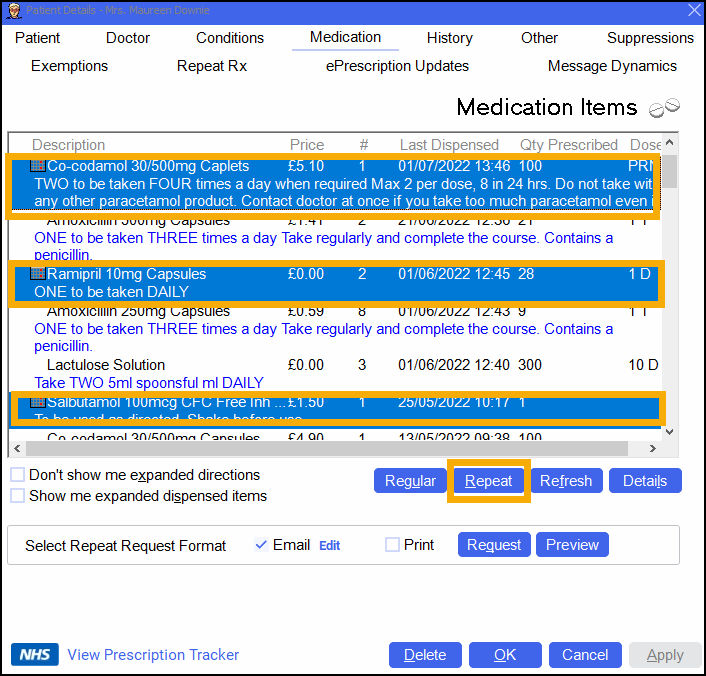
If the regular medication is not selected, you can use Regular to select all items that have been marked as regular items and then simply select Repeat
 to populate the Dispensary screen with those items.
The calendar icon will also display under the px name on the Dispensary screen, if you have used dose codes to populate the directions, hovering over this icon will indicate when the next prescription date is anticipated.
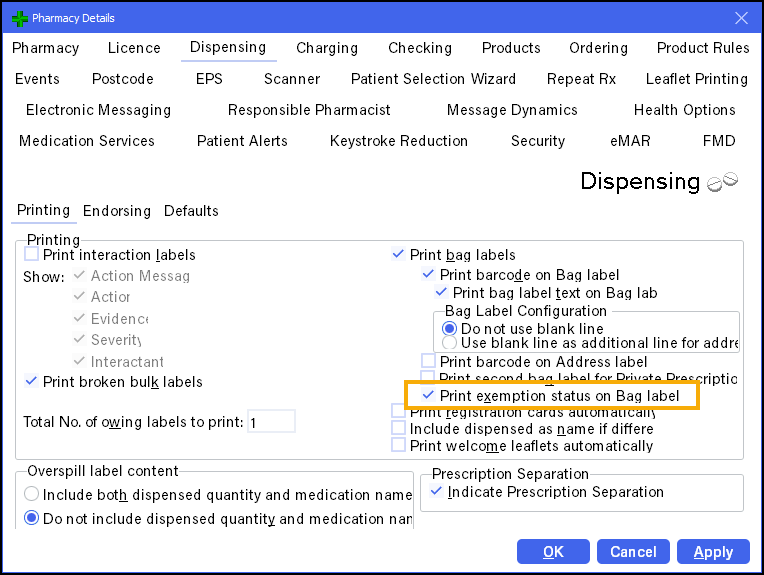
From Pharmacy Details - Dispensing - Printing, tick Print exception status on Bag label.
From the Dispensary screen, select the Ordering menu and switch on Enable Order Summary:

How do I enable the personal List when I am dispensing? (5:11)
See Entering the Product Description for details.
How do I import MDS patients to the new version of MDS? (4:14)
See Importing Care Home and Care Home Patient Data and Importing Community Patient Data for details.
If the Clinical Check Module has the User Restrictions in place, that is that only a User Account with the role of Pharmacist recorded against it, then if the token is printed after the check, the following displays on the token:
| Manual Check | Automated Clinical Check |
|---|---|
| The pharmacist's initials, registration number and the date of the check display on the dispensing token | Checked - Auto and the date of the check display on the dispensing token |
|
|
|
Where do I restrict Clinical Check access?
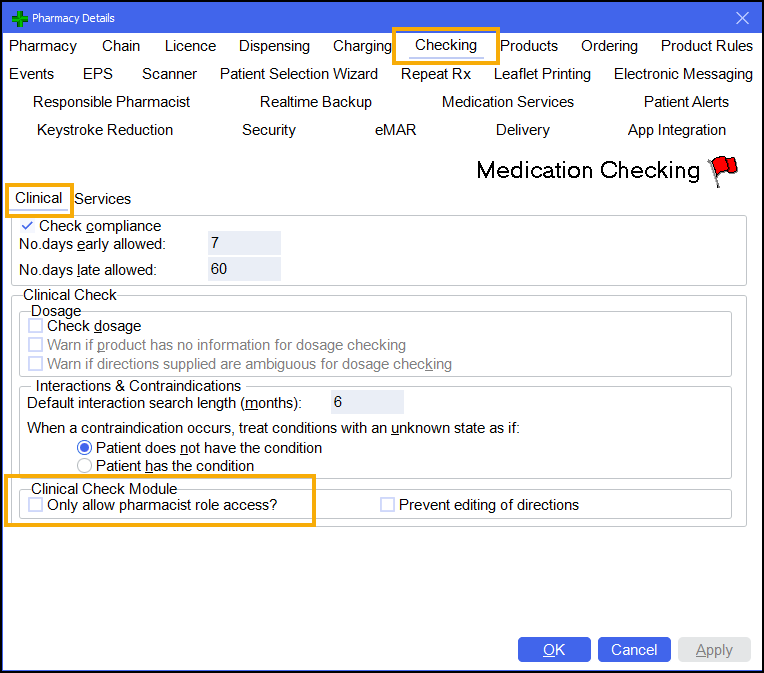
In Clinical Check Module place a tick next to Only allow pharmacist role access?:

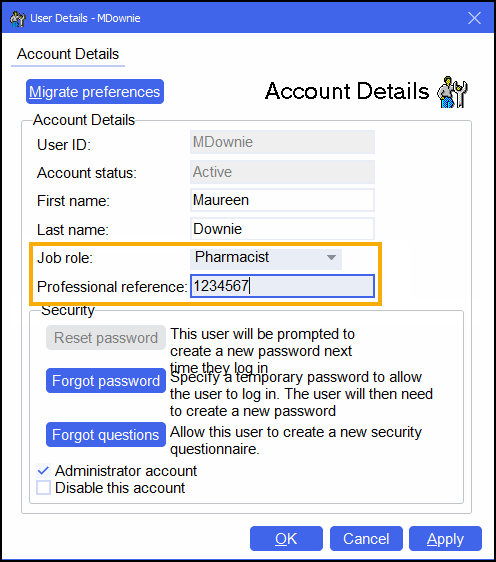
Where do I set the Pharmacist's role?
How do I merge duplicate patient records? (1:43)
-
Select Tools - Bulk Operations.
-
Double click on Merge Patients.
-
Enter the names of the patients to be merged in the two boxes and select Next
 .
.
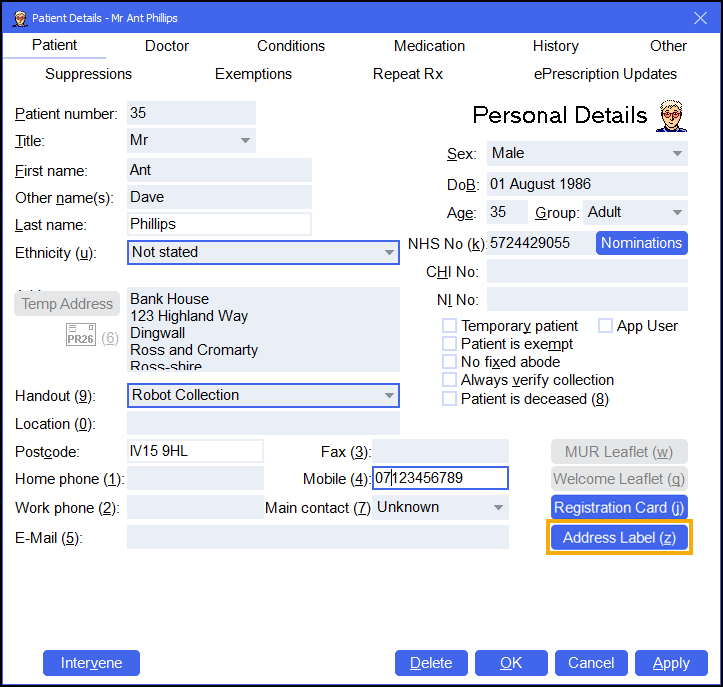
From the Patient Details screen select Address Label or press Alt + Z on your keyboard:
-
From the Pharmacy Manager Toolbar, selectQuick Actions - Quick Interaction Check or select Ctrl + Alt + Q on your keyboard.
-
If you would like to check products against a patient’s PMR, place a tick in Check for patient and enter the patient’s name, if not, leave this blank.
-
To add products to the list select Add
 .
. -
Any interactions and sensitivities display in the bottom half of the window. To see the full details of the interaction, highlight the message and select Explain
 .
.

