Processing Documents
Regardless of how a document is received, you process them in the same way:
-
From DocHub, if necessary, select Not filed from the Side Navigation Bar.
Training Tip - Not filed initially displays by default when you open DocHub, with the earliest uploaded document displaying first. You can sort the documents into any order by selecting a column header to order them by. -
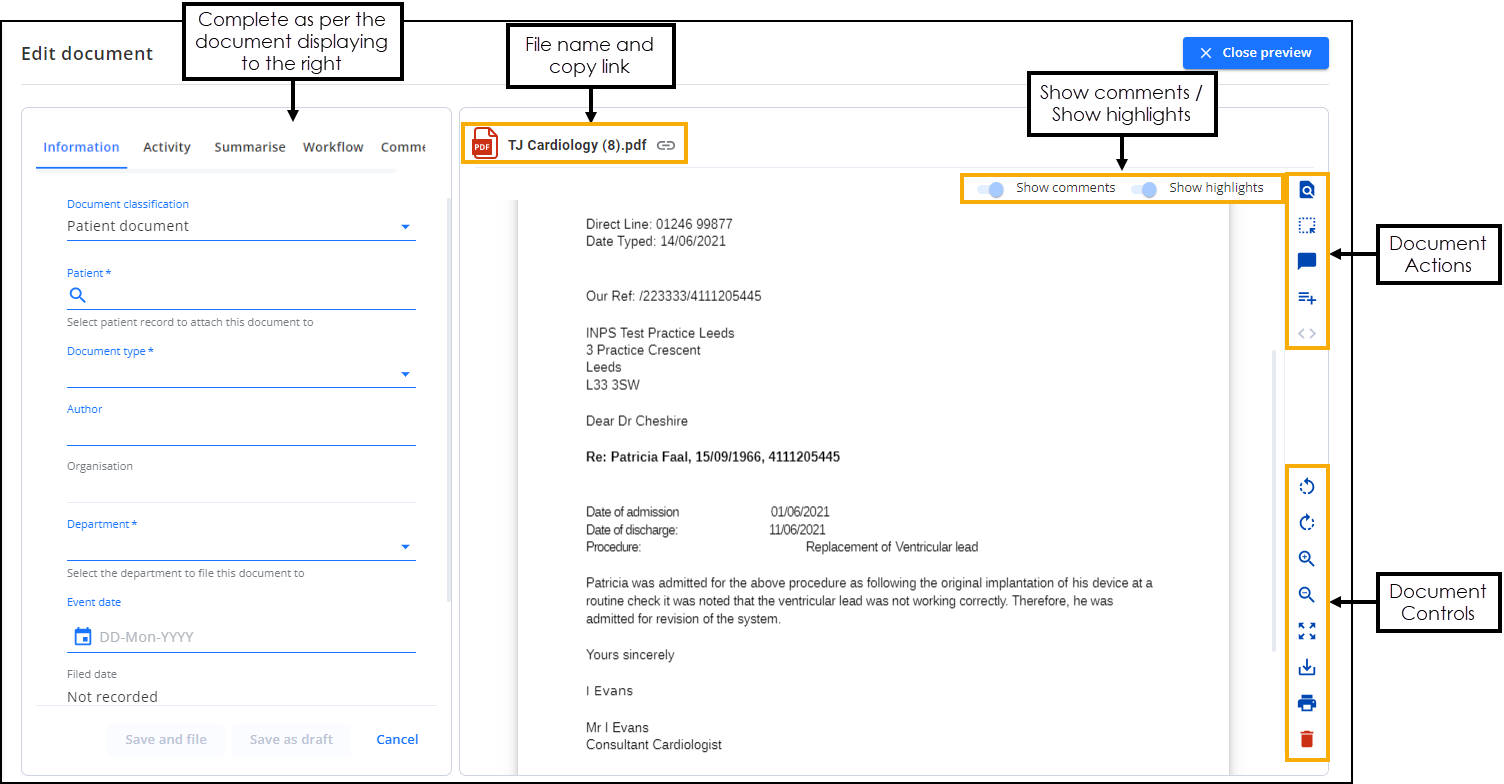
Select the document name to display a preview and start processing the data:

The following controls are available to help you process a document:
 Document Actions
-
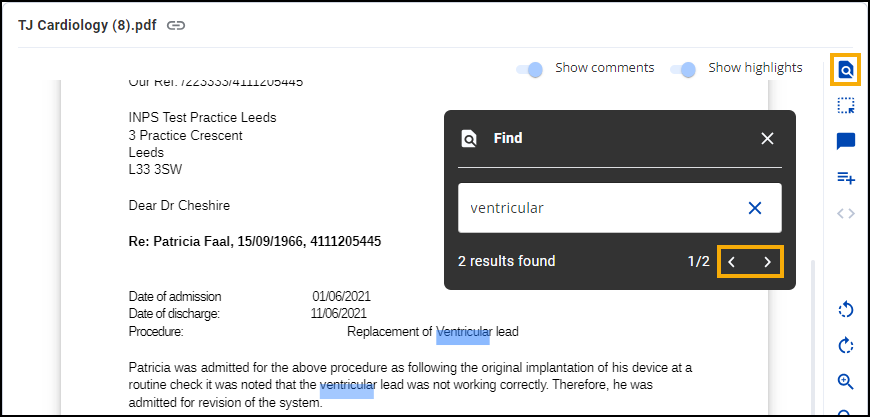
 Find - Select to search for specific text in the document. The Find screen displays, enter your search criteria into Search document, the document highlights as you type. Use the arrows to scroll through the results:
-
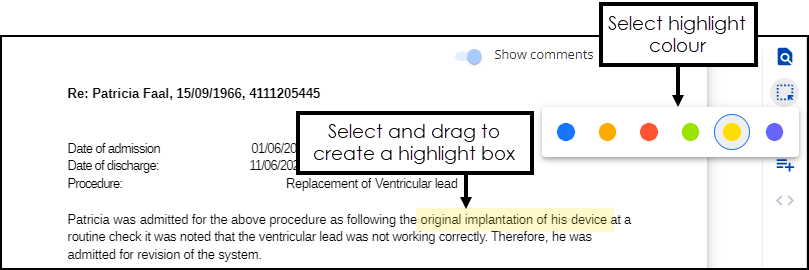
 Highlight - Select to highlight a block of text in the document. Hover over Highlight to select a highlight colour and then select and drag to create the highlight:
Hover over a highlight, to view who created the highlight and when it was created.
See Adding a Highlight for details. -
 Comment - Select to add a comment to the document. Enter the comment required and select Send
  :
:
The comment is added to the document.
See Adding a Comment for details. -
 Create Task - Select to create a Task for this document. See Creating a Task for details.
 -
 Next page - Select to move through the pages of a multi-page document.
 Document Controls
-
 /
/ Rotate left/Rotate right - Especially useful for images, you can use this to rotate the document through 90 degrees at a time either clockwise or counter clockwise.
 -
 /
/ Zoom in/Zoom out - Select the Minus - to reduce the size of the document or Plus + to enlarge the document. The percentage value in the middle displays the changes you make.
 -
 Full screen - Select to display the document in a full screen format. See Full Screen Mode for details.
 -
 Download - Select to download the selected document. To view your Downloads folder, open Windows File Explorer, and then locate and select Downloads. A list of your recently downloaded files displays.
 -
 Print - Select to print the document.
 -
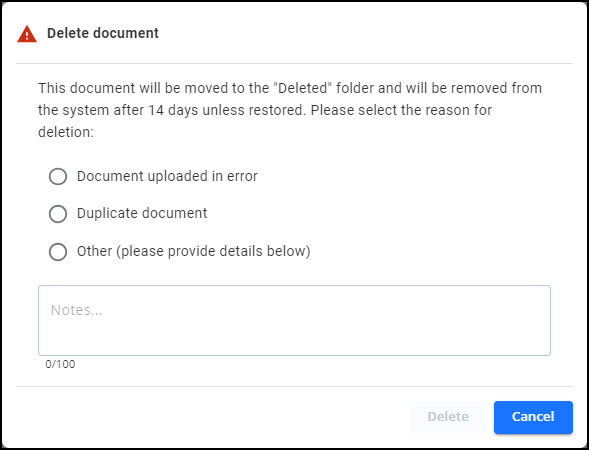
 Delete - Select to delete the document. The Delete document screen displays, select the deletion reason, add any notes required and then select Delete:
The deleted documents are then stored in the Deleted documents folder for 14 days, after this time, unless they are restored, the documents are deleted from the system. To restore a document, see Restoring a Deleted Document.
 Show comments / Show highlights
Slide the toggle to switch the comments and highlights On
 or Off
  .
.If there are no comments or highlights on the document the option is disabled
 .
. Share document
Select Copy link to document
 to copy the document link to your Windows Clipboard, this can be useful if, for example, you want to share with a colleague:
-
-
You can now complete the document data using the following tabs:
-
Information - Enter document and patient information to allow you to file and locate the document. See Filing a Document for details.
-
Activity - Select to view the document activity/audit trail, see Viewing Document Activity for details.
-
Summarise - Select to allocate clinical terms relating to this document. The first time you select the Summarise tab it is in Edit mode, after that you must select Edit to add or update any clinical terms. See Summarising a Document for details.
-
Workflow - Select to view the workflow items/Tasks linked to this document. See Workflow Documents for details.
-
Comments - Select to view the active and resolved comments on the document. See Viewing and Resolving Comments on a Document for details.
-
-
Select Close Preview or
 to return to the DocHub Home screen.