Viewing Filed Documents
To find and view filed documents:
From DocHub, select the document required, if you are not sure where the document is, select All Documents from the pane on the left side of your screen and then find the document required using either:
-
Filters - Utilise the available filters, see Using Filters in DocHub for details, or
-
Search or Sort - Enter your search criteria or sort the documents, see Searching for and Sorting Documents for details.
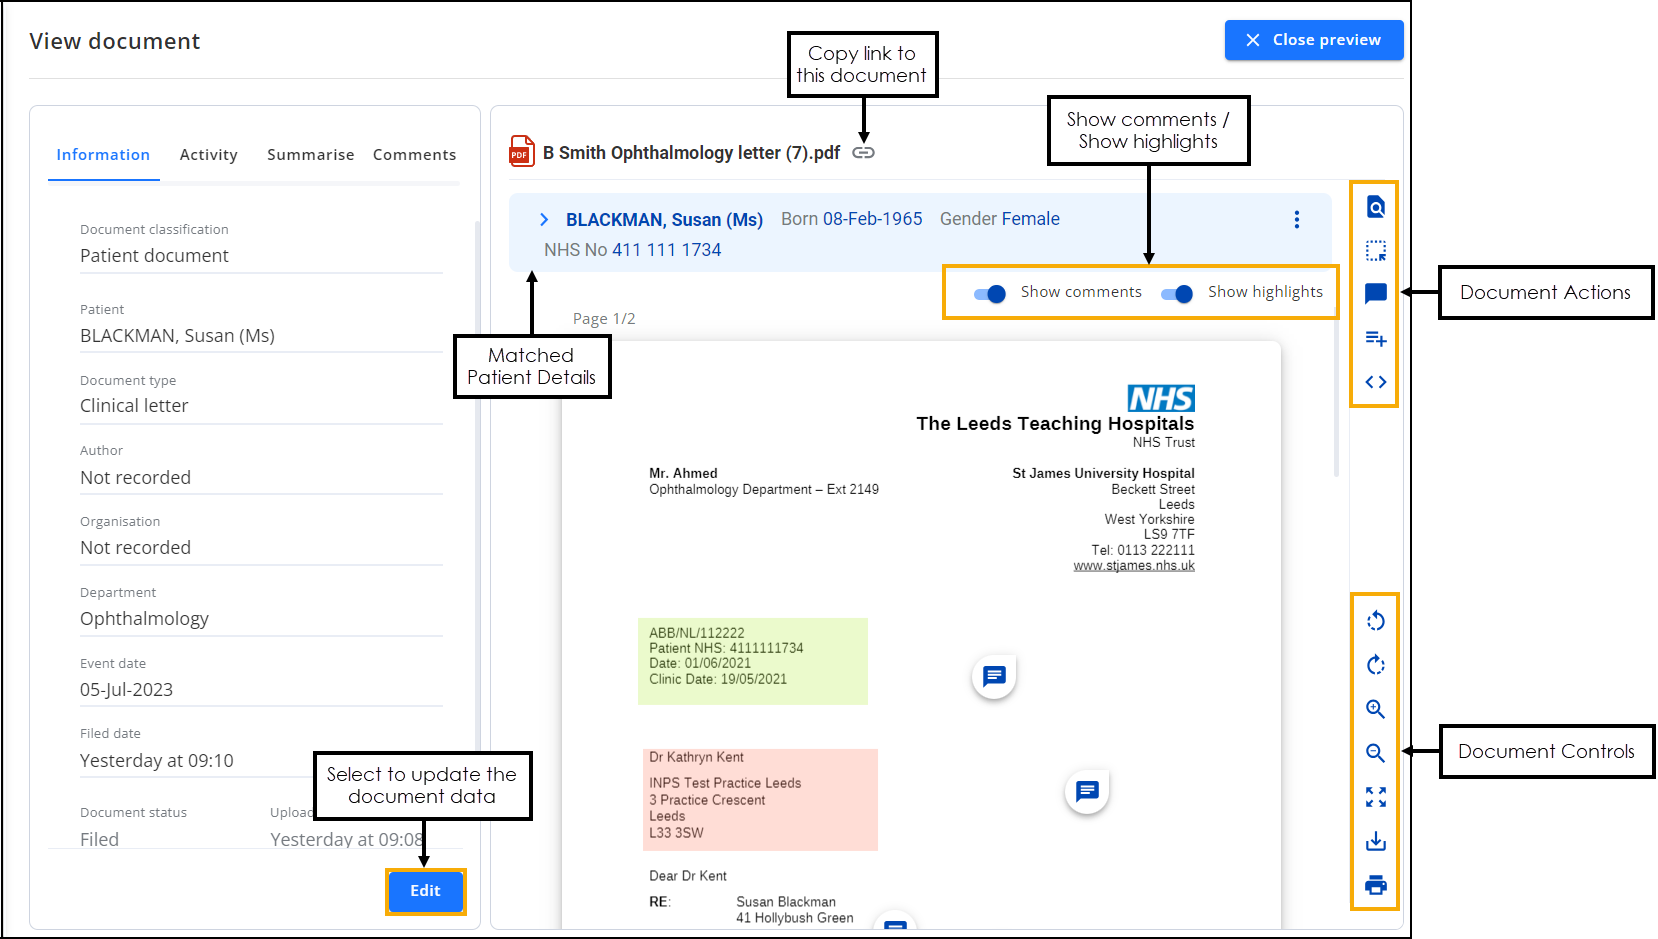
The document displays, the Document Data from the document displays on the left and the actual document on the right:

The following option may assist in the viewing of a document on your screen:
-
 Rotate left - Especially useful for images, you can use this to rotate the document through 90 degrees at a time either clockwise or counter clockwise.
 -
 Rotate right - Especially useful for images, you can use this to rotate the document through 90 degrees at a time either clockwise or counter clockwise.
 -
 Zoom in - Select the Minus - to reduce the size of the document or Plus + to enlarge the document. The percentage value in the middle displays the changes you make.
 -
 Zoom out - Select the Minus - to reduce the size of the document or Plus + to enlarge the document. The percentage value in the middle displays the changes you make.
 -
 Fullscreen - Select to display the document in a full screen format. See Full Screen Mode for details.
 -
 Download - Select to download the selected document. To view the Downloads folder, open Windows File Explorer, and then locate and select Downloads. A list of your recently downloaded files displays.
 -
 Print - Select to print the document.
-
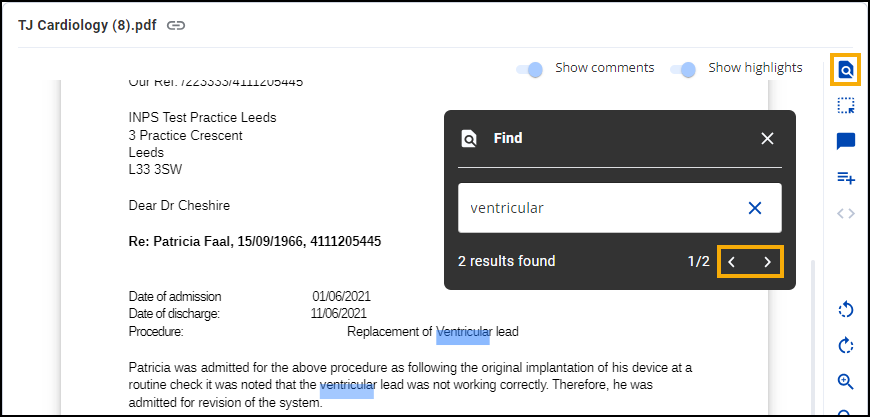
 Find - Select to search for specific text in the document. The Find screen displays, enter your search criteria into Search document, the document highlights as you type. Use the arrows to scroll through the results:
-
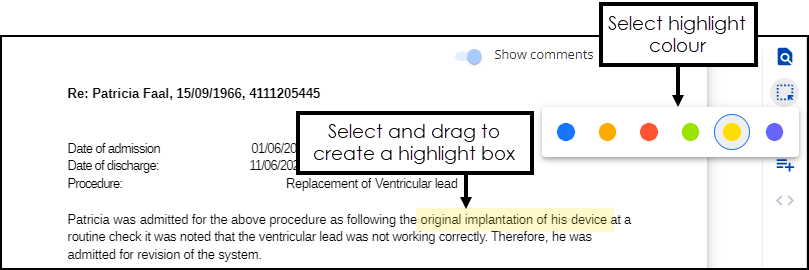
 Highlight - Select to highlight a block of text in the document. Hover over Highlight to select a highlight colour and then select and drag to create the highlight:
Hover over a highlight, to view who created the highlight and when it was created.
See Adding a Highlight for details. -
 Comment - Select to add a comment to the document. Enter the comment required and select Send
  :
:
The comment is added to the document.
See Adding a Comment for details. -
 Create Task - Select to create a Task for this document. See Creating a Task for details.
 -
 Next page - Select to move through the pages of a multi-page document.
Slide the toggle to switch the comments and highlights On  or Off
  .
.
If there are no comments or highlights on the document the option is disabled  .
.
From the matched patient details, you can select:

-
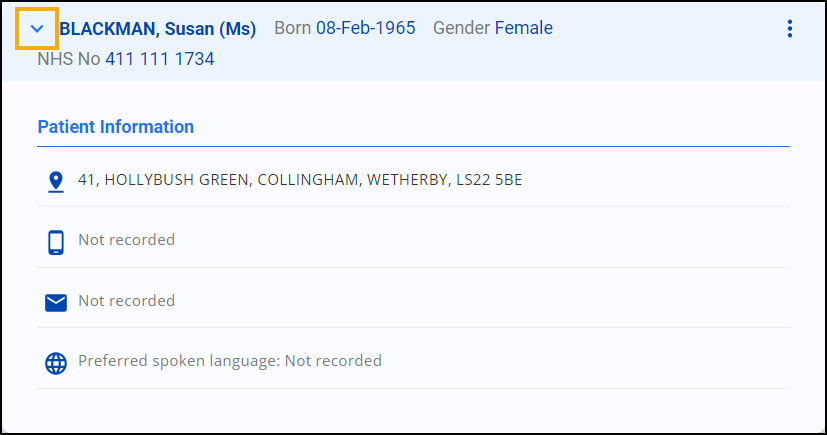
 Patient Information - To view the Patient Information screen. This displays the patient's address, phone number, email and preferred spoken language:
Select
 to close the Patient Information screen.
 -
 Patient actions - To open Patient actions options, select View patient record to launch the patient's record in Vision 3:
You can now select Edit  to edit the document data as required, see Editing Filed Documents for details.