Hypertension Consultation
The Hypertension Case-Finding Service Consultation screen displays once you have started a new service and have chosen a patient:
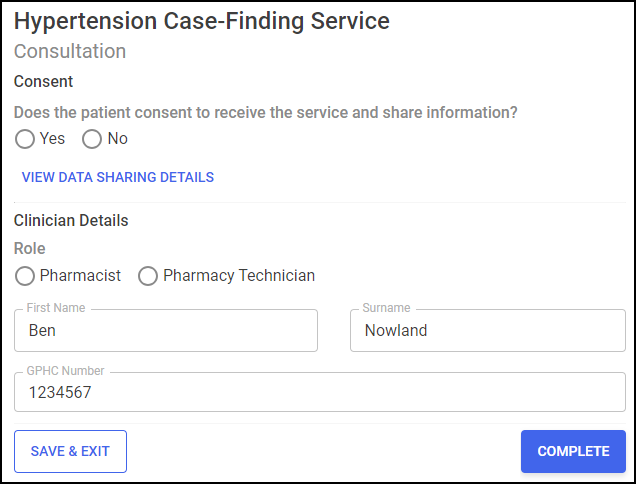
The Hypertension Case-Finding Service Consultation screen includes the following sections, complete as appropriate:
You must record the patient consents to receive the service and share data before recording any other data. To record consent:
-
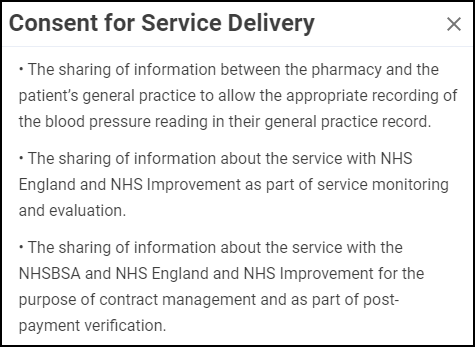
Select VIEW DATA SHARING DETAILS
 to display the data sharing details:
-
Select Close
 to exit the data sharing details and return to the Consent section.
 -
In the Consent section, select either:
-
Yes - To record that the patient consents to data sharing, and continue to the Consultation Details section, or
-
No - To record that the patient does not consent to data sharing, and then select CLOSE
 to close the Hypertension Case-Finding Service Consultation screen. This episode saves to the Completed Episodes tab.
-
Complete the date and time of this consultation:

-
Date of Consultation - Select Date
 to open a calendar and select a date, or select NOW
  to add the current date and time.
 -
Time of Consultation - Select Time
 to enter the time of consultation, or select NOW
  to add the current date and time.
Complete the method of entry to the service:

-
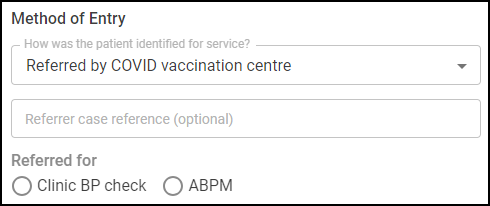
How was the patient identified for service? - Select from one of the following methods of entry:
-
Patient identified in the pharmacy
-
Patient self referral
-
Referred by GP practice
-
Referred by COVID vaccination centre
-
Referred by optician
-
Referred by dentist
Training Tip - When the patient is referred by a healthcare provider, you can add a Referrer case reference.
-
-
Referred for - Select what the patient was referred for, either:
-
Clinic BP check - Follow the Clinic Blood Pressure Check instructions below.
-
ABPM - See ABPM Consent for details on providing an ABPM device.
Note - You are not prompted to select what the patient was referred for if the patient was identified in the pharmacy or self -referred. -
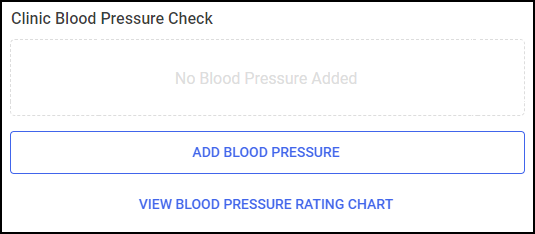
Complete this section to add a blood pressure reading:
-
Select ADD BLOOD PRESSURE
 to add blood pressure readings. The Add Blood Pressure Readings screen displays:
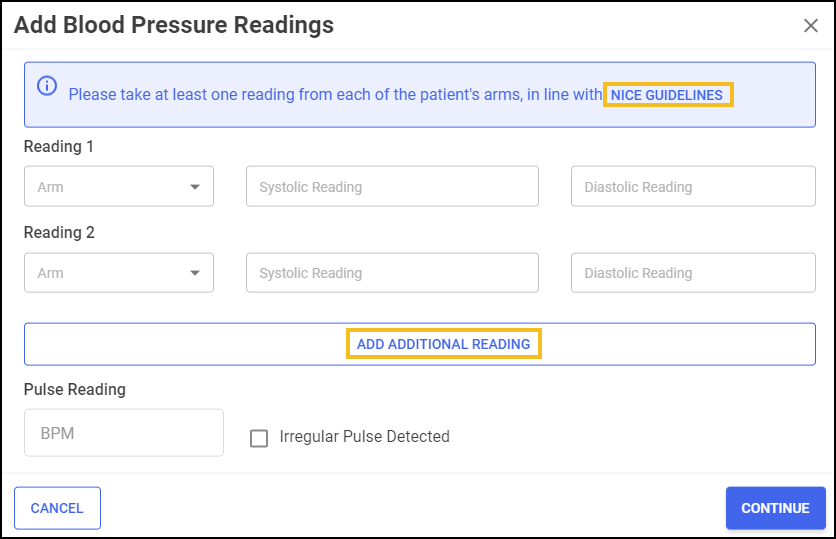 Training Tip - Select NICE Guidelines to access NICE Hypertension Guidelines in a new browser tab.
Complete as follows:
-
Reading 1:
-
Arm - Select either Left or Right.
-
Systolic Reading - Enter a systolic value.
-
Diastolic Reading - Enter a diastolic value.
-
-
Reading 2:
-
Arm - Select either Left or Right.
-
Systolic Reading - Enter a systolic value.
-
Diastolic Reading - Enter a diastolic value.
-
-
Additional Readings - If required, select ADD ADDITIONAL READING
 to add more blood pressure readings.Note - You can add a minimum of one and a maximum of 10 readings, however if possible, you must take at least one reading from each of the patient's arms.
 -
Pulse Reading - Enter a pulse reading.
-
Irregular Pulse Detected - Tick if an irregular pulse is detected. See Hypertension - Irregular Pulse for more details.
-
-
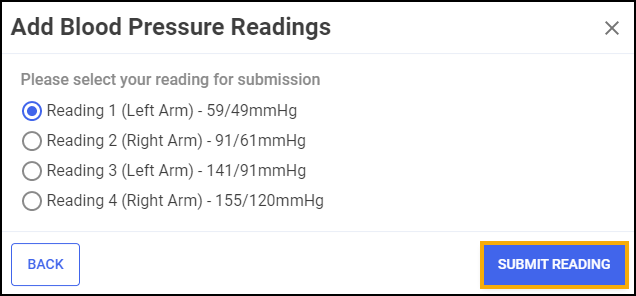
Once all the readings are added on the Add Blood Pressure Readings screen, select CONTINUE
 . The Add Blood Pressure Readings summary screen displays:
-
Select a reading for submission, and then select SUBMIT READING
 .Training Tip - Select BACK
 to edit a reading.
 The reading is submitted and is allocated a blood pressure rating:
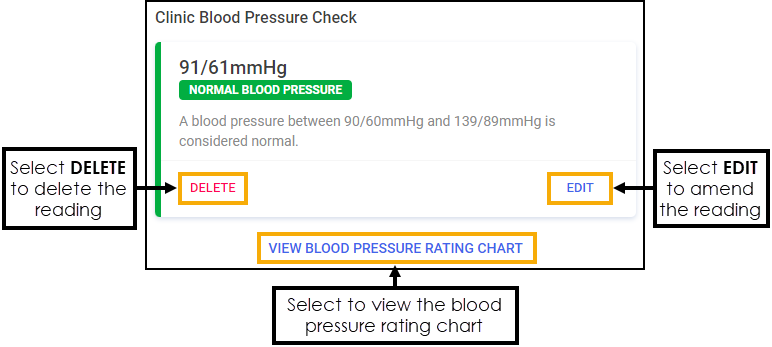 Training Tip - Select EDIT
 to amend the reading, or DELETE
  to delete the reading.
Select VIEW BLOOD PRESSURE RATING CHART
 to view the rating chart:
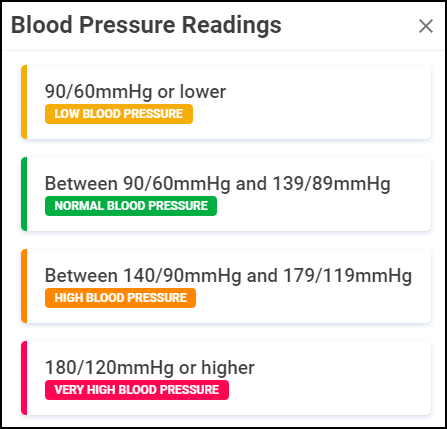
How you continue the consultation depends of the blood pressure rating, select from below to view the next steps:
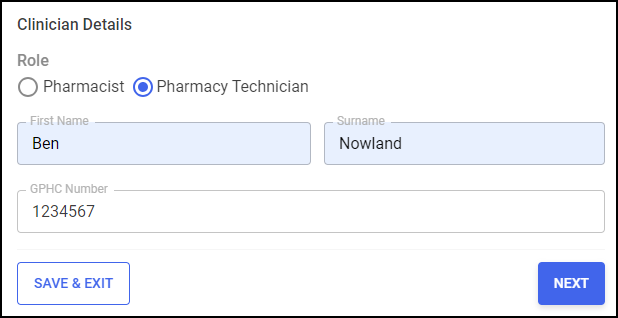
This section automatically populates with the logged in user's details. Select the clinician's role as either Pharmacist or Pharmacist Technician, and update the details manually if required:
