|
|
|
|
|
Quick Summary - Add a New Guideline
The example used here is a copy of the pre-defined Acute myocardial infarction guideline. You can amend this in any way that suits your practice, making sure to save your amendments when you have finished.
These are steps you might take to add a new guideline for Acute myocardial infarction. Adapt these to your own needs once you are familiar with the outline.
- Click on Guidelines menu, then Select Guidelines.
- Uncheck Reports and Centrally Issued. Click on New.
- At the Header screen:
- Guideline Mnemonic: ACUTEMI
- Guideline Description: Acute myocardial infarction.
- Triggering Read Term: Click on the Triggers button. On the Edit Guideline Read Trigger(s) screen, click on Practice Settings. Then select an acute MI description from Read (eg type #G30, the Read term for Acute myocardial infarction). Click on Add, then OK.
- Category:Local Guideline – which has two effects: (1) it will be displayed when Locally Generated is selected at the Select Guideline screen, and (2) when selected by double clicking from a Guideline Index, an on-screen view displays. If you choose Report instead here, then it goes straight to printing without an on-screen view.
- Sex Filter: Both.
- Click OK.
- At the new Guideline screen, click on the title bar of the floating toolbar and move it to one side.
- Click on Sub-heading
 on the floating toolbar. Type in Reference. Click OK (see "Sub-heading in Guideline").
 - Click on Text
 on the floating toolbar. Either type in references to justify the guideline, or you can use Import to bring the text from elsewhere (see Text). For example, BNF; NEJM 1994; 330: 1287-1294; BMJ 1994; 308: 767-771; Prescriber 19 Dec 1993; 15-27; MeRec Bulletin 1992; 3 (10): 37-40. Click on OK.
 - Click on Sub-heading on the floating toolbar. Type in Aim. Click OK.
- Click on Text on the floating toolbar. Type in the aim of the guideline, eg To reduce morbidity and mortality due to heart attack (see Text).
- Click on Sub-heading on the floating toolbar. Type in Supportive Text. Click OK.
- Click on Text on the floating toolbar. Type in, or import, any supportive text for the guideline (for an example, see Text).
- At this stage, you would be wise to click on Save to save the guideline so far.
- Click on Sub-heading on the floating toolbar. Type in Analgesia. Click OK.
- Click again on Sub-heading on the floating toolbar. Type in Prescribing message. Click OK. Indent this by pressing the right cursor arrow once.
- Click on Text on the floating toolbar. Type in, or import, any Prescribing Message for analgesia (see the example in Text).
- Now you can enter the drug regime (see more details on Drug Regime). If you have no pre-defined drug regimes, you will need to set these up. Click on Drug Regime
 on the floating toolbar.
- Click on New. In Mnemonic type in DIAMORPHINE, and in Description, Diamorphine. Click on OK.
- Click on Add Drug to Regime.
- At the Select Drug screen, double click in the top window, and select DIAMORPHINE INJ 5mg (as you would normally do in Therapy). Click on New and add the drug defaults. Make sure the drug default is highlighted then press OK.
- Repeat step 15 for a drug regime of CYCLIMORPH 10 INJ.
- With the last line selected (ie framed with a faint line), enter a new Sub-heading of Antiemetics, then a Prescribing message, then repeat steps 14-15 to enter drug regimes for METAMORPHOSED and PROCHLORPERAZINE.
- Repeat for a sub-heading of Antiplatelet therapy / nitrates, a prescribing message, and drug regimes for ASPIRIN and GLYCERYL TRINITRATE.
- Under Glyceryl Trinitrate spr 400 mcg spray when required 1 or 2 puffs under the tongue, then close the mouth, add a further sub-heading, typing Drug Information for Patient.
- Click on Drug information for patients
 and type in, or import, information about GTN which you can print out for a patient see Drug Information for Patient.
 - At this stage, you would be wise to click on Save to save the guideline so far.
- Suppose you want to remind yourself to make an entry under Heart Examination in the CV/BP Management screen Clinical Data Hotspot:
- Click on Clinical Data Hotspots
 on the floating toolbar.
 - On the Clinical Data Hotspot screen, Add is the default, but you can also choose Display or Edit.
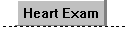
- In Caption, enter Heart Exam.
- Select Clinical Entities - CV and BP Search Group - Heart Examination.
- The Default Read term should be 24... Exam of cardiovascular system. Click on OK.
- A button, entitled Heart Exam, is inserted, which when clicked (in user mode, not design mode) will display the Heart Examination screen.
- Click on Clinical Data Hotspots
- If you want to include a picture as an aid in your guideline, click on Bitmap
 (see Image). Select the bitmap (*.bmp) from the directory in which it is stored.
 - You may also include an external Application such as word processing. These are described in Multi-media.
- Save your guideline and click Close.
- In order to include the new guideline in the Guideline Index, next call up the guideline called U_INDEX: Local Guideline Index. Go into the design mode, then embed the guideline you have just created. Save and Exit.