Add Weekly Plans
Weekly Plans (1:13)
The weekly template plans for each book owner are used in the Extension Plan view, and become the released appointment books.
- From the Select Weekly plans
 .
. - Select Add weekly plan...
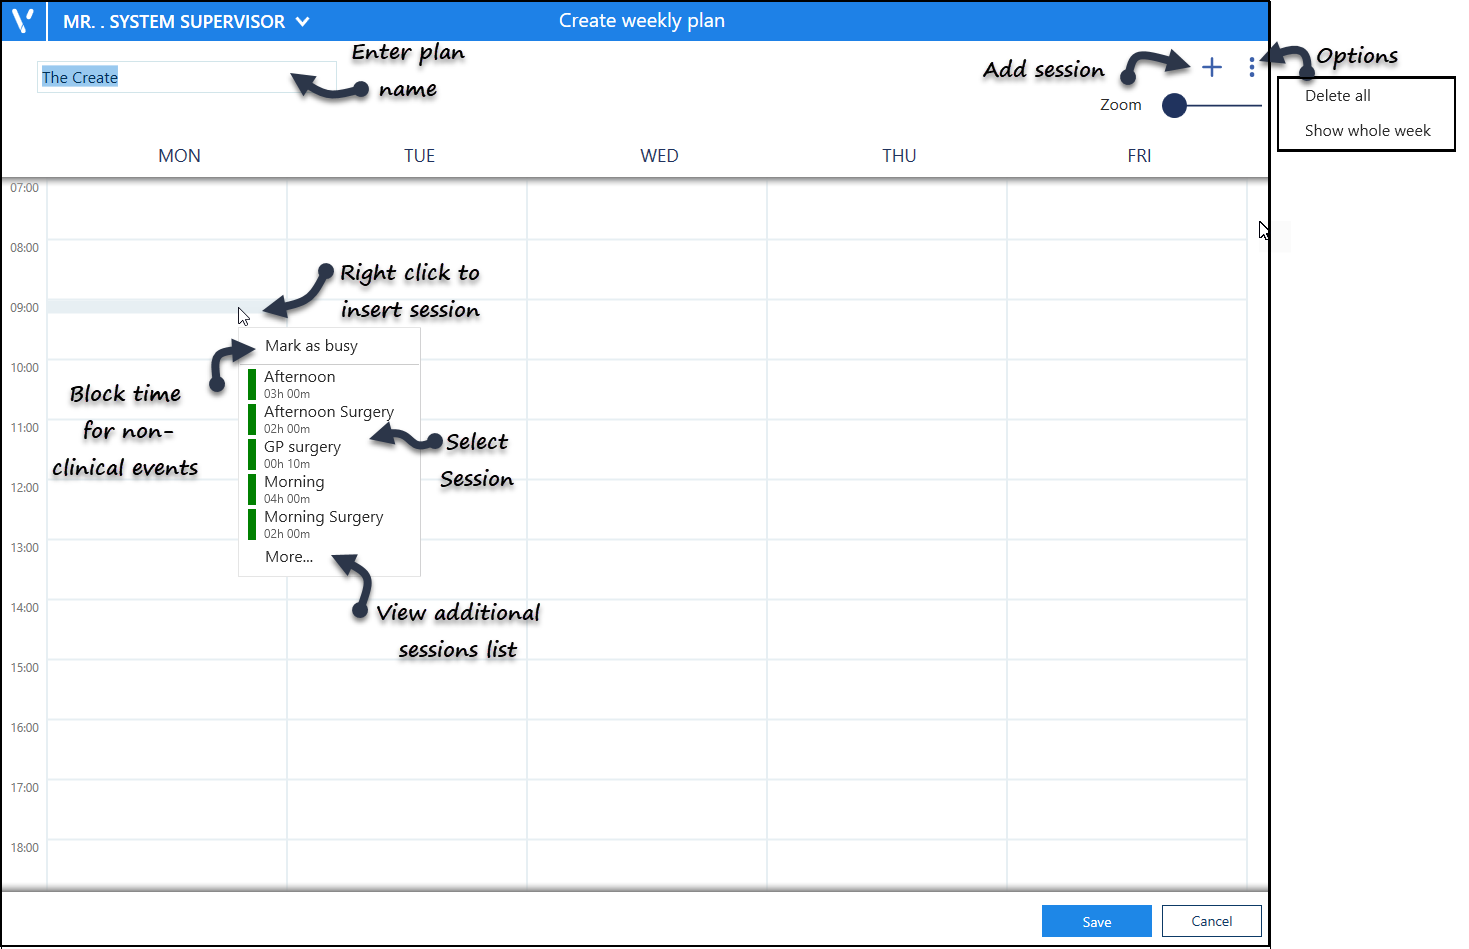
 from the top left of the view. The Create weekly plan view displays.
 - Enter the plan name in the box, in the top left of the view.

- The Sessions define the clinic / surgery, and can be inserted by either:
- Right click on the plan, and select a session (see above image).
The More... option displays further session. - Alternatively, select the Add
 button at the top right.
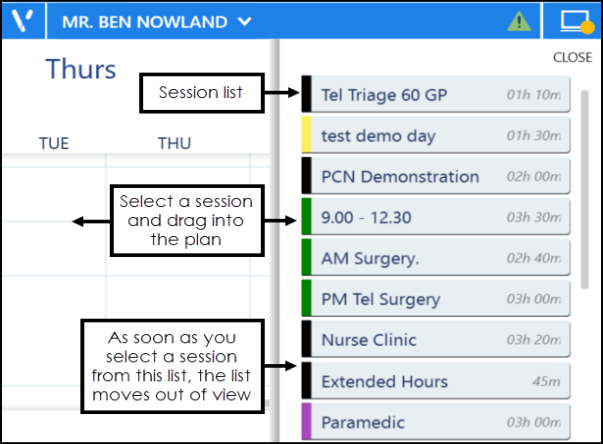
A side bar displays containing a list of sessions:
Select the session and drag into the plan. As you drag the session, the side bar moves out of view.
- Right click on the plan, and select a session (see above image).
- Once the sessions are in the plan, they can be dragged to a different time if required.
- To copy the session into additional days, right click on a session and select copy.
Move to the required day, right click and choose Paste. The plan updates.See Edit Weekly Plans for more information. - Optionally, time can be blocked off for other purposes. See Mark as Busy for more information.
- Select the Save button at the bottom right to add the plan.

- The Weekly plans lists displays with the new plan added.
-
Select Save to save your changes, Reset to cancel any changes or Sort (A-Z) to reorder the list.

Updating Rows
The following notifications display on the screen when additions, modifications and deletions are made:
-
 Addition - Adding a new row.
 -
 Modification - Modifying an existing row.
 -
 Deletion - Deleting rows.
 if the change cannot be made, for example, if the name you are using is already in use.