Setting User Details
The User Details screen allows you to customise how Pharmacy Manager works for you.
To set your preferences:
-
Log in to Pharmacy Manager in the usual way.
-
Select Tools - User Settings - User Details.
-
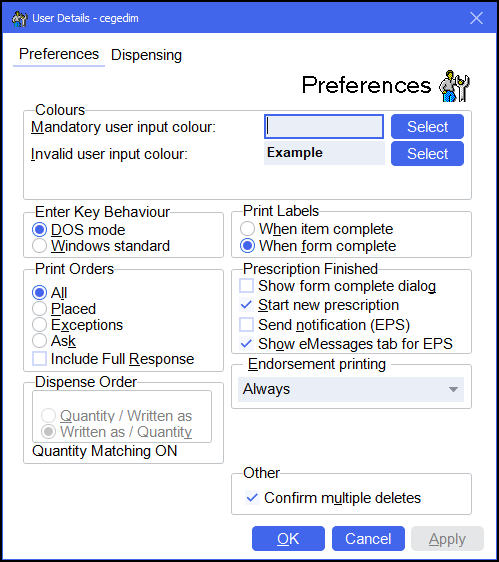
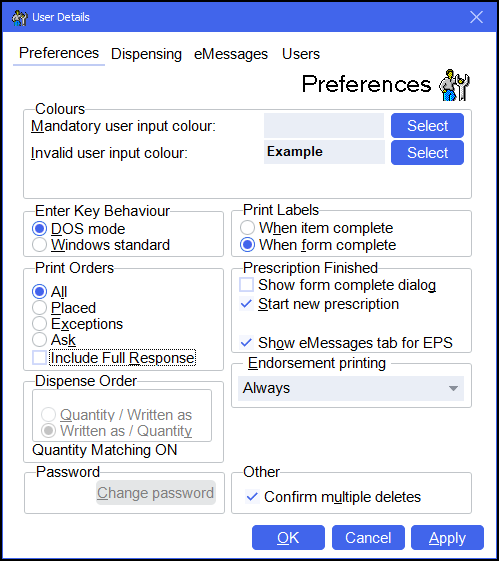
The Preferences tab displays as default on the User Details screen.
Complete as follows:
| England | Scotland |
|
|
|
Choose the colours Pharmacy Manager displays for your log in. Select Select  , highlight the colour you require and select OK
  .
.
Select to set how you use the keyboard:
- DOS mode - Select to use Enter to move through an on-screen form.
- Windows standard - Select to use Tab to move through an on-screen form.
Set how you want any orders printed:
- All - Select to print all your orders.
- Placed - Select to print placed lines only.
- Exceptions - Select to print exceptions only.
- Ask - Select to be prompted to select what to print each time.
- Include Full Response - Select to print all responses from your wholesaler including text
messages.See Pharmacy Details - Ordering for further details.
Set when Pharmacy Manager prints labels, either:
-
When item complete - Pharmacy Manager prints a label after each item is dispensed.
-
When form complete - Pharmacy Manager prints the required labels once all items on the form are dispensed.
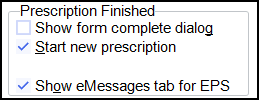
When a prescription is finished, you can select to show the form is complete and take you to the endorsing screen.
-
Show form complete dialog - Tick to show the complete prompt immediately after finishing a prescription.
-
Start new prescription - Tick to clear the screen when a form is finished.
- Show eMessages tab for EPS - Select to return to the eMessages screen once an electronic prescription is complete.

Select from:
- Show form complete dialog - Tick to show the form complete message.
- Start new prescription - Tick to clear the screen when a form is finished.
- Send notification (EPS) - Select to send the notification immediately upon selecting Finish to print the label. The prescription is not available for collection on the Pending screen.
- Show eMessages tab for EPS - Select to return to the eMessages screen once an electronic prescription is complete.
You can set the Endorsment screen to automatically display once a prescription is completed and the labels have printed, this can save time in busy pharmacies. From Endorsement printing, select either:
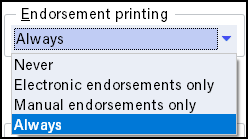
- Never - The endorsement option does not display automatically, regardless of the endorsement type.
-
Electronic endorsements only - The endorsement option displays automatically after each prescription where an electronic endorsement is required.
Note - England only - The Electronic endorsements only setting refers to EPSR2 prescriptions only. It does not include EPSR1 prescriptions which cannot be endorsed electronically.Note - Wales only - The Electronic endorsements only setting is not applicable because Wales 2DRx prescriptions cannot be endorsed electronically. - Manual endorsements only - The endorsement option displays automatically after each prescription requiring a printed endorsement.
- Always - The endorsement option displays automatically regardless of the endorsement type. This option is recommended.
Tick Confirm multiple deletes to display a confirmation message when you delete more than one item at a time.
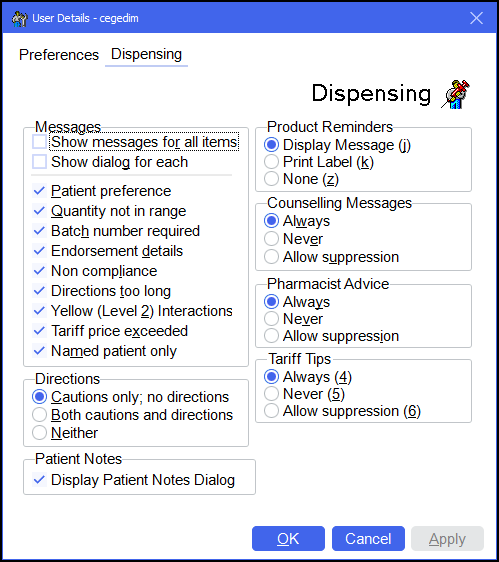
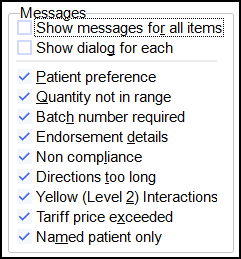
- Show messages for all items - Tick to display messages for all items in the message box, rather than just the product you are currently dispensing.
- Show dialog for each - Tick to display each message in the dialogue box.
Now tick the types of message to display:
- Patient preference
- Quantity not in range
- Batch number required
- Endorsement details
- Non compliance
- Directions too long
- Yellow (Level 2) Interactions
- Tariff price exceeded
- Named patient only

Select either:
- Caution only; no directions
- Both cautions and direction
- Neither
Patient Notes combines information that you have entered on the patient details Conditions and Other tabs. Tick to display patient notes, where they exist, when selecting a patient in the Dispensary screen.

Select how patient reminders display, see Product file - Details tab for more details:
- Display Message - To display patient reminders on the screen.
- Print Label - To print patient reminders on a label.
- None - To not display patient reminders.
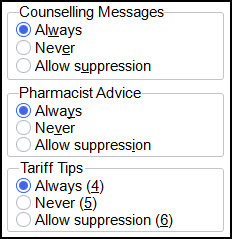
Select to:
- Always - To always display the screen,
- Never - To never display the screen, or
- Allow suppression - To display the screen but allow suppression.
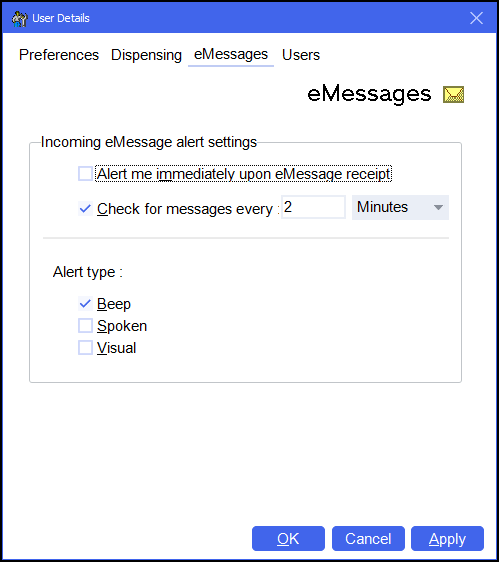
-
Alert me immediately upon eMessage receipt - Tick to receive an alert when receiving an eMessage.
-
Check for messages every - Set the frequency to check for eMessages.
-
Alert type - Set the alert type, either Beep, Spoken or Visual.
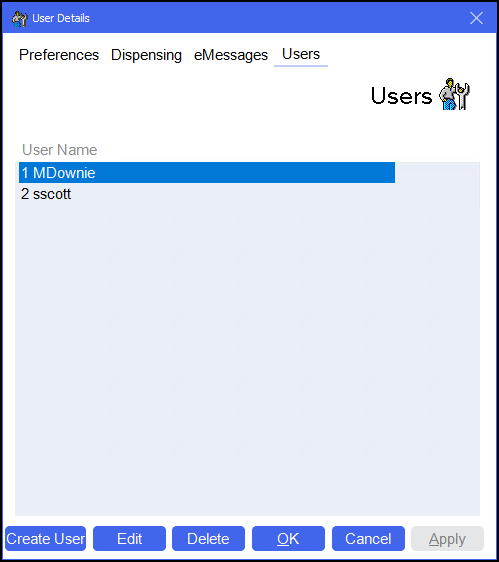
Use this tab to create new users, edit the password for existing users or delete users:
-
Select Create User
 to create a new user, the Password screen displays:
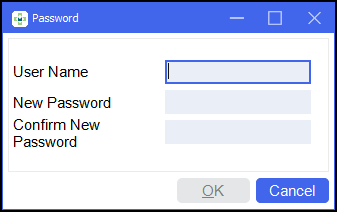
Enter the user's credentials.
-
Select the User Name from the list and then select:
-
Edit - To change the password for the selected user:
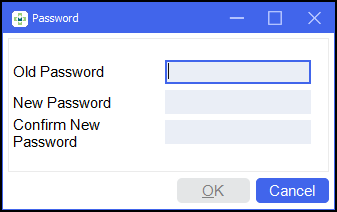
Enter the user's Old Password, New Password and Confirm New Password.
-
Delete - To delete the selected user.
-
