Endorsing the Prescription
Endorsing
Endorsing is the feature whereby Pharmacy Manager prints, on the original paper prescription, the exact items that the system is dispensing, as a form of confirmation.
You can set Pharmacy Manager to do this as you dispense items, provided you have a suitable printer.
Configuration
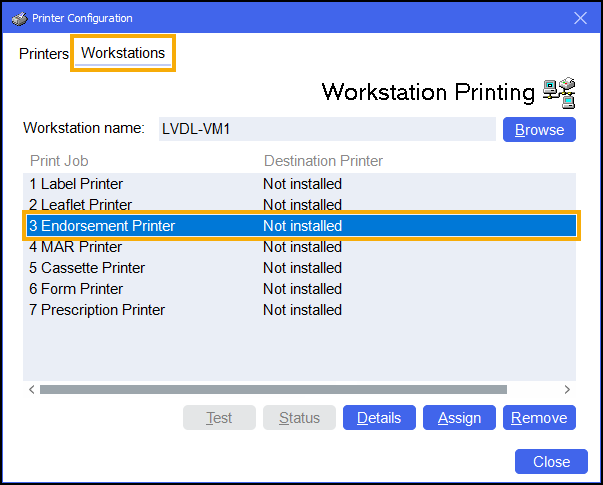
First check if an Endorsement Printer is assigned to your PC:
-
From the Pharmacy Manager Toolbar select Tools - System Settings - Printer Configuration - Pharmacy Manager.
-
Select the Workstations tab:
-
View the Endorsement Printer for your workstation, if a printer is not already assigned, select Assign
 .
. -
Select the required printer from the list and select OK
 .
. -
Select Close
 to close the Printer Configuration screen.
Second, enable endorsing:
-
From the Pharmacy Manager Toolbar select Tools - User Settings - User Details:

-
Select the Preferences tab.
-
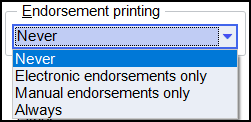
Select the drop-down in the Endorsement printing section and select the option that applies:
-
Never - The Endorsement screen does not display after finishing a prescription. See Delay endorsement printing for more details.
-
Electronic endorsements only - The endorsement screen displays automatically after each electronic prescription.
-
Manual endorsements only - The endorsement screen displays automatically after each non-electronic prescription.
-
Always - The endorsement screen displays automatically regardless of the prescription type.
-
Endorse now
After
you select Finish  (F12),
the Dispensary Supply screen
displays:
(F12),
the Dispensary Supply screen
displays:
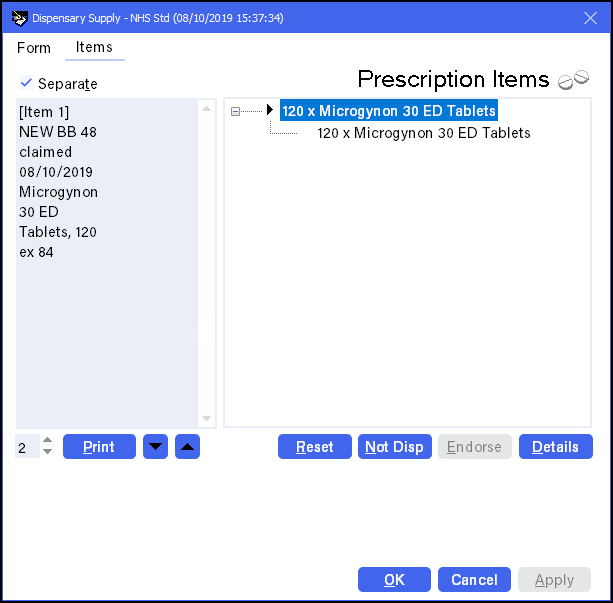
The layout of the screen approximates the endorsing on the prescription.
-
Check what displays on the screen, to make sure the endorsement on the left matches the products on the right.
-
In the event that more than one make of tablets or capsules has been selected to fulfil a prescription, those makes are displayed on the Dispensary supply tab.
The buttons at the bottom of the Dispensary supply tab and the procedures to follow next vary depending on prescription type (electronic or paper - and whether you are printing endorsements or not) and your region (England or Scotland).
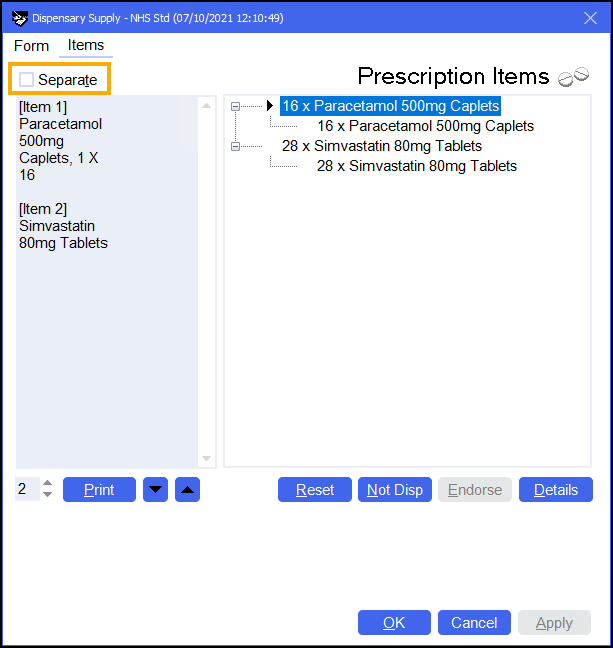
Prescription separation
To aid identification of prescriptions that are affected by the prescription separation rule, if you have chosen to print endorsements, it is possible to manually append the word Separate so it is printed at the top of the left hand side of the prescription above the area used for the pharmacy stamp.
-
Place a tick next to Separate to mark the prescription accordingly when the endorsement is printed.
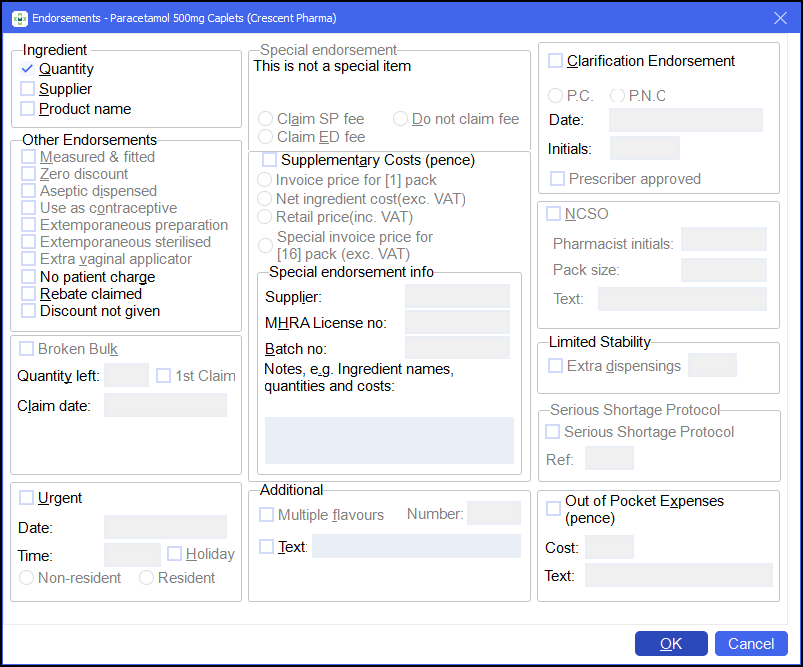
Additional endorsements
To add further endorsements, highlight the item on the
Dispensary supply screen and then select Endorse  .
.
When additional endorsements are permitted for the product dispensed, check boxes are enabled. If a check box is disabled, that particular endorsement is not permitted. In the images below, for example, measured & fitted would not be an applicable endorsement to a cream or ointment prescription item.
English Endorsements
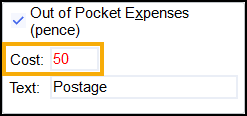
Out of pocket expenses
The July 2012 Drug Tariff introduced the concept of a minimum value to out of pocket expenses (OOPE) claims. Claims need to total 51p or more to be accepted.
This is subject to change, the current threshold can be seen against each product's endorsing information.
If you input an OOPE claim for less than this value, the system prevents you from saving the endorsement. The value displays RED.
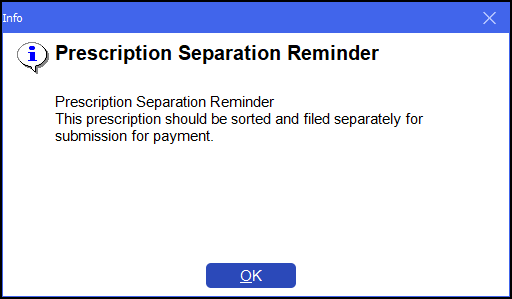
Further, any prescriptions with OOPE claims are subject to prescription separation rules, if activated. See Prescription Separation for more details.
If you have activated prescription separation, the following alert displays after you have entered a valid out of pocket expense endorsement.
OOPEs are reported on the FP34 report so that you can confirm that remuneration has been made correctly.
Scotland
Quantity & pack size endorsement
See Product file - Endorsing tab for more details on how to automatically apply quantity and pack size endorsements for selected products.
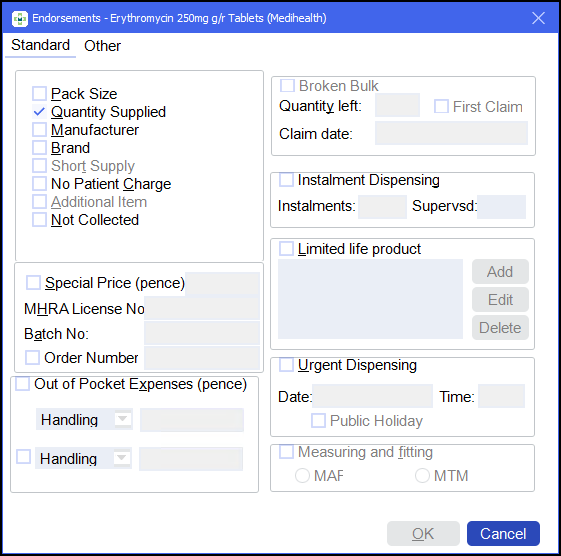
Short supply endorsement
This is the Scottish equivalent of NCSO in England.
Part 13 of the Scottish tariff provides a list of items in respect of which endorsements on the grounds of short supply are permitted for the stated month. If you have bought any such generic items (which are recognised shortages) at higher than tariff price, you should clearly endorse each script with the total cost of the amount dispensed, and Short Supply or (SHS).
If the Short supply/NCSO endorsement setting is enabled for such a product, Short Supply on the endorsements screen is enabled, but unchecked. Tick Short Supply and the relevant endorsement will be applied:

This applies the manufacturer, the pack size and the SHS notation.
PSD recognises that you may not have received any discount on these items and, as they should not be in PSD drug masterfile, they should be priced as zero discount items. However if you received no discount, you may wish to mark them as ZD to ensure that no discount is applied.
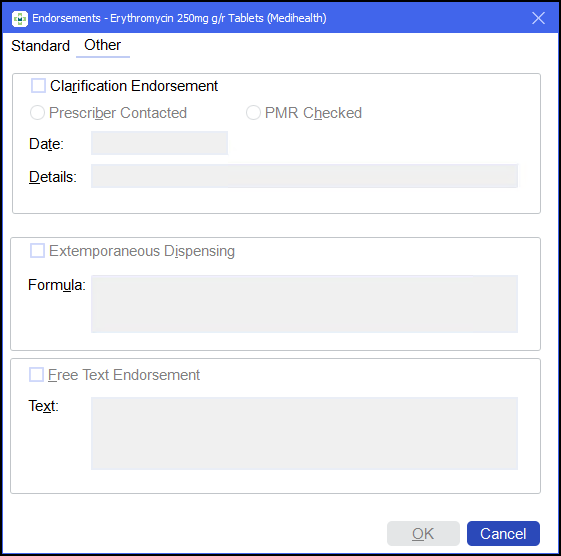
Endorsements Other tab
Select the Other tab to access the endorsement options relating to Clarification Endorsement, Extemporaneous Dispensing and Free Text Endorsement:
To save and exit
Check any additional endorsements
and select OK and then select Print  to start printing.
The endorsement will stay on screen until you select OK so that you can
re-print.
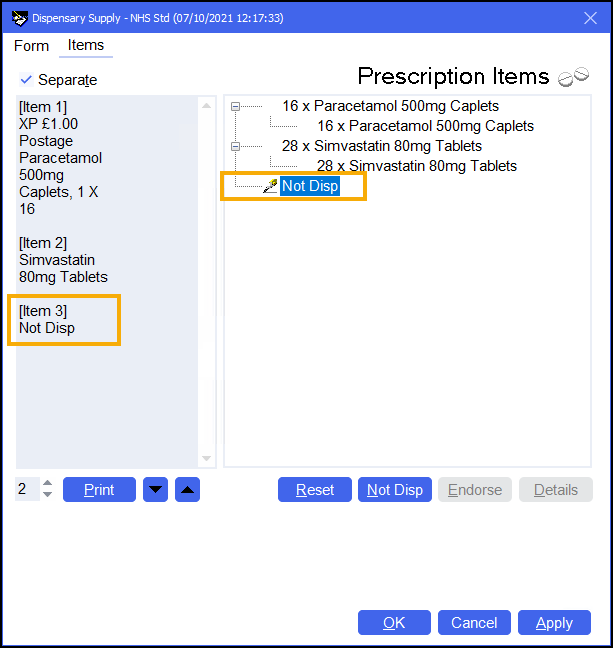
Not dispensed
For non-electronic prescriptions, you will normally dispense all the items in the sequence that they display on the prescription. The printed endorsements then display in a matching sequence.
On occasion, a patient may not want one or more items.
-
Select the item that is not required and select Not Disp
 .
. This will add a corresponding Not dispensed reference on the Dispensary supply screen in the last position on both the left pane, the list of endorsements to be printed, and the right pane, the list of items:
-
Use the Shuffle
 up and down arrows to move the Not
dispensed selection up (or down) so it is in the correct position.
up and down arrows to move the Not
dispensed selection up (or down) so it is in the correct position. -
Select Print
to start printing once you are satisfied with the changes.
Delay endorsement printing
If you prefer, you can save up the prescriptions and endorse them later, provided the correct options are set.
Endorsement printing setup for delayed endorsement:
-
From the Pharmacy Manager Toolbar select Tools - User Settings - User Details.
-
Select the Endorsement printing drop-down arrow:
-
Select Never from the drop-down list.
Endorse from Pending tab:
-
From the select Pending
 .
. -
Set the Filter list by to All pending supplies and tick Include not endorsed:

-
Select the patient to endorse and then select Endorse
. -
The Dispensary Supply screen displays, continue as required.