Creating a Codeset File
A Codeset File is a library of Read2, CTV3 and SNOMED CT codes that are used when creating rules in a Pathway.
Creating a Codeset File is usually the first step towards developing a Pathway.
- From the Outcomes Manager dashboard select Pathway Developer.
- Select Designer from the Codeset group.

The Codeset File screen displays:
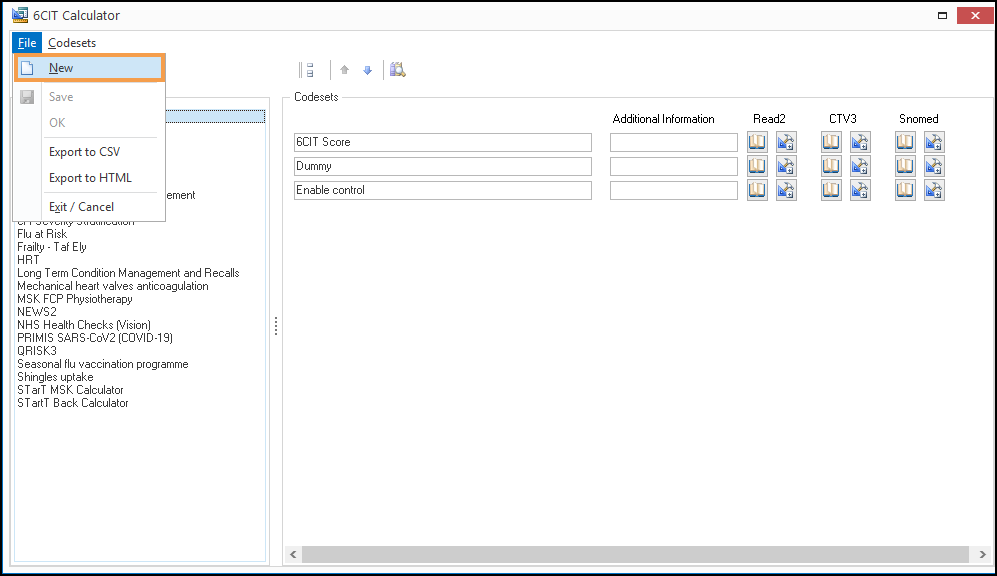
- Select File from the upper left, followed by New from the menu.
- Enter a name for your Codeset File.

- Select OK to create the Codeset File.
- Select the new Codeset File, and from the toolbar select Codesets.
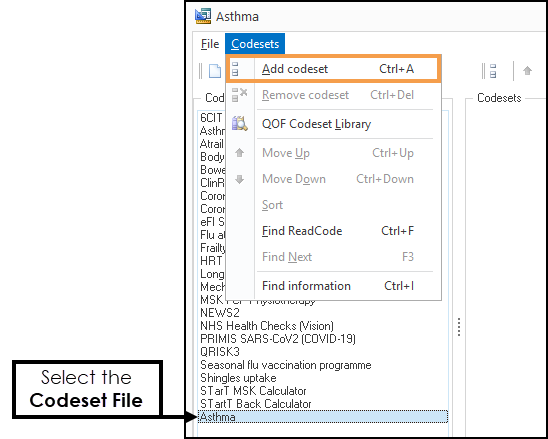
- Select Add codeset from the menu.
- Enter a name for the new Codeset.
Note - This is the name you see when building Rules inside a Rule Node.
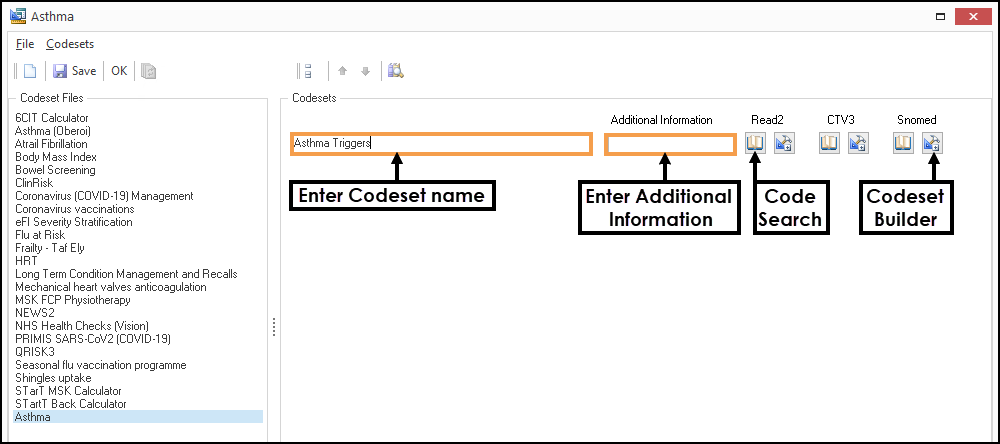
- Enter Additional Information as required.
Note - Additional Information displays in the Indicator Logic.
- Codes can be added to the Codeset using either:
- Code Search
 - Searching by terms or drugs.
 - Codeset Builder
 - Adding Codes manually.
See - Codeset Builder. - QOF Codeset Library - Import predefined Codesets.
See - Codeset Builder - Import QOF Library. - Imported - SNOMED CT codes can be imported from a specifically formatted file, for example, PRIMIS specification.
- Code Search
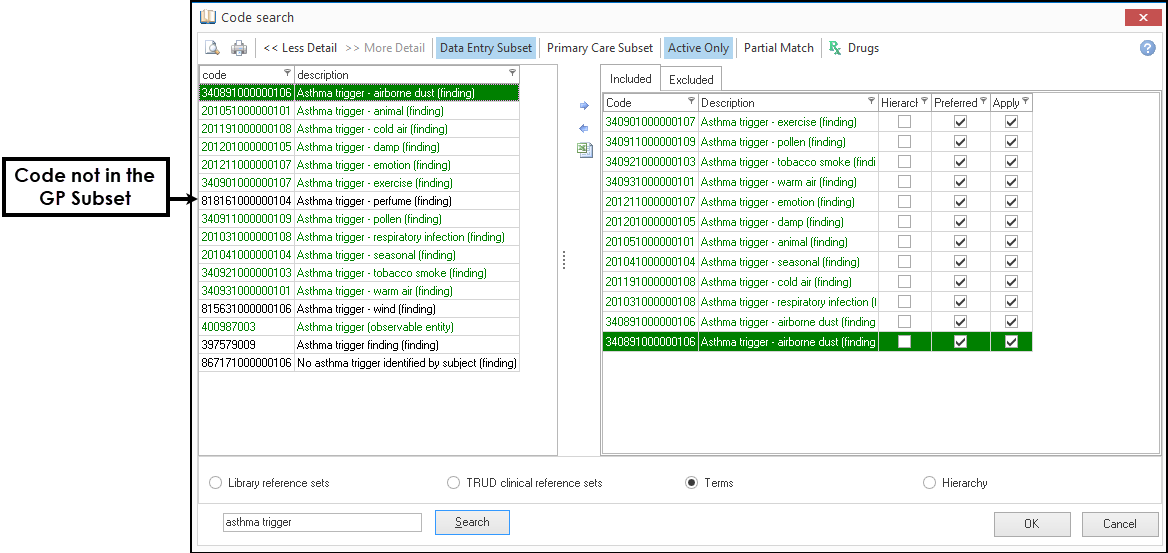
- For your chosen dictionary, for example, Read2, select Code Search .
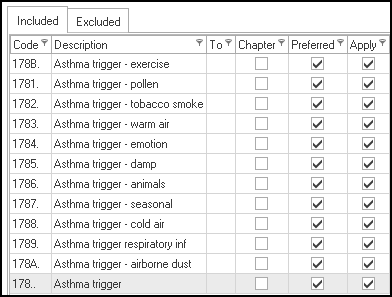
The Read2 codes can later be mapped to CTV3, and CTV3 codes mapped to SNOMED CT. - From the Code Search screen enter a keyword, for example, Asthma trigger.
Optionally, select the relevant checkbox to filter the results by code category. Note - A Codeset should contain either Clinical or Drug codes only, not a combination of both types. For example, Asthma Management clinical terms only or Asthma Medication codes only.
 - Select the Codes required, then select Insert
 to add them to the Codeset.
You can add to either the Included or Excluded tabs of the Codeset.Note - The Excluded tab can be used to exclude a single code or multiple Codes from a Reference Set. This avoids having to manually enter long lists of Codes that are within a Reference Set to omit ones that are not needed. - The Preferred and Apply checkboxes are selected by default, review the settings:
Chapter/Hierarchy -Includes all codes within the specific Chapter/Hierarchy.
Note - If you have selected a Read chapter, these do not automatically map to a SNOMED CT hierarchy.Preferred - The code displays on the Template's list, if cleared, the user needs to select More Detail to access the code.
Apply - Enables users to add the code through the template, if cleared the patient's history entries display.
- Select OK to add the codes.
- Once you have added the codes using one dictionary, for example, Read2. These can be converted to CTV3, and from CTV3 to Snomed.
- Right click on either Code Search or Codeset Builder to display the menu.
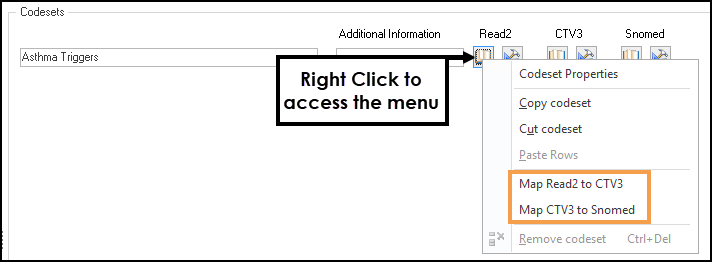
Select Map Read2 to CTV3.
This maps the individual codes and chapters.Select Map CTV3 to Snomed.
Note - The Map function does not map Read chapters to SNOMED CT hierarchies.- Optionally, use Code Search to add additional codes as required.
When using Code Search with the SNOMED CT dictionary any codes which are not in the GP Subset display in black, this means there is not a direct mapping to a Read code.
- Right click on either Code Search or Codeset Builder to display the menu.
- Continue to add more Codesets and Codes as required.