Prescribing from a Local Guideline
To prescribe from a Guideline:
- From Consultation Manager, select the appropriate patient and the Guideline required, see Selecting Guidelines for details if required.
- Check any relevant information for prescribing on the selected Guideline.
- Locate the medication you wish to prescribe and double click on it.Training Tip - Where appropriate, Drug Check symbols display in front of the item name, select to view the details.
- The Prescribe Drug screen displays, select from Acute or Repeat.
- Select OK.
- Either:
- The Therapy - Add screen displays, check the details, complete as required and select OK, or
- If you selected a Preferred Drug, depending on your settings, the item may automatically display, see Preferred Drug List for details.
- The Drug Check screens display as per your settings, respond as appropriate to continue.
-
Press F9 on your keyboard twice to print the prescription.
Depending on the way the drug was added to the Guideline, you have the following additional options:
A Drug Regime within a Guideline is an ordered collection of drug defaults providing a prescribing protocol that can be prescribed from that Guideline.
Where there is more than one drug in the drug regime, you can group the drugs together so that all the drug lines are highlighted when you click on one. At the time of prescribing, you can then either:
- Double click on a line just to prescribe one line, or
- Prescribe all the items together by selecting a row to highlight all the items and then select GO
 . Training Tip - You can remove an item form being issued by selecting it to remove the highlight before you select GO.
Check the details on the Drug Check screens in the usual way.
A Drugs Class List is a list of drugs from the same group within your drug dictionary. If a there is a Drug Class List within a Guideline, select the heading and the individual drugs display in green. These are drugs that are not on the Preferred Drug List.
Double click on an item to prescribe it.
Right click on an item to select from the following options:
- Make Repeat - This flags the drug item with a repeat symbol. When you double click on the line to prescribe it, it defaults to Repeat in the Prescribe Drug screen.
- Formulary - This toggles between the Formulary (when ticked) or full Drug Dictionary (not ticked). If you change this, the Drug class list will be re-displayed accordingly.
- All Generics - If ticked, the Drug class list will be re-displayed including all generic forms.
- Discontinued - If ticked, the Drug class list will be re-displayed including all discontinued items.
- Back up BNF Tree - This allows you to go back up the BNF Tree. Another Drug class bunch is selected if you click on it, and included within the same Drug class list.
- Find... - If you are looking for a particular drug, select Find and enter in the drug you are looking for.
- Properties - The standard amendment screen for the level, text indent and whether initially expanded.
The Preferred Drug List displays beneath the main sub-heading for the Drug Class or beneath the Active Repeat Masters (Drug class) heading, whichever is used. Beneath the Preferred Drug List is then the Drug Class heading, followed by the drugs within that Drug Class in green:
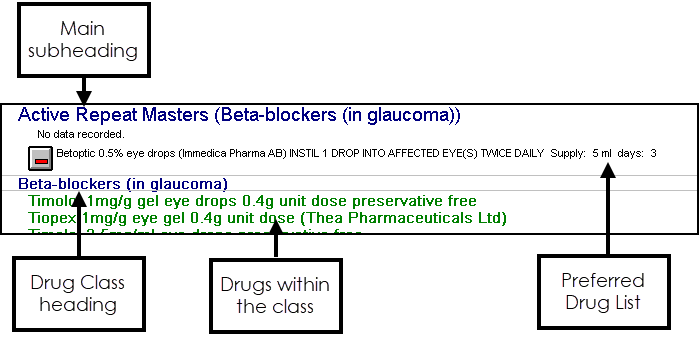
The following additional information displays:
-
'No data recorded' displays if the patient does not have any items from the Drug Class.
-
Drug Check warning symbols relevant to the selected patient display, select to view details.
Right click on an item to select from the following options:
- Make Repeat - To flag the drug item with a repeat symbol. When you double click on the line to prescribe it, it then defaults to Repeat in the Prescribe Drug screen.
- Add - To display the Derive New Drug Default screen and add another item to the Preferred Drug List. This can be for the same item with different defaults or you can select a different one. Complete the screen as required and select OK. A warning displays if any new drug default is not valid for the current patient, for example, if you have added a new line for age 0-12 years, and the current patient is over 12 years.Training Tip - When initially populating a Guideline, it is recommended that you deselect any patient. This allows you to view all the drugs in your preferred list irrespective of age range.
- Remove - To delete an item from the Preferred Drug List.
- Properties - To manage the position of the item on the screen, see Line Levels and Text Indents for details.