Marking an Item as an MDS Item from the Dispensary Screen
When dispensing to a patient from the Dispensary screen, you can easily mark an item as a Monitored Dosage System (MDS) item and set the schedule.
To mark an item as an MDS item from the Dispensary screen:
-
From the Dispensary screen, enter the patient, prescriber, item details and directions as normal.
-
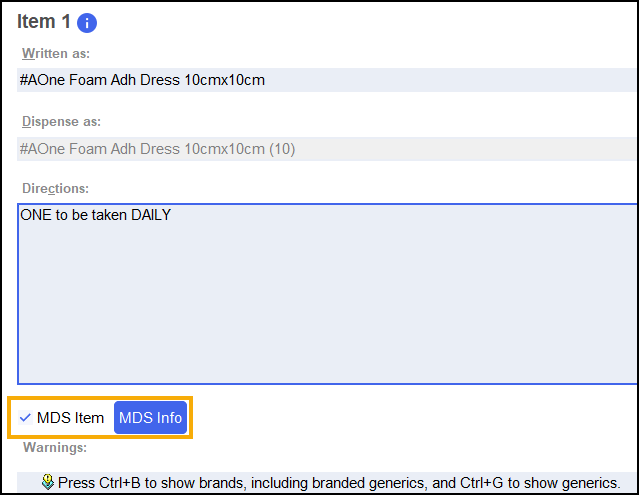
Place a tick in MDS Item and then select MDS Info
 :
: Training Tip - A tick displays next to MDS Item automatically if the item is already on the new MDS module.
 -
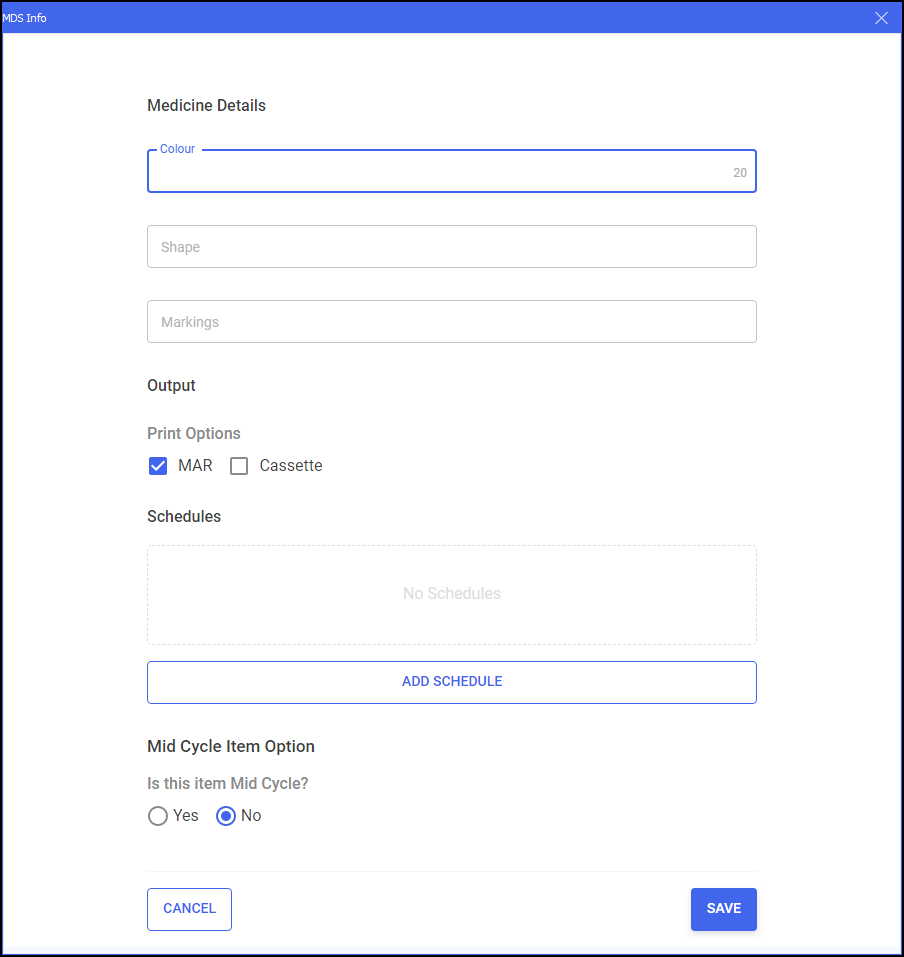
The MDS Info screen displays:

Edit the medication details and schedule as required:
-
Medicine Details:
-
Colour - Enter the colour of the medication.
-
Shape - Enter the shape of the medication.
-
Markings - Enter any markings on the medications.
-
-
Output:
-
Print Options - Select the print options, either a MAR chart or a Cassette sheet, or both.
-
-
Schedules - Any existing schedules display.
For more information on adding or editing medication schedules, see Adding a Monitored Dosage System (MDS) Medication Schedule and Editing a Medication Schedule. -
Mid Cycle Item Option - Select Yes to set this as a mid-cycle item and then set the mid-cycle date range.
-
-
Select SAVE
 .
. - Continue to dispense the medication in the usual way.Training Tip - Press Ins/Insert on your keyboard to finish the dispense without printing labels.
The medication item now displays on the patient's Active Medication tab.