Dispensing 2DRx prescriptions in MDS
On the eMessages tab, a home ![]() icon adjacent to a electronic message indicates the prescription is for
a patient who is identified as MDS
or MDSC.
icon adjacent to a electronic message indicates the prescription is for
a patient who is identified as MDS
or MDSC.
You can dispense this prescription via the MDS functionality.
-
Highlight the patient/prescription on the eMessages tab.
-
Click the Dispense button.
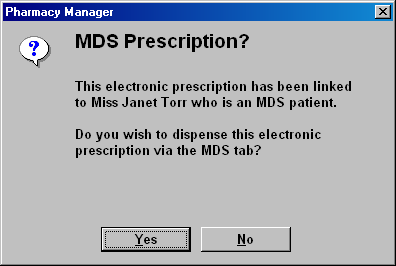
-
Click the Yes button to proceed to the MDS functionality.
-
Alternatively, click the No button to proceed to the Dispensary tab via the Patient selection wizard.
-
If you choose to dispense from the MDS tab and the medication period has not already been defined, you will be prompted to specify the medication period.
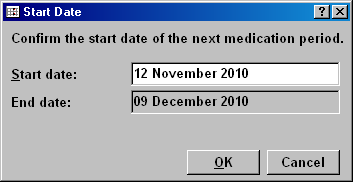
-
The default date range is based on tomorrow being the start date.
-
Click the OK button when the start and end dates are correct.
The main MDS patient administration window appears.
To maximise the display of the grid, and to reduce your reliance on the scroll bar, you can hide the virtual prescription.
-
Click the Hide
 button to clear the virtual prescription.
Alternatively, press
  &
& .
. -
If you wish to retrieve the virtual prescription when it is hidden, click the same button - now called Show - again. Alternatively, press
 &
&
 .
.
![]()
The system remembers the Hide/Show position as your own default mode on patient cycle display. When you recall the next patient, it uses the same display>Even when changing from one home to another or after a system closedown and restart, the mode remains the same until you change it.
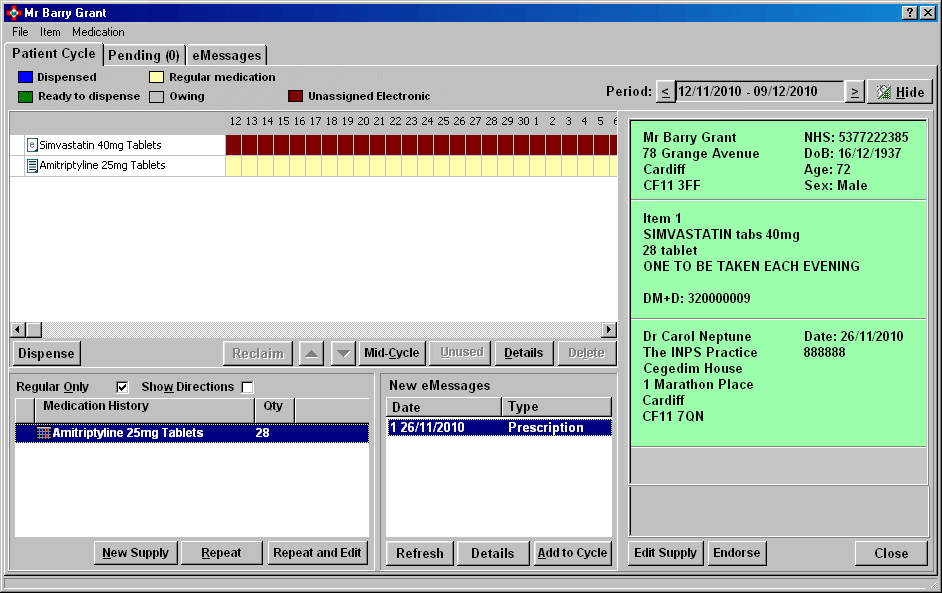
-
In the illustration, the item on the virtual prescription has been automatically linked to the item on the grid row. However, it has not yet been added to the current cycle.
-
In the New eMessages pane, highlight the required prescription and click the Add to cycle button. Alternatively, press
 &
& .
.
This takes you to the normal Dispensary screen via the Patient selection wizard.
Follow normal dispensing processes. Pay particular attention to the quantity (normally in multiples of 28 if you are on a 28-day MDS system).
-
At the end of the prescription, click the Finish button after the last item to revert to the Patient cycle tab.
-
If you need to see further detail about this prescription, click the Details button. This opens the eMessage details.
-
Click the OK button to revert to the Patient cycle tab.
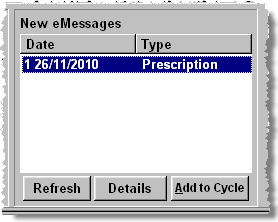
-
Click the Refresh button to check for any further prescription eMessages that may have been delivered for this patient since you opened the Patient cycle display. It will also remove any that have added to the cycle.
-
Click the Details button to open up the eMessage details.
See also Form finished.
For more details see 2DRx eMessage details
MDS reconciliation
If you have an electronic prescription that covers medication you have already added to an MDS patient record manually, to avoid duplication you will need to reconcile the new eMessage with the existing manually added items on the Patient cycle grid.
For more details see MDS reconciliation.
MDS pending tab
For more details see MDS Pending supplies.
eMessages tab
-
Click on the eMessages tab to display a filtered view of items limited to the selected patient.
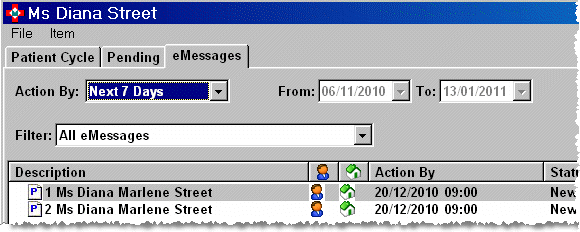
For more details see eMessages tab
The system allows you to repeat an item the patient has had previously without scanning the current iteration/prescription.
However, with the advent of ETC, to be able to claim for a prescription electronically, although the paper prescription form is the legal entity, you must scan the prescription.
Electronic claim and printed endorsement
-
Having scanned the barcode of a 2DRx prescription repeat, select and dispense the downloaded message from the eMessages tab.
-
When prompted, click Use MDS tab.
-
On the Patient Cycle screen, click Add to Cycle.
-
Dispense the prescription as you would normally.
-
Revert to the View >Patient Cycle Screen and click the Endorse button.
-
Click the Claim button to electronically transmit the claim and also to print the endorsement on the paper form (or alternatively click to Send Claim Later).
Paper claim only
It is possible to repeat a prescription without creating an electronic claim.
-
Click on the eMessages tab to display a filtered view of items limited to the selected patient.
-
Identify the patient and click the View button
-
On the Patient Cycle screen, click Repeat (or Repeat & Edit)
-
Dispense the prescription
-
Click the Pending tab
-
Highlight the prescription to Endorse
-
Click the Endorse button and finalise the endorsement as necessary
You can print the endorsement if required, but there is no option to submit an electronic claim.
Updated 28th March 2018