Dispensing Wizard
Once an electronic prescription has been received and you have selected/highlighted the transmission on the eMessages tab, the next step is to confirm the identity of the patient and to discover whether the patient already has a patient record in Pharmacy Manager before going on to dispense the items.
In many instances, the patient may already have a patient record in your system when they get their first electronic prescription. In some cases the patient will be new to your system and will have their first electronic prescription. Both these different types combine to create a third type of patient - existing with their second or subsequent electronic prescription - once they have had their first electronic prescription. There are links to all types below.
To start this process, on the eMessages tab, click the Dispense button with the selected prescription highlighted to start the Patient selection wizard.

For an explanation of any of the variations, choose and click a link below:
Existing patients - first eAMS prescription
New patients - first eAMS prescription
Existing patients - subsequent eAMS prescription
![]() Occasionally, you may encounter a problem
after scanning a prescription where you do not receive a response from
the ePMS. In such an event, the prescription status may
be "stuck" on Requesting
or some other error state. See Trouble-shooting
for more assistance.
Occasionally, you may encounter a problem
after scanning a prescription where you do not receive a response from
the ePMS. In such an event, the prescription status may
be "stuck" on Requesting
or some other error state. See Trouble-shooting
for more assistance.
Electronic prescriptions with Repeat Rx registered patients
If a selected prescription is for a Repeat Rx registered patient, an alert appears indicating that electronic prescriptions are not compatible with Repeat Rx.
-
Click the Yes button to continue dispensing the prescription outside the scope of Repeat Rx
-
Alternatively, click the No button which will cause the patient selection wizard to close immediately.
-
You must then deal with the electronic script manually. This would mean marking the prescription as complete and processing it as a paper repeat prescription.
Selecting multiple prescriptions
Pharmacy Manager permits multiple prescriptions for the same patient to be selected.

-
Highlight the first selection and then, holding down the
 key, click subsequent
selections with the mouse.
-
Alternatively, once the first selection is highlighted, again holding down the
 key, use the
 or
or  cursor arrows to move
to a subsequent selection. Press the
  bar to highlight
the subsequent selection.
-
Furthermore, if the intended selections are next to each other, select the first prescription, and then continue to highlight further selections by holding the
 and pressing the
  or
or  cursor arrow.
-
Once the multiple selections have been made, click the Dispense button with the selected prescription highlighted button to start the Patient selection wizard.

![]() Once the Patient
selection wizard starts, the prescriptions are merged
into one virtual prescription selection. However, the separate prescriptions
can be identified by the item numbering. For example, if there were eight
items initially spread over three prescriptions, the item numbering would
be 1, 2, 3 followed by 1, 2, 3 again, followed finally by 1 and 2.
Once the Patient
selection wizard starts, the prescriptions are merged
into one virtual prescription selection. However, the separate prescriptions
can be identified by the item numbering. For example, if there were eight
items initially spread over three prescriptions, the item numbering would
be 1, 2, 3 followed by 1, 2, 3 again, followed finally by 1 and 2.
Incorrect selection
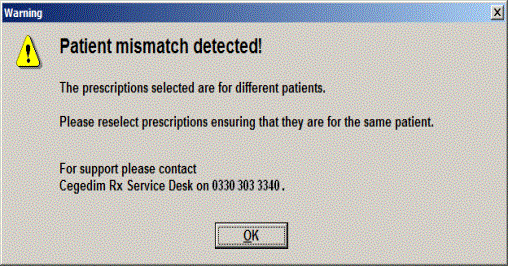
An alert appears if you try to process multiple prescriptions that are for different patients.
-
Click the OK button and re-select correctly for one patient.
![]()
The Dispense button will remain disabled for a multi-select operation if you choose two or more prescriptions which together have and do not have MDS matched status.
See also Multiple selection mismatch alerts
Automatic prescription grouping
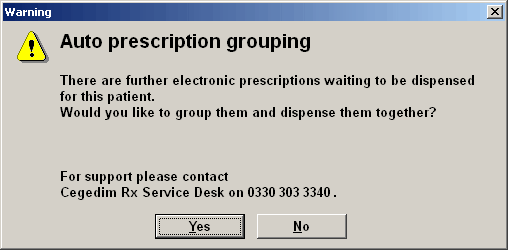
When eMessages for the same patient have been downloaded at different times, you may overlook making a multiple selection.
In order to avoid patient inconvenience if they do not receive all their medication, Pharmacy Manager can be configured to alert you when there are two or more prescriptions for the same patient.
-
Click the Yes button to group the prescriptions and dispense them together.
To enable grouping to take place, matching criteria must be met:
-
Patient details are the same - name, NHS number, date of birth, gender, address, postcode and prescriber.
-
Prescriber is the same.
-
All prescriptions must be New status.
-
No prescriptions must have expired.
-
All prescriptions must be the same message type.
![]()
For ePharmacy configured systems, whilst it is possible to separately group either two or more AMS prescriptions or two or more CMS prescriptions so long as the other criteria are met, it is not possible to group together a mixture of AMS and CMS prescriptions.
See also Pharmacy details - Electronic messaging
Other functions
The remaining buttons on the eMessages tab will vary according to the status of the highlighted prescription. Once a prescription has proceeded from New status, the Dispense and Abandon buttons disappear.


Abandon
Click the Abandon button to return a new prescription to the ePMS. If you subsequently find you need to dispense a previously abandoned prescription, scan it again to bring it back from the ePMS a second time.
Re-request
Use of the Re-request button will probably not arise often. If a prescription has been downloaded, but remains not dispensed (with a status of New) for any significant period of time, it is possible to re-request an up-to-date version in the event, for example, that the GP has telephoned you to inform you that he has changed the prescription.
Edit
Use the Edit button to revert to the Dispensary tab to complete a prescription that is not yet finished.
Resend
Click the Resend button to resubmit a claim that has failed. This may arise because a response has not been received from the ePMS and the status of the eMessage remains as Claiming. The Resend button will only appear in focus for eMessages that are eligible for resending.
Complete
Click the Complete button to change the status to Complete. This has the effect of clearing the entry from the eMessages tab.
![]()
If you mark an unfinished prescription as Complete, you not be able to send an electronic claim for that prescription subsequently.
Details
Click the Details button to view the prescription content - the virtual script representation - without having to activate the dispensing wizard. This can, for example, enable you to check dispensary stock before proceeding.
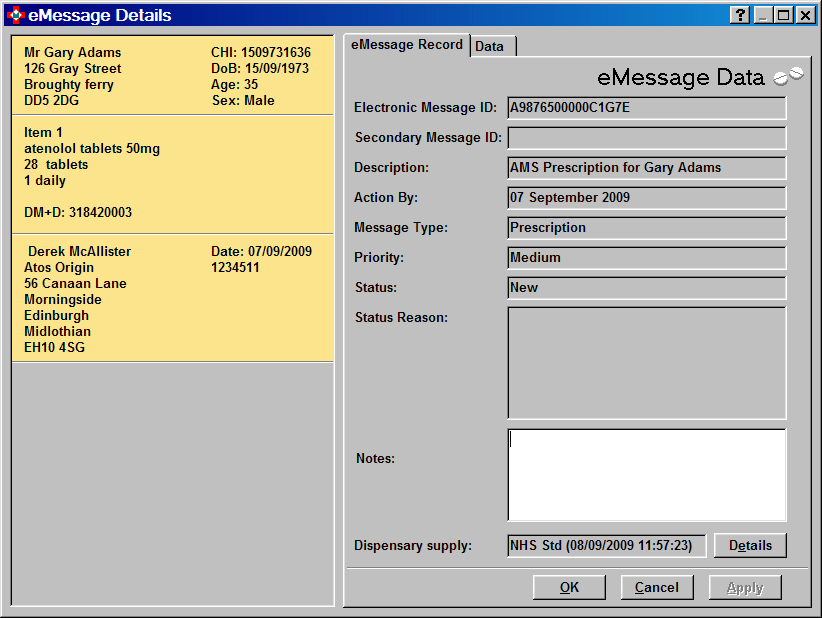
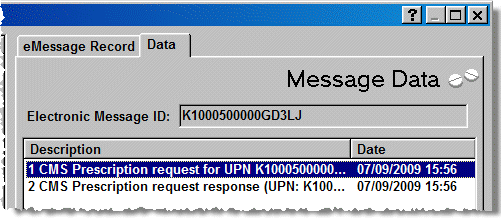
The Data tab displays a time stamped step-by-step summary of each stage the message has reached, including an indication whether it was received (request response) or sent by you (request).
The Dispensed items tab displays a time stamped list of the items dispensed.

-
Click the Details button to open up the Prescription item details for the item.
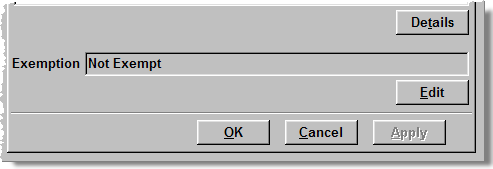
You are able to view and edit the exemption reason for an electronic prescription after you have finished dispensing. The patient's exemption status will have been recorded at the time of dispensing for inclusion in the notification and claim messages. However, if it was recorded incorrectly, it is possible to correct it before the claim is submitted.
-
Click the Edit button.
-
Make the appropriate alteration to the exemption for this prescription.
![]()
Any change to the exemption made here is for this prescription only. It does not make a change to the exemption in the patient's record.
Updated 19th June 2013