Trouble-shooting
Manually using the dispensing wizard
Occasionally, you may encounter a problem after scanning a prescription where you do not receive a response from the ePMS. In such an event, the prescription status may be "stuck" on Requesting or some other error state.
The priority will be to dispense the prescription without making the patient wait unnecessarily.
Whilst the status does not change to New, it is possible to navigate through the patient wizard manually.
To start this process, on the eMessages tab, click the Dispense button with the selected prescription highlighted button to start the Patient selection wizard.

![]() If the Dispense
button is initially disabled, click the Reset
button. This should advance the status to Requesting
when the Dispense button becomes
enabled.
If the Dispense
button is initially disabled, click the Reset
button. This should advance the status to Requesting
when the Dispense button becomes
enabled.
The failure to receive an electronic prescription means you will have to progress through the Patient selection wizard manually. For example, you will have to input the patient name and confirm identity. Additionally, you will have to manually identify the dispensed items.
Once the prescription has been dispensed, you can complete the electronic endorsement.
The scanner
No light emitting
Check connection to ensure scanner cable is physically seated correctly in the computer USB port. Remove and reseat cable plug.
If these steps fail to provide a remedy, telephone Service Desk. Typing UUIDs is a temporary fallback position.
Light emitting but not scanning
The scanner may be attached to a different USB port to the one in the Pharmacy Manager settings.
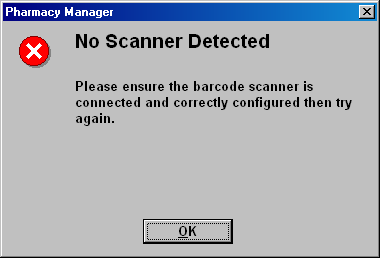
The scanner connection button is red - ![]() - showing no scanner detected. Double click the scanner connection button
- showing no scanner detected. Double click the scanner connection button
![]()

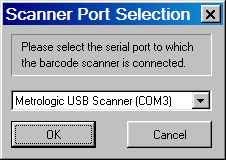
The scanner port selection window appears.
-
Click the
 and select
the correct port/device.
The scanner detection button should turn green ![]()
![]() This solution can also be activated through
Tools > Pharmacy Details
> Scanner tab. Click the
This solution can also be activated through
Tools > Pharmacy Details
> Scanner tab. Click the ![]() and
select the scanner port from the list of available ports.
and
select the scanner port from the list of available ports.
Light emitting but no response when scanning

The scanner connection button is red - ![]() - showing no scanner detected. The scanner may require resetting.
- showing no scanner detected. The scanner may require resetting.
Scan the barcodes on the Scanner Setup Sheet to ensure the scanner holds the required settings.
Click here for a copy of the Scanner setup sheet for the Metrologic 9520 scanner.
Click here for a copy of the Scanner setup sheet for the Metrologic MS9544 scanner
The sheet is saved in PDF format, requiring installation of Adobe Reader on the PC. You must also print out the sheet for scanning using a suitable high resolution printer. Most laser printers will be satisfactory.
![]() You cannot scan the computer screen.
You cannot scan the computer screen.
Contact Service Desk if you continue having difficulties with your scanner.
Printing endorsements on prescriptions
![]()
Ensure you have your endorsement printer configured. For more details see Endorsement via Windows drivers.
In order to ensure that endorsements are printed in the correct position on the prescription, it is advised that correct printer settings are in place.
Menu > Tools > Printer configuration > Pharmacy Manager
-
Left click once over your endorsement printer to highlight the selection
-
Click the Details button
-
Click the Prescription tab and complete the prescription printing setup accordingly
For the Brother printer (e.g. HL-5240) the followings values should be used:
-
Left Margin: 1
-
Top Margin: 1
-
Width: 66
-
Height: 60
-
Number of characters: 16
For Star SCP-700 printer the following values should be used:
-
Left Margin: 1
-
Top Margin: 0
-
Width: 66
-
Height: 66
-
Number of Characters: 11
![]() However, note that for the Star SCP-700
printer type, you should use the Epson FX-85 driver. Furthermore, you
should not check
However, note that for the Star SCP-700
printer type, you should use the Epson FX-85 driver. Furthermore, you
should not check ![]() the Windows driver box. Telephone Service Deskfor assistance
in setting up your endorsement printer.
the Windows driver box. Telephone Service Deskfor assistance
in setting up your endorsement printer.
Updated 1st July 2010