Using the Code Mapper
Some data within your EMIS system may not convert cleanly to the Primary Care Hosted Solution, this may include:
-
Clinical data - A valid clinical term is required,
-
Drug data - A valid DM+D drug name is required.
You should check automatically mapped data and manually map data that cannot be linked to a valid entry within the Primary Care Hosted Solution:
-
From Codee, select Favourites
 and then select the database you want to work on, either:
-
BLUEEMIS PrimaryClinicalCode MSTRVISION READ for clinical terms, or
-
BLUEEMIS DrugPrimaryClinicalCode MSTRVISION DrugPrimaryClinicalCode for medications.
-
- From the top of the EMIS column, select:
- Code status:
- All - Selected by default, to display all EMIS data.
- Mapped - Select to display data that is successfully mapped to a Vision 3 term.
- Unmapped - Select to display data that you must manually map to a Vision 3 term.
- Sort by:
- Code - Select to display in code order.
- Start date - Select to display by start date.
- End date - Select to display by end date.
- Occurrences in system - Select to display by number of instances.
- Sort
 - Select to change the sort order by ascending or descending order.
To map unassigned terms, select:
Code status - Unmapped
Sort by - Occurrences in system
Sort - Down arrow:

- Code status:
-
Now, on the Vision 3 side, find an entry to match an EMIS item to using either:
-
Copy Code
 to copy and paste the code of an EMIS entry,
 -
Copy description
 to copy the description of an EMIS entry, or
 -
Entering key words into Search code above the Vision 3 entries. Matching entries display as you type.
Training Tip - To select multiple EMIS items to map to one Vision 3 term, hold down Ctrl on your keyboard and select all the items required and then release Ctrl. You can then drag and drop all the selected items.
-
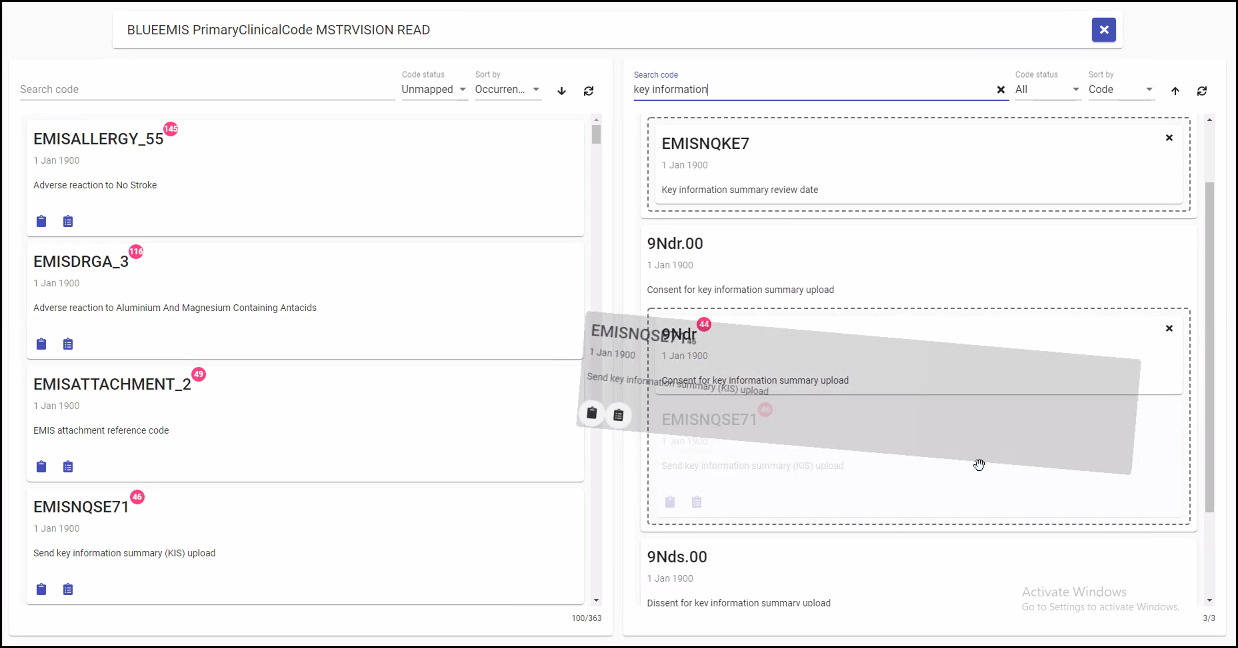
- Once you find a term you want to map the EMIS entry to, simply drag and drop it to the Vision 3 entry required:

Once mapped the EMIS entry displays an Equals to
 , select to display what the entry is mapped to.Note - More than one EMIS entry can be mapped to the same Vision 3 entry.
 -
Repeat Steps 3 and 4 until you have cleared the Unmapped list, or as many as you deem appropriate.
Training Tip - Mappings automatically save and are updated to your final data conversion ready for your Go Live day. -
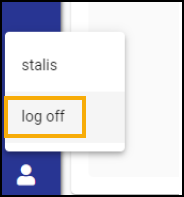
Once you have finished, either this session or the entire list, select User Profile from the bottom left of the navigation bar and select Log off, or simply close your browser:

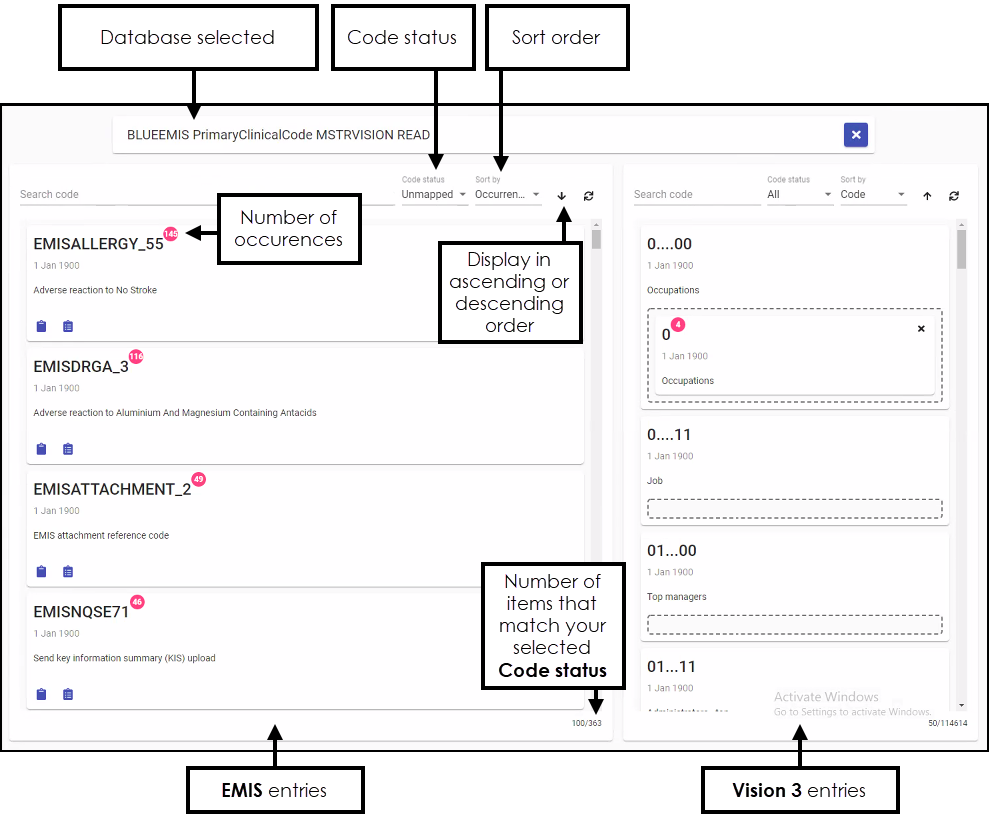
The Code Mapper screen displays with EMIS data in the left column and Vision 3 data in the right column:
