Adding Filters
Saved Filters (0:34)
Filters provide a quick way to view a selection of book owners and/or clinics, for example, all GP's or all Nurses. The default filter displays book owners with active plans:
-
From the , select Saved filters
 . The list of existing filters displays:
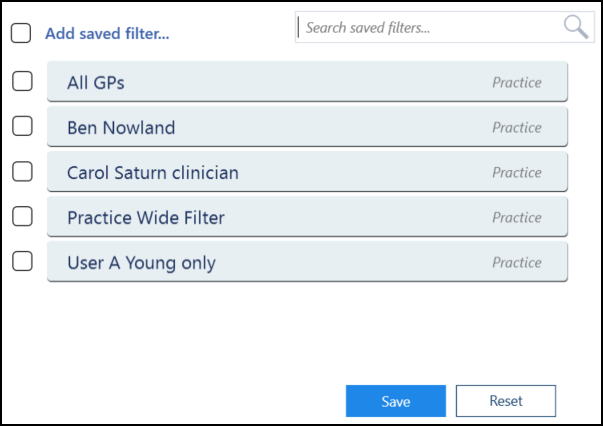
-
Select Add saved filter
 from the top of the screen. The Create Saved Filter screen displays:
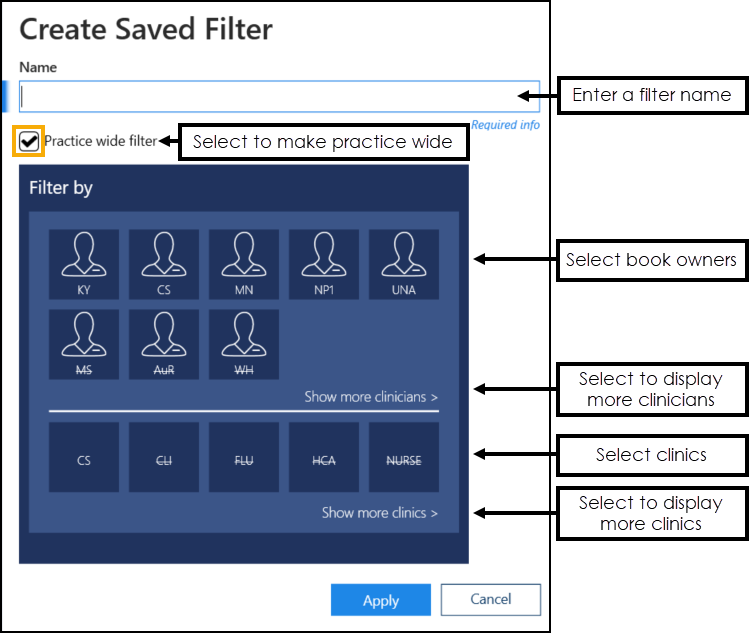
Complete as appropriate:
-
Name - Enter a name for the new filter.
-
Practice wide filter - Tick to make this filter available to the whole practice.
-
-
Select the book owners that you want to include.
Training Tip - Choose Show more clinicians to display all book owners.Note - Inactive book owners display at the end of the list and have a line through their name. -
Select the Clinics that you want to include.
Training Tip - Choose Show more clinics to display all clinics.Note - Inactive clinics display at the end of the list and have a line through the name. -
Select Apply
 to save changes. The list of current filters displays, including the new filter:
-
Select Save to save your changes or Reset to cancel any changes:

Updating Rows
The following notifications display on the screen when additions, modifications and deletions are made:
-
 Addition - Adding a new row.
 -
 Modification - Modifying an existing row.
 -
 Deletion - Deleting rows.
 if the change cannot be made, for example, if the name you are using is already in use.