FAQs
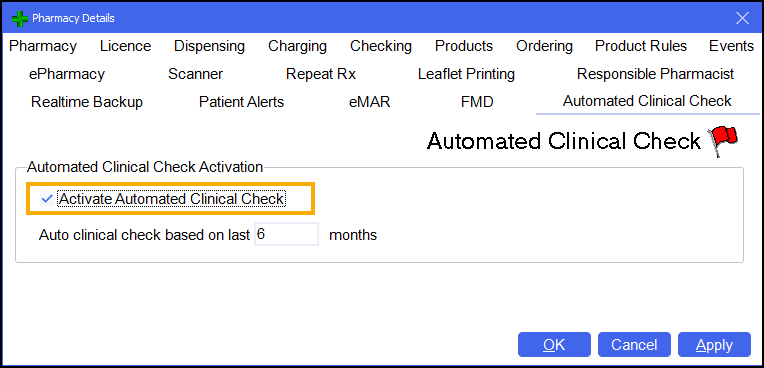
The configuration setting for auto clinical check is in Tools - System Setting - Pharmacy Details - Automated Clinical Check:
The auto clinical check takes place when a prescription is downloaded. The Pharmacy Manager business intelligence engine analyses the contents of the prescription message to determine whether it can be auto checked or not.
The clinical check status displays on the New Prescriptions screen. This can be accessed either from the dashboard Dispensing Evolution has Begun tile, or from the eMessages screen, select New Dispensing - Take me there. Prescriptions that have been auto checked display with a status of Checked - Auto, which means that they may be handed to the dispenser to begin labelling straight away, allowing the pharmacist to focus on prescriptions with a status of Requires Check. You can quickly filter for auto checked prescriptions on the New Prescriptions screen.
If you have the standalone Clinical Check module restricted to pharmacist access, when tokens are printed, any prescriptions that have been auto clinical checked print with Checked - Auto on them. These may be separated from those that require a clinical check in order to begin labelling.
If a prescription has been manually checked within the past six months and there has been no change to the patient record (new conditions, sensitivities, allergies), the item, quantity or directions prescribed, then Pharmacy Manager marks the prescription as auto clinical checked.
Yes, if an auto check has taken place and you feel that a prescription needs manually checking, then on the New Prescriptions screen, select Actions next to the relevant prescription and then select Reset Clinical Check. The prescription reverts back to a status of Requires Check and you can perform a manual clinical check.
Prescriptions that contain schedule 2 or 3 controlled drugs or high risk medication are never automatically clinically checked. Manual checks must always be performed for these items.
Yes, absolutely. The auto clinical check feature has been designed to work with the recent dispensing innovations such as Fast Labelling. When a prescription has been auto checked, then on the dispensing page all the warnings and interactions are pre-confirmed, Fast Labelling pre-populates the items, directions and quantity, meaning that all the dispenser needs to do is select Finish  to print the labels if they are happy to proceed.
Yes, if you want to increase the frequency of manual checks for eligible auto check prescriptions from once every six months, then go to Tools - System Settings - Pharmacy Details - Automated Clinical Check, and change Auto clinical check based on last n months where n is the necessary frequency. The frequency can be set between one and six months.
How do I Merge Duplicate Patient Records (1:43)
-
Select Tools - Bulk Operations.
-
Double click on Merge Patients.
-
Enter the names of the patients to be merged in the two boxes and select Next
 .
.
-
From the Pharmacy Manager Toolbar, select Quick Actions - Quick Interaction Check or select Ctrl + Alt + Q on your keyboard.
-
If you would like to check products against a patient’s PMR, place a tick in Check for patient and enter the patient’s name, if not, leave this blank.
-
To add products to the list select Add
 .
. -
Any interactions and sensitivities display in the bottom half of the window. To see the full details of the interaction, highlight the message and select Explain
 .
.
Claim Deferred status is indicated when a non- tariff special item prescription has been collected but the invoice information is missing.
How do I Endorse a Prescription with a Status of Claim Deferred (3:03)
How do I Reset My Password (2:38)
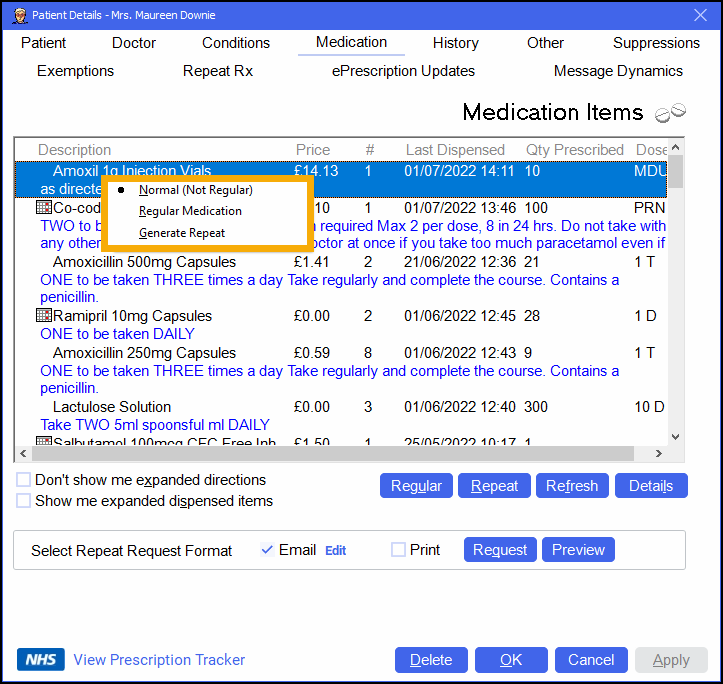
Regular items (as opposed to one-off items) are those that the patient will receive each month/ prescription period. Highlight an item, right click and select either Normal, Regular or Generate Repeat:
When you choose to dispense from the patient's history, all items marked as regular will be highlighted and when you select Repeat  these items will automatically be added for dispensing.
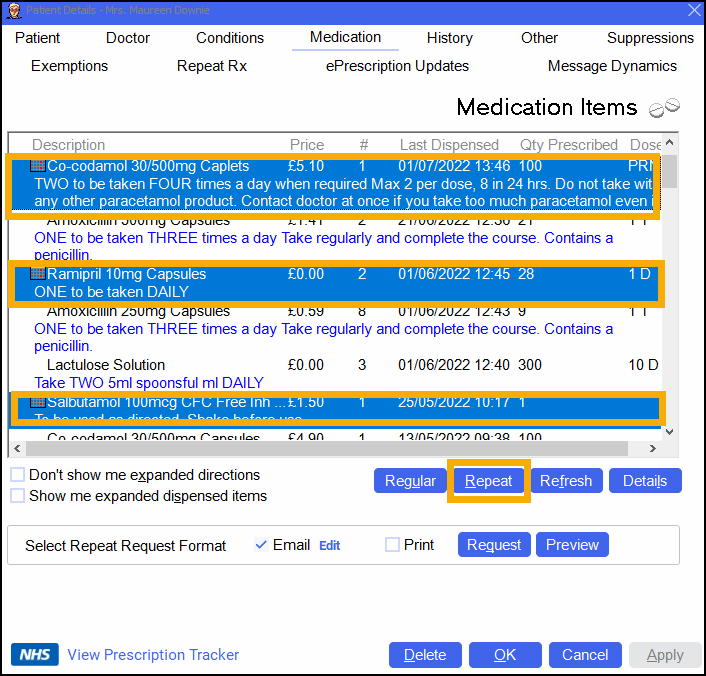
If the regular medication is not selected, you can use Regular  to select all items that have been marked as regular items and then simply select Repeat to populate the Dispensary screen with those items.
The calendar icon will also display under the px name on the Dispensary screen, if you have used dose codes to populate the directions, hovering over this icon will indicate when the next prescription date is anticipated.
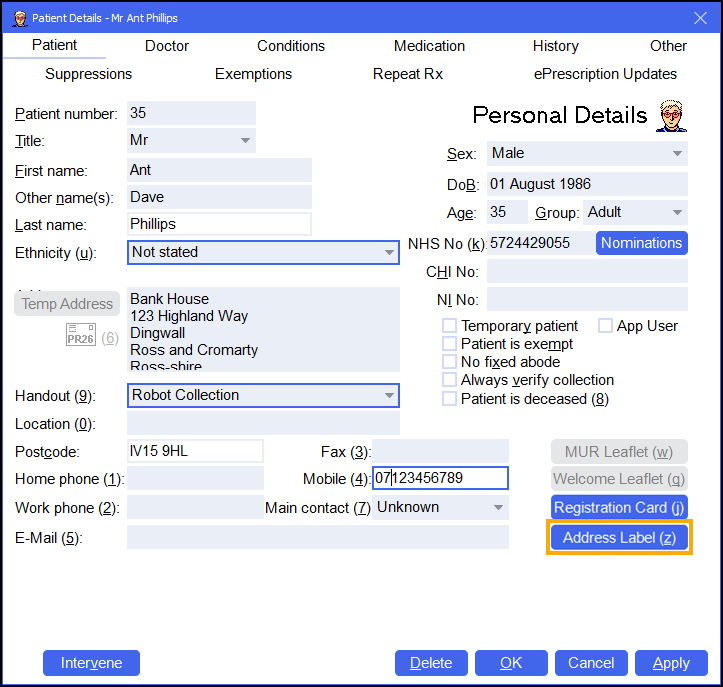
From the Patient Details screen select Address Label  or press Alt + Z on your keyboard:
When you set up a wholesaler make sure to set the transmission type to Print a report that can be faxed.
Select the item on the Stock & Order Management - Ordering screen and then press Ctrl + PgUp on your keyboard to increase the order or press Ctrl + PgDn on your keyboard to decrease the order.
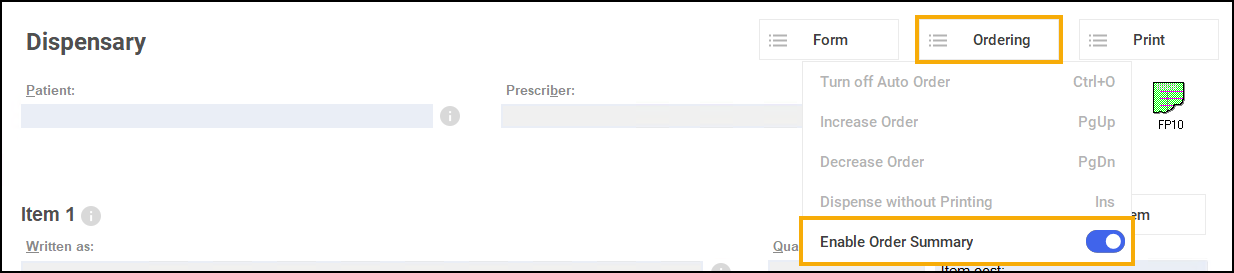
From the Dispensary screen, select the Ordering menu and switch on Enable Order Summary:
How do I Add a Patient Note or Custom Label? (3:09)
See Adding Patient Notes or Print Custom Label for details.
How do I Change the Stock Control Profile for an Item? (3:07)
See Setting the Stock Control Method for an Individual Product for details.
How do I Create a Dispensing Policy? (3:40)
See Dispensing Policies for details.
How do I Create an Audit Grid on Dispensing Tokens - England only (3:22)
See Audit Grid for details.
How do I Enable the Personal List When I am Dispensing (5:11)
See Entering the Product Description for details.
Searching for a Patient (0:49)
See Searching for a Patient for details.
How do I Set the Private Prescription Fee (3:19)
See Private Prescription Charges for details.
How do I Add a Batch Number and Expiry Date? (1:23)
How do I Set up Trusted Directions (4:47)
See Setting Up Trusted Directions for details.