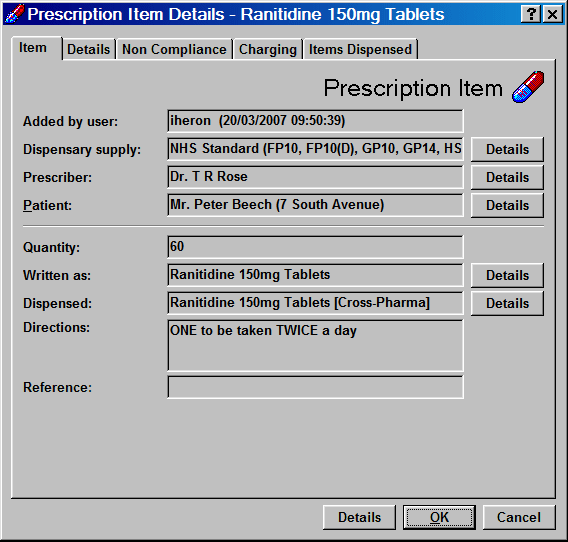
Prescription item details
|
Patient Details > History tab > Select (dispensed) product item > Details button > Prescription Item Details screen |
Prescription Item Details shows you all about that particular item on that particular prescription for that patient.
Click to select the tabs you want to look at.
Here are some example screens:
Item tab
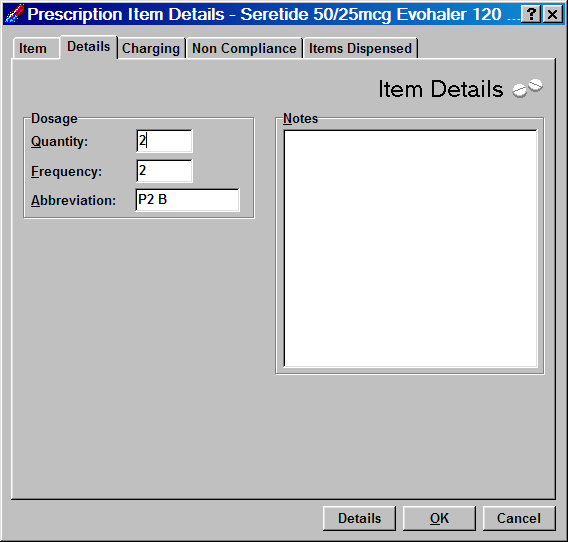
Item details tab
When dispensing, you will come to the Item Details screen
by pressing ![]() .
.
Non Compliance tab
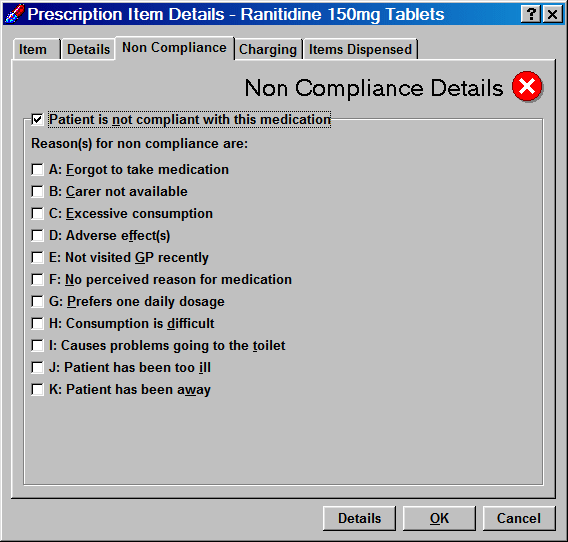
To set a non-compliance reason for this patient:
Check
 Patient is not
compliant with this medication
Patient is not
compliant with this medicationCheck
the reason required.
Charging tab
You can see the automatic charge calculations.
This would be useful if a patient was not exempt from prescription charges, but one item on the prescription was non-chargeable. This specific item can be marked as non-chargeable.
Check
Override to override
automatic charges.Click the
 drop-down arrow and select non-chargeable from the list
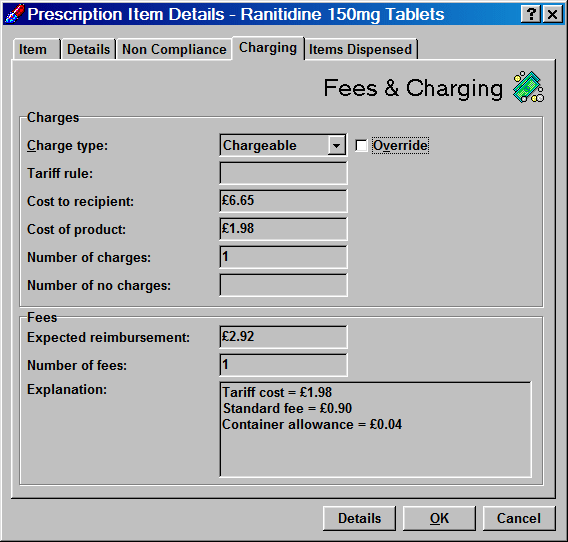
![]() If this is a private prescription, the
content of this display varies accordingly.
If this is a private prescription, the
content of this display varies accordingly.
Items dispensed
This displays the item/manufacturer version dispensed.
If a dispensing robot is configured, it also includes the amount dispensed from either the shelf or the robot (or both).
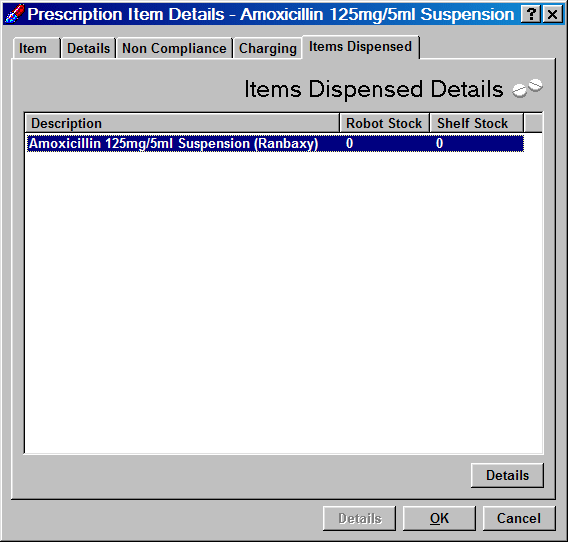
Click the Details button to access the Batch number and Expiry date.
These may be required for some prescriptions e.g. veterinary private prescription or counter sale products.
The empty fields will be highlighted if their completion is mandatory
Enter the Batch number and Expiry date.
![]()
Press the OK button to save any changes and to close the window.

Click on Details button to see Medication details.
A common feature at the bottom of these tabs is the Details button which, when clicked, will provide more information about the dispensed item.
See Medication Details for description.
The Detailsbutton adjacent to any input box provides more relevant information about that field.
Click OK to finish.
Updated 24th September 2010