Add User
Adding a New User (2.01)
Adding a User involves two stages:
- Enter User Details
- Allocate Licences
- From the main Dashboard select Administration.
- Select Users from the menu, and Users from the sub menu.
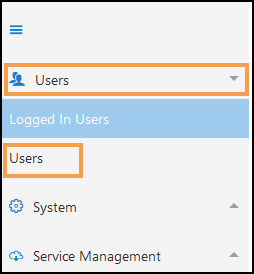
The Users list displays.
- From the toolbar select Add User
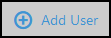 .
.The Add User pop-up displays.
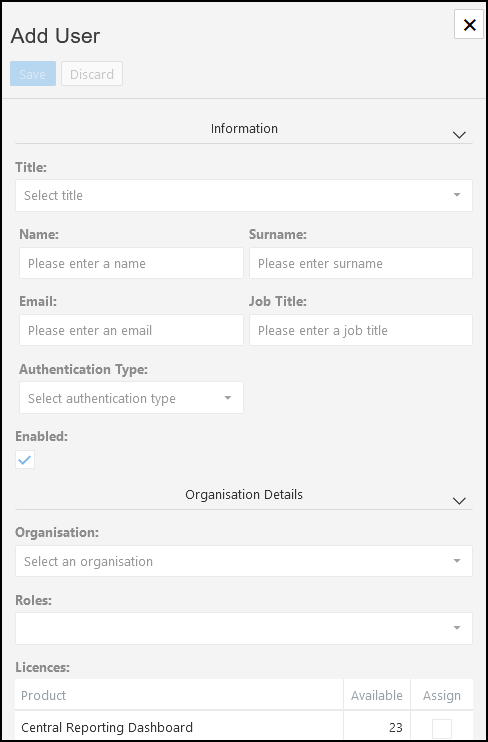
- In the Details tab, enter the following:
- Title (Mandatory)
Choose from the drop-down list:
Ms, Miss, Mrs, Mr, Dr or Prof. - Name (Mandatory)
- Surname (Mandatory)
- Email Address (Mandatory)
This must be a valid email address as this is used for Two Factor Authentication, it also needs to be unique. - Job Title
- Authentication Type (Mandatory)
Choose from Normal authentication or Two Factor authentication - email (recommended). - Enabled (selected by default) activates the user.
- Title (Mandatory)
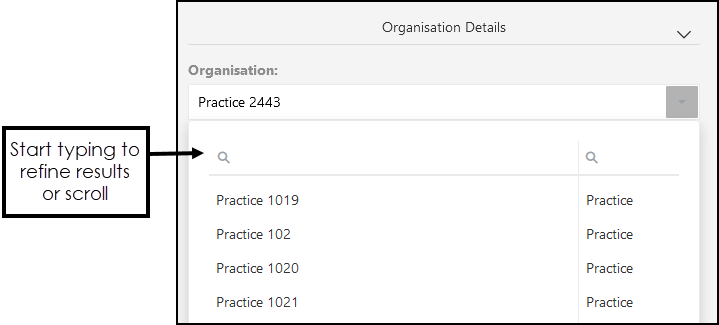
- In the Organisation Details section, select the appropriate Organisation from the drop-down list.
- To set the user as an Administrator, select the Role from the drop-down list.
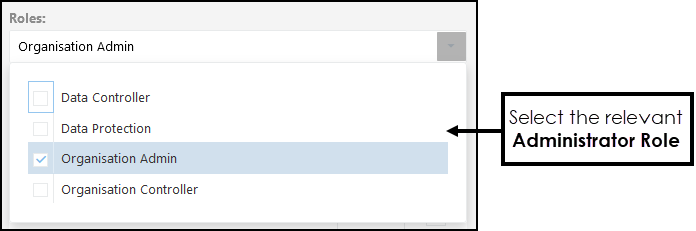 See - Administration Roles for the associated functions for each role.
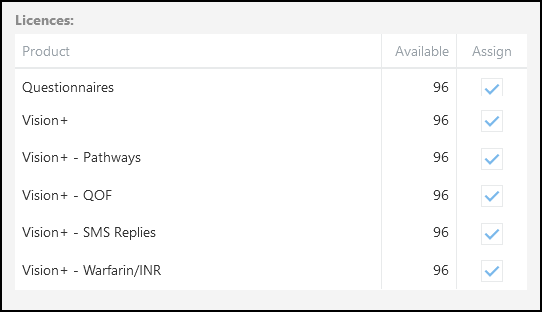
 - In the Licenses section select Assign to allocate available product licenses.
- Select Save to add the new user.
An email notifies the user that their account is enabled and includes a system generated password, which they are prompted to change on first use.
See - Edit User.