Processing Documents in Vision 3
To attach documents to a patient record:
-
If not already open, open Vision 3 and select Consultation Manager.
-
Select the Local Index
 .
. -
Select Scanning Assistant
 .
. -
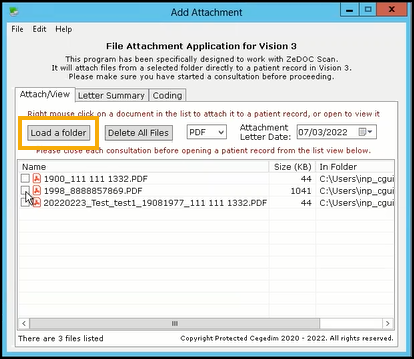
The Add Attachment screen displays, select Load a folder and navigate to the folder containing your scanned documents:
-
Your scanned documents display, if required, double click on a document to view the details.
-
From Add Attachment, right click on a document and select Open Patient Record. The patient record displays.
Training Tip - We recommend you start at the top of the list and work down. -
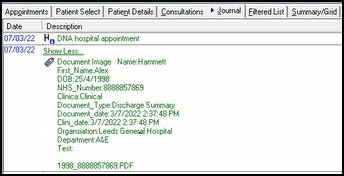
Next, from Add Attachment, right click on the same document and select Attach to Vision. An entry is added to the patient record with all the related metadata:
-
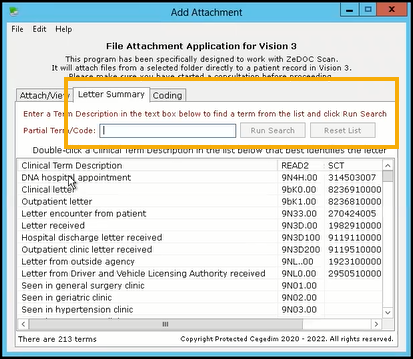
Optionally, you can now summarise the document. From Add Attachment select the Letter Summary tab, search for and select the required clinical term:
 See Updating the Term Description List for details on how to update the list available.
 -
A History - Add screen displays with the clinical term selected, add any Comments as required and select OK to save.