Getting Started in Consultation Manager
The following is an overview of accessing and using Consultation Manager for simple consultations:
- From the Vision 3 front screen, select Home - Consultation Manager
 .
. - The Consultation Manager screen displays differently depending on your settings, see Consultation Manager Setup for details:
- If the Consultation screen displays, select the appropriate Consultation Type, for example:
- If you are a GP about to start surgery, select Surgery consultation, and automatically start a new consultation after selecting a patient.
- If you are printing off today's repeat prescriptions, select Repeat Issue.
- If the Consultation screen displays, select the appropriate Consultation Type, for example:
- Now, select the appropriate patient, you can either:
- Select Select a Patient
 ,
, - Press F3, or
- Select Consultation - Select a Patient.
Type part of the patient's name in Search Details, for example SMI J for John Smith and select Find
 . Select the patient required from the list offered and select OK.
Once selected, the patient details displays on the title bar at the top of the Consultation Manager screen.
See Selecting a Patient for full details. - Select Select a Patient
- The Patient Record displays. The Patient Record varies depending on your practice and personal settings, see Consultation Manager Setup and Patient Preview for details. A common Patient Record usually consists of a:
- Navigation Pane - A summary list, breaking down existing data by type.
- Tabs - A central area containing tabs that display existing data, for example:
- Journal - A full list of the selected patient's data entries.
- Tests - A list of the selected patient's pathology and X-ray results.
- Filtered - Displays whichever data is selected from the Navigation pane.
- Therapy - Consisting of several tabs which display and enable you to issue, Acute and Repeat medication.
- Reminders - A yellow message in the top right of the screen containing reminders. The reminders can be added manually or generated automatically from:
- Clinical Audit
- Daybook/Tasks
- Patient Groups
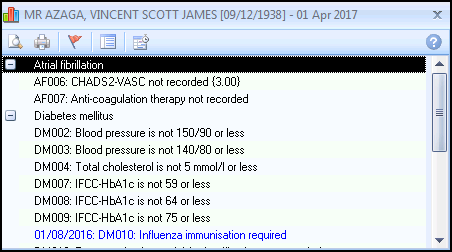
- Vision+ - The Vision+ Alerts screen may display, showing any missing QOF or practice protocol information on the patient record. Simply double click on a line to add data:
 See the Vision+ Help Centre for full details of using Vision+.
- To enter data, you must have a consultation started, depending on your settings:
- If a consultation starts automatically when you select a patient:
- Your sign-in name, consultation type for example Surgery, date and time display at the bottom of the screen:

- Open/Close Consultation appears depressed when a consultation is open

- Your sign-in name, consultation type for example Surgery, date and time display at the bottom of the screen:
- If no consultation is open, the status bar states No Open Consultation
 .
.- To open a consultation, select Open/Close Consultation
 .
.
- To open a consultation, select Open/Close Consultation
See Consultations and Consultation Types for further details. - If a consultation starts automatically when you select a patient:
- If the Patient Record is not automatically maximised, select Maximise
 in the top right corner. You can pre-set the screen to display at its maximum from Consultation Manager Setup - Patient Record.
 -
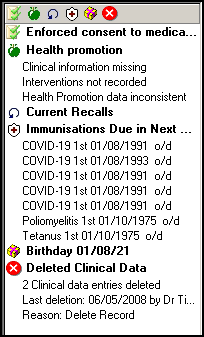
Once a consultation is started, the Alerts pane, indicating where essential entries are missing, displays at the bottom of the Navigation pane.

- You are now ready to enter data. There are two main ways to enter data:
- Add - Select the Add menu (Alt-A) and then the option you require, see Using the Add Menu for details.
- Read Term - Add - Enter either a keyword or a # and then a Read code in Read Term - Add and press Enter, see Adding Clinical Data for details.
See Getting Started Videos for handy video tutorials and Desk Aids for visual two page guides.
Note – To print this topic select Print  in the top right corner and follow the on-screen prompts.