Appointments Backup Settings
Automatic Appointments backups are set in the Appointments Backup app.
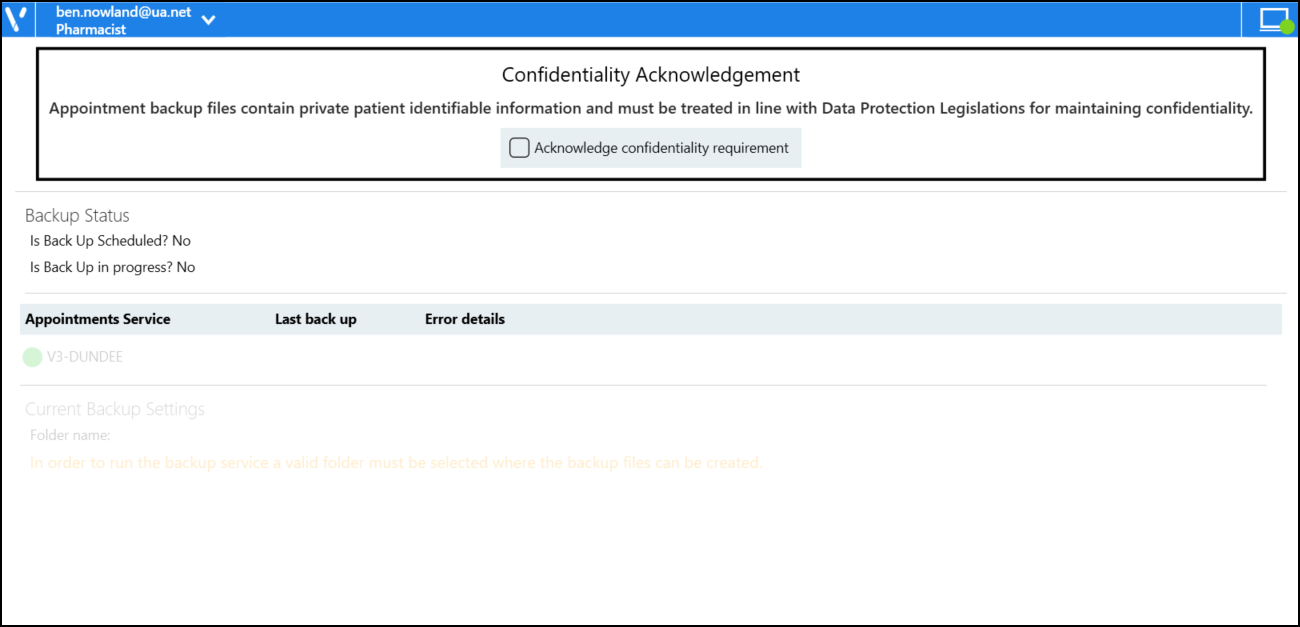
On start up, Appointments Backupdisplays a confidentiality acknowledgement advising 'Appointment backup files contain private patient identifiable information and must be treated in line with Data Protection Legislations for maintaining confidentiality.'.
To set your backup options:
-
Tick Acknowledge confidentiality requirement to confirm that you understand the requirement.
-
From the Current Backup Settings section, select Edit Settings.
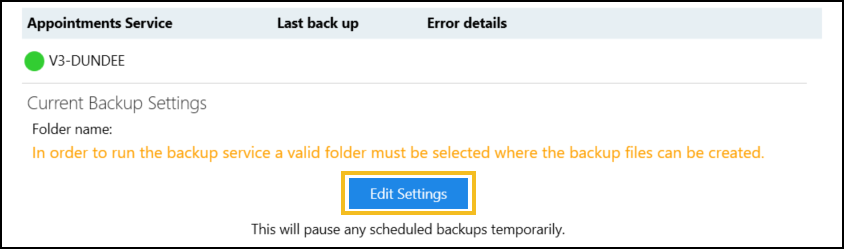 Important - A message displays advising 'This will pause any scheduled backups temporarily'.
 -
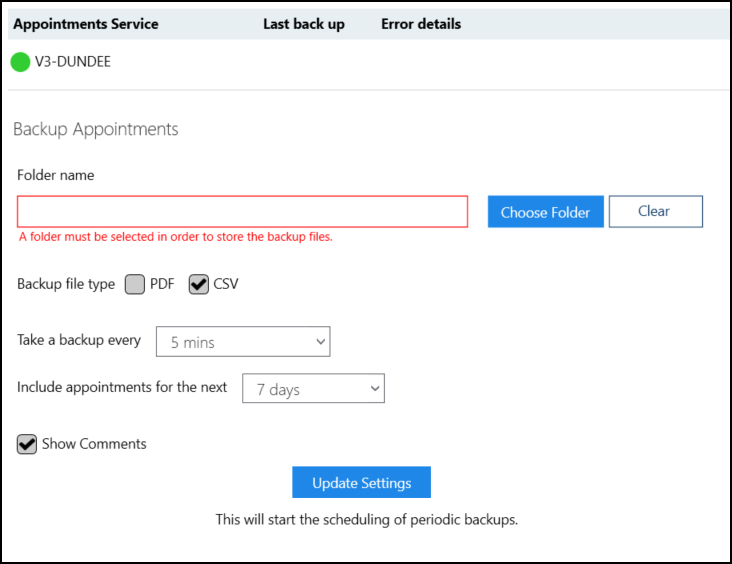
Complete the backup details as appropriate.
-
Folder name - Set the backup folder location as advised by your Health Board, select Choose Folder to locate the folder or Clear to clear the current location.
Important - We recommend that backups to local drives are set up by full time staff, for example, Practice Managers or IT Managers.If a drive is no longer available a message displays 'Selected backup location (file_location) is not available or cannot be written to. Please select a new backup folder. If you select to continue without backup then you may be prompted again when next opening Appointments.':
Select either:
-
Try Again - Select to try again.
-
Change backup folder - Select to open the Browse for Folder screen to select a different folder, your backup preferences update with the folder selected.
-
Continue without backup - Select to continue without a backup. Until a backup is set, the prompt displays each time you log into Appointments Backup.
-
-
Backup file type - Choose whether to output the backup as a PDF (printable) or a CSV (spreadsheet) file.
-
Take a backup every - Select the backup schedule in minutes from the available list:
We recommend you set up at least two users to run the backup in the following configuration:
-
User 1 - Backup every 5 minutes.
-
User 2 - Backup every 16 minutes.
-
-
Include appointments for the next - Choose to back up either 7 or 14 days of future appointments data including the current date.
-
Show Comments - Tick to show any appointment comments in the output (recommended).
-
-
Select Update Settings to save your settings.
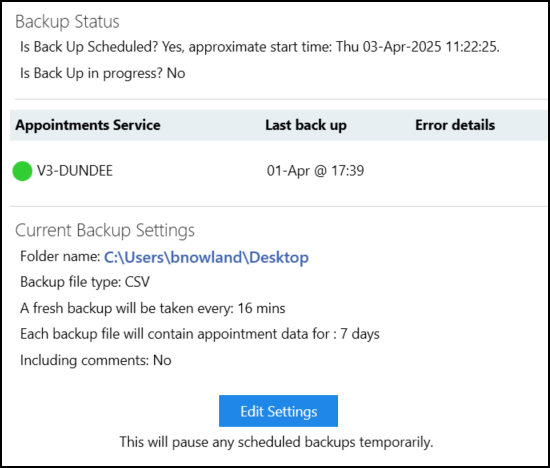
The current back up settings display.