Setting up an Initial Filter
You can set up a personal view that displays every time you select a patient, this can be populated with any data that displays in the navigation pane. This facility is often used to create a bespoke patient summary.
To set up your Initial Filter:
-
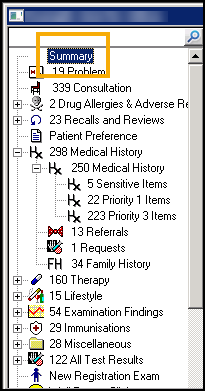
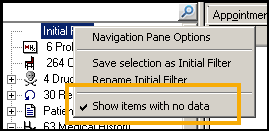
From Consultation Manager, with a patient selected, right click on Initial Filter and select Show items with no data:
-
Holding your <Ctrl> key select all the options you want to include, for example, Medical History - Priority 1 and 0’s. The Filtered tab updates as you select items.
-
Release the <Ctrl> key and right click Initial Filter again.
-
Select Save selection as Initial Filter.
-
If you want this screen to display as your initial screen when a patient is selected, right click on the Filtered tab and select Options.
-
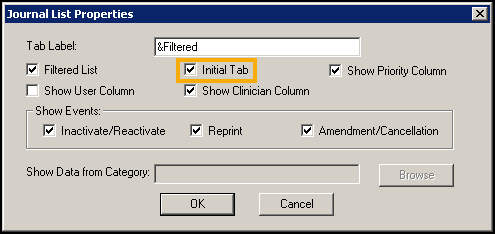
The Journal List Properties screen displays, tick Initial Tab and select OK:
-
A message displays asking you to close and reopen the Consultation Framework, select Yes to continue.
To display this view at any point during a consultation, select Initial Filter from the navigation pane:

To rename this view, right click on the Initial Filter again and select Rename Initial Filter. Update the name as required, for example Summary: