eMED3 in Vision Anywhere
The eMED3 form, designed in conjunction with the Department of Work and Pensions (DWP), can be created during any encounter in Vision Anywhere. It includes all the information currently held on the handwritten MED3 form.
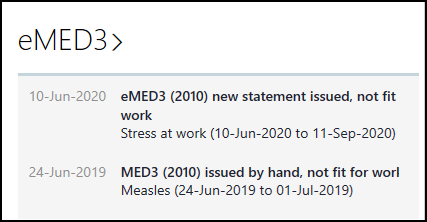
A patient's existing eMED3 records display in the Patient Summary screen under eMED3:

Select the eMED3 category header to display the full list.
In England, eMED3 data is collected and sent electronically to the Department of Work and Pensions (DWP) at regular intervals from the patient’s registered practice. Vision 3 details are available from Electronic MED3 (eMED3) Extract - England.
Important points to note:
- GP user, based in the patient's practice, you must have a GMC code recorded in Vision 3 - Control Panel to create an eMED3, see Adding Doctors in the Management Tools Help Centre for details.
- GP user in a shared care setting:
- The eMED3 form can only be accessed for patients registered at a Vision practice, for patients registered at an EMIS practice, the MED3 general history entry is the only option available.
- The first time you create an eMED3, if your GMC code is not part of your set up in the V360 Clinical Portal, you must add it manually at the end of the eMED3 Doctor's Statement screen. The GMC code is retained for future eMED3's.
- Non GP users based in the patient's practice, can access the eMED3 Doctor's Statement screen. It defaults to Issued by hand and this cannot be changed.
- Non GP users in a shared care setting, cannot access the eMED3 Doctor's Statement screen. If required, you can record an eMED3 as a general history entry.