Creating Task Templates
Important - For practices with a hosted server, for example AEROS, you must watch the videos on your local desktop. To do this copy and paste the url for this web page into your local browser. Local health board restrictions may also affect access.
Setting up Task Templates (2:08)
To facilitate fast and accurate task creation throughout your practice, Task Templates should be created. It is important you check the list of existing templates before adding new ones, duplications clutter your system and lead to longer selection time for your staff.
Note - You must have administrator rights to access Settings - Task Templates, see Security - Add User to Security Group for details.
-
From Tasks, select Settings
 .
. - Now select Task Templates
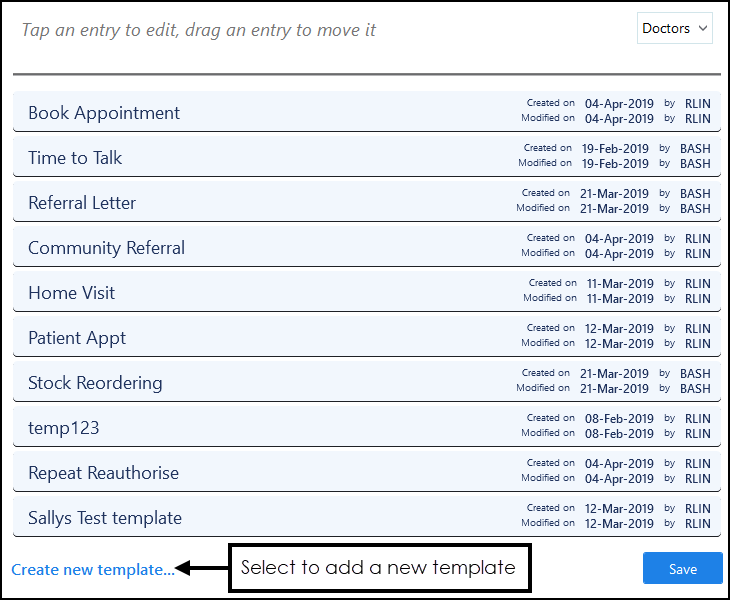
 and all your existing task templates display:
- Select either Create new template...and the New Template screen displays, or you can select an existing template and select Copy
 :
:
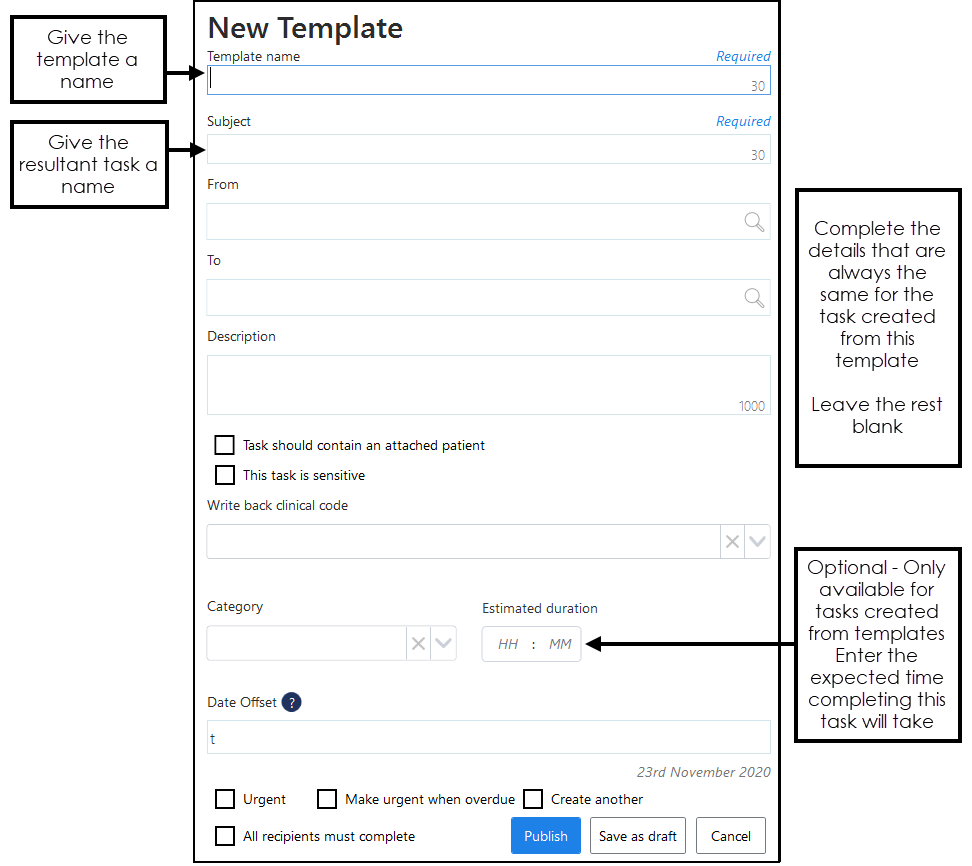
- Complete the template with the default details required:
- Template name - Used to select the correct template. Enter an appropriate name for this template, a maximum of 30 characters, for example, 'Reauthorise request'.
- Subject - Displays for the recipient of the task. Enter the text to display on the task created from this template, this can match the Template name, but does not have to.
- From (optional) - This defaults to the person creating a task from this template unless a staff member or group is entered here, simply type and select from the smart list offered if appropriate.
- To (optional) - If the task this template creates usually goes to the same staff member or group, start typing their name and select from the smart list offered, for example, 'Receptionists'.
- Description (optional) - If there is a standard text used each time for this task add it to Description, for example, 'Please reauthorise the following repeats,'.
- Task should contain an attached patient (optional) - Tick if any task created from this template is usually attached to a patient.
- This task is sensitive (optional) - Tick if this task is deemed sensitive.
- Write back clinical code (optional) - You can select from a predefined list of administrative clinical terms to be added from your template if appropriate.
- Select a category (optional) - You can select from a predefined category for your template if appropriate.
- Estimated duration (optional) - You can enter an estimated time for completing this task, for example, a review and reauthorise medication is estimated to take 10 minutes.
- Date Offset (optional) - If a task created from this template usually has a time frame, using the usual d=days, w=weeks, m=months or y=years short hand, enter the time frame, for example, 2d = 2 days.
- Urgent (optional) - Tick, if by default, a task created from this template should be marked as Urgent.
- Make urgent when overdue (optional) - Tick if, by default, any tasks created from this template should escalate to Urgent if not completed within the specified time frame.
- Create another (optional) - Tick to create another template once this one is saved/published.
- All recipients must complete - Tick to force all recipients to action this task, if not selected only one recipient has to complete the action.
- Select either:
- Publish to save and make this template available to all.
- Save as draft, to save this template as a draft. It displays in the Settings - Task Templates list with (draft) following the template name. This is not available for use until you select and Edit
 the draft, make any changes required and then select Publish.
- A 'Template 'name of template here' was completed successfully' message displays at the bottom of the screen for a few seconds.
Note - If at any time you need to cancel the creation of this Template select  at the top right of the Template screen.
 at the top right of the Template screen.
You should now arrange the templates into quick lists for individual staff groups, if you do not order the templates above the black line for a given group, the members of that group are offered all the available templates in list order.
See Setting the Display Order of Task Templates and Editing or Deleting Task Templates for further details.
Note - To print this topic select Print  in the top right corner and follow the on-screen prompts.