Sorting Active Medication
To manage a patient's active medication you can easily sort, minimise and group their medication items:
Sorting the Active Medication
To sort the active medication alphabetically, select Product Name (Asc) for ascending (A-Z) or Product Name (Desc) for descending (Z-A):

Show or Hide Medication Information
Select Show Less to reduce the information that displays for each medication item:

The amount of information that displays is reduced making it easier to sort the medication into groups:

Grouping Medication
The medication can be split into multiple groups on the Active Medication screen, this acts as a page break when printing a MAR chart. This can be used to separate medication types, for example, tablets, creams and dressings.
Adding a Group
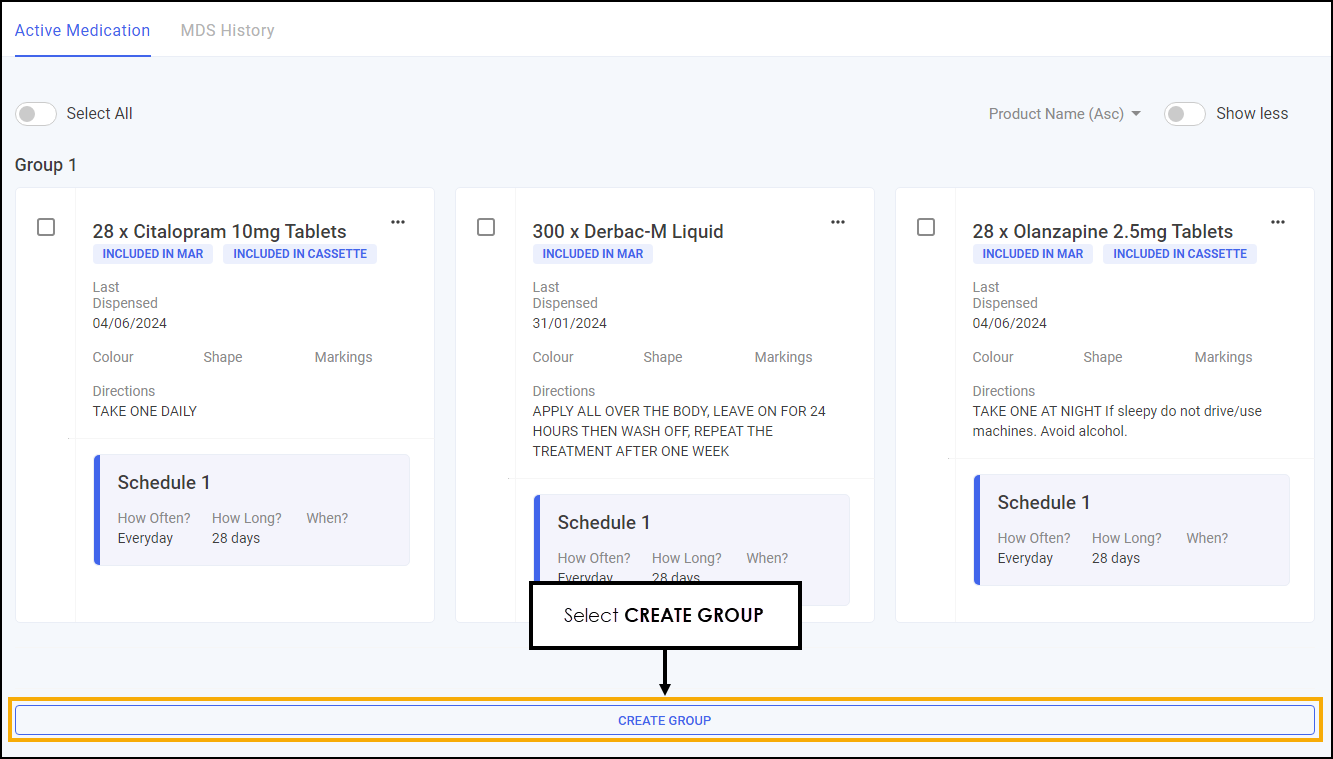
Medication displays in Group 1 by default, to add another group:
-
Select CREATE GROUP
 at the bottom of the Active Medication screen:
-
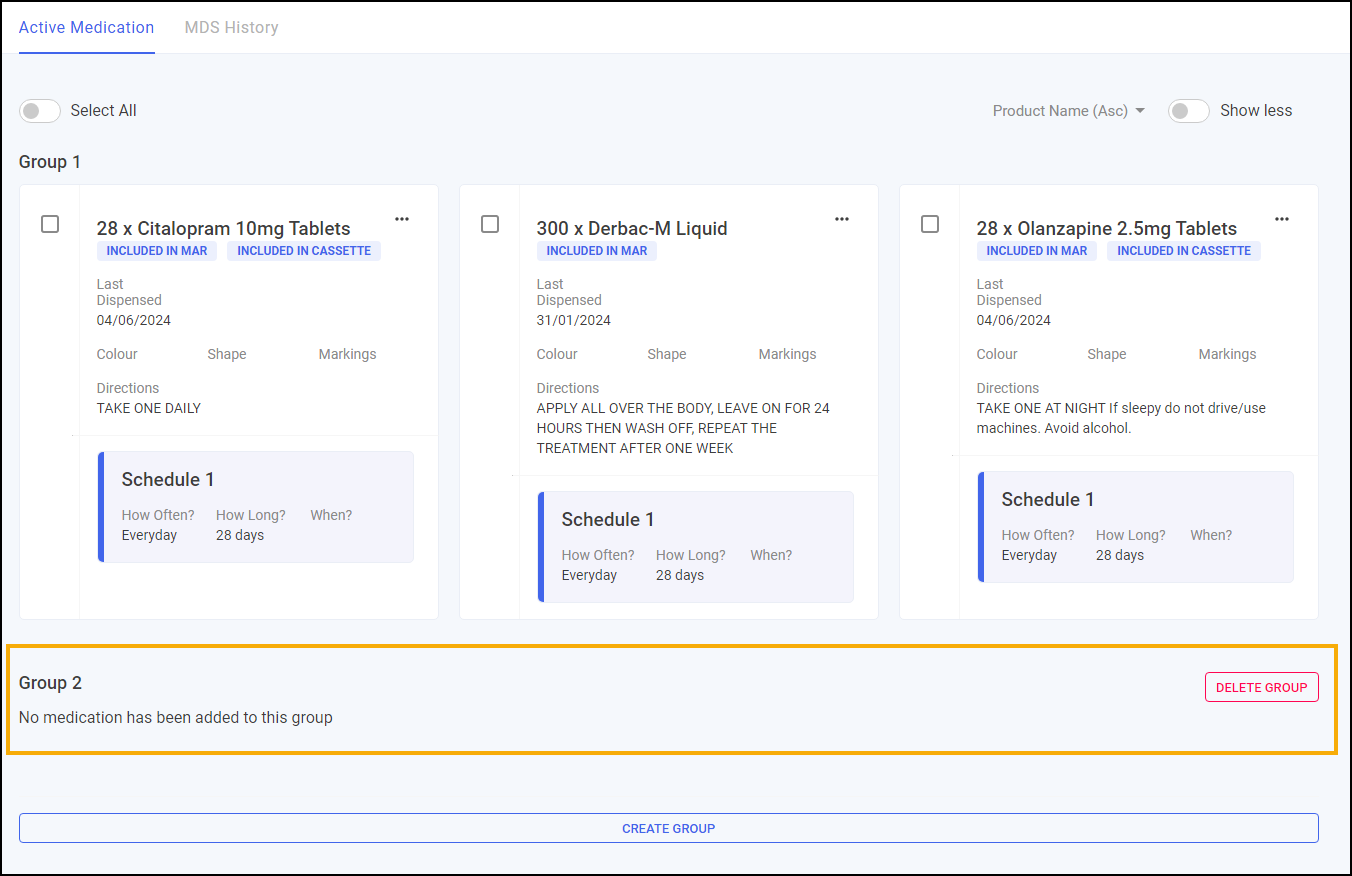
The new group displays at the bottom of the screen:
Moving Medication Between Groups
To move medication between groups you need to have multiple groups set up. See Adding a Group for details.
To move an item into another group:
-
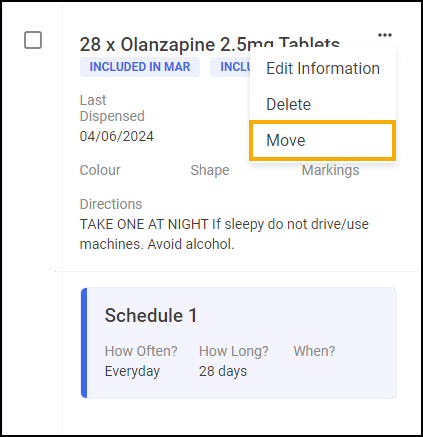
On a medication, select Options
 - Move:
-
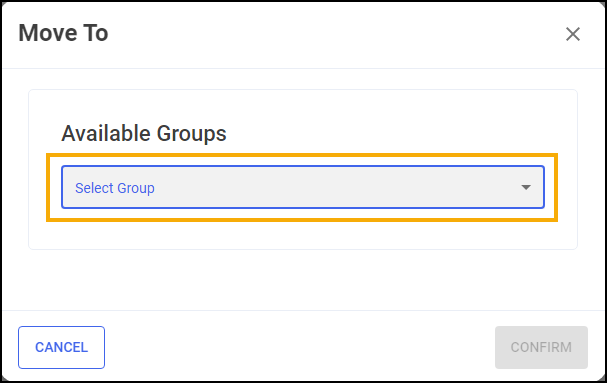
The Move To screen displays, select the group to move the item to from Select Group:
-
Select CONFIRM
 .
.
The medication item moves to the selected group.
Deleting a Group
To delete a group:
-
Select DELETE GROUP
 next to the group required:
 -
You are prompted 'Are you sure you want to delete Group n', where n is the group number you are deleting:

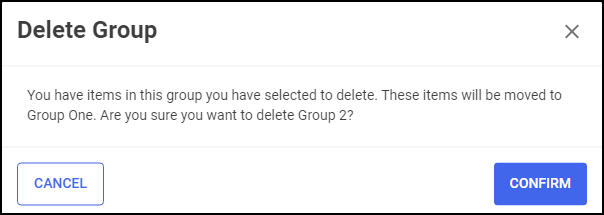
Please note, if the group contains items, you are prompted 'You have items in this group you have selected to delete. These items will be moved to Group One. Are you sure you want to delete Group n', where n is the group number you are deleting. Select CONFIRM
 and the items move to Group 1:
The group is deleted and the existing groups are renumbered.