Assigning a Printer
Assigning a printer is basically allocating it for a particular use. Some printers will be used for a single purpose for example, the label printer, whilst other printers will be multi-purpose, for example, reports, leaflets and MDS stationery printing because they all use blank A4 paper.
To assign a printer:
-
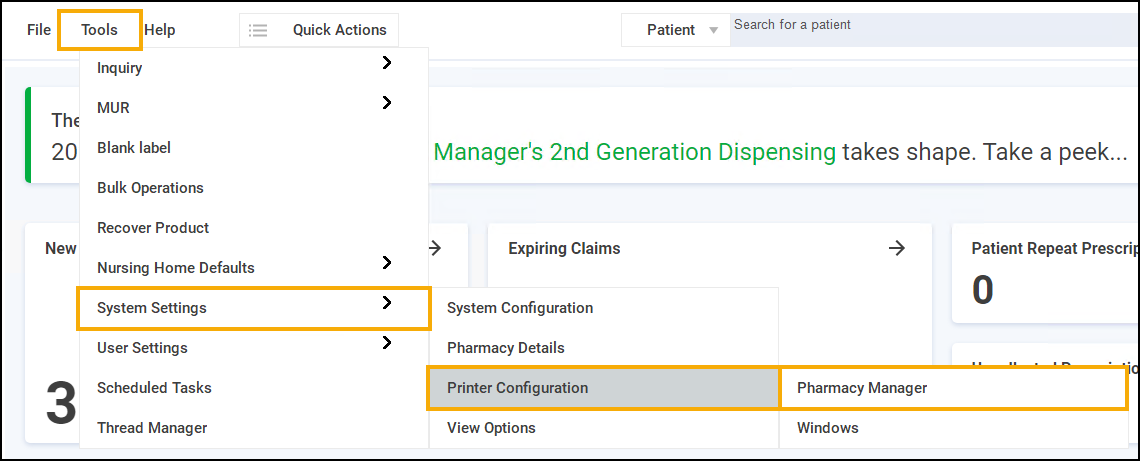
From the Pharmacy Manager Toolbar, select Tools - System Settings - Printer Configuration - Pharmacy Manager:

-
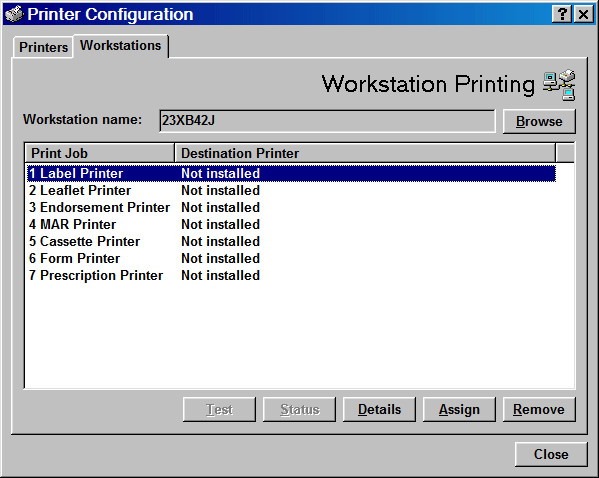
Select the Workstations tab.
-
Select the print job required, either select the name or press the appropriate number on the keyboard.
-
Select Assign
 .
. -
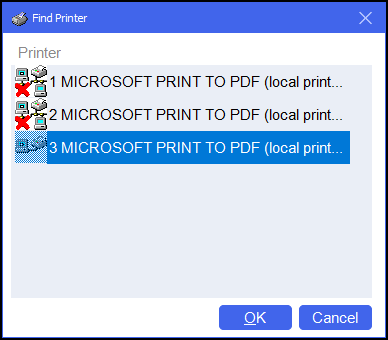
The Find Printer screen displays, select the printer required from the list of installed printers:
 Note - If the printer has a red cross next to it, it is unsuitable for the selected print job. For example, a thermal label printer would be unsuitable for MAR printing.
 -
Select OK
 .
.
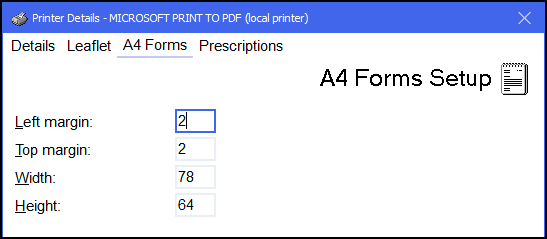
If using a printer to endorse or to print leaflets, then the A4 Forms tab of the Printer Details screen displays the default page sizes. To access the Printer Details screen from the Workstations tab, highlight the Print Job required and then select Details  :
:

In order to have installed the printers correctly, you should only need to have up to three printers listed. You can use these multiple times for the print jobs in the Workstations tab.
To test that the you have installed the printers correctly, use the Test option at the base of the screen. This will print a test label for the label printer, and a welcome leaflet on the leaflet printer.
Label printer configuration

-
At Print Job, click on Label Printer.
-
If it says Not installed select Assign and then select the appropriate Label printer.
Set when to print labels
Your system may be set to print labels either after each item, or when the form is complete.
-
To check this, From the Pharmacy Manager Toolbar, select Tools - User Details - Preferences.
-
From the Print Labels section select
 either When item complete or When form complete, whichever you prefer.