Editing labels already printed
To edit a label you have already printed:
-
Press the
 View History speed button
or use
  &
& to retrieve it from the
dispensing history;
OR use
Dispensary tab > Menu > View > History
This brings up the Prescription Items screen, which will list all items you have dispensed for today, or you can select yesterday, last 7 days or last 30 days or Other. This means define your own period to view using the drop-down menu on the left-hand side, labelled When:

The edit you undertake would typically be an alteration to the dispensed quantity or a change to the dosage and directions
Amending previously printed items
-
Click the Item tab if it is not already selected
-
Highlight the chosen item then click on Edit or use keyboard
 &
& .
.
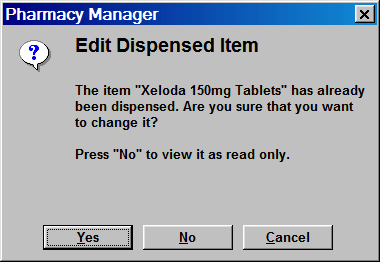
This takes you back to the Dispensary tab where you will be asked to confirm that you wish to edit the item.

-
Click the YES button in order to edit the item e.g. to alter the dispensed quantity or to amend or append dosage and direction lines.
-
Click the NO button in order to retrieve the label for non-editing purposes e.g. to print a bag label or to increase the quantity of the item on order
-
Click the CANCEL button if you wish to do neither of the above and leave the item unchanged.
-
Amend the necessary item details and press
 to print.
This will amend stock usage and make a new entry in the patient record.
Amending previously printed prescriptions
Prescriptions can be similarly retrieved. Click the Form tab then highlight the chosen prescription form then click the EDIT button. If the prescription is for a single item, the procedure is the same as outlined above for an item.
If the prescription contains more than one item, the
first item is displayed on the Dispensary
tab. Click the navigation buttons ![]() to move forwards or backwards through each prescription item until you
find the item you wish to amend.
to move forwards or backwards through each prescription item until you
find the item you wish to amend.
Alternatively, use ![]() &
& ![]() or
or
![]() &
&![]() to move to the next
or the previous item
to move to the next
or the previous item
When the item you wish to edit is displayed, type ![]() &
&![]() to display the edit
item options as outlined for a single prescription item above.
to display the edit
item options as outlined for a single prescription item above.
Continue now as you would proceed for a single item. When you have completed the first item, you can move to the next or previous item for further changes. When you have completed your changes to one or more items, click the FINISH button to print the revised label(s).
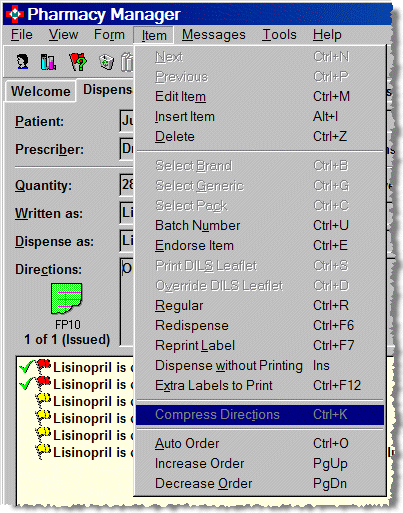
Note: from this screen you can also access many other functions such as reprinting labels, deleting items etc., in fact all functions available from the Item menu:

New 19th December 2017