Using the Calendar Tile
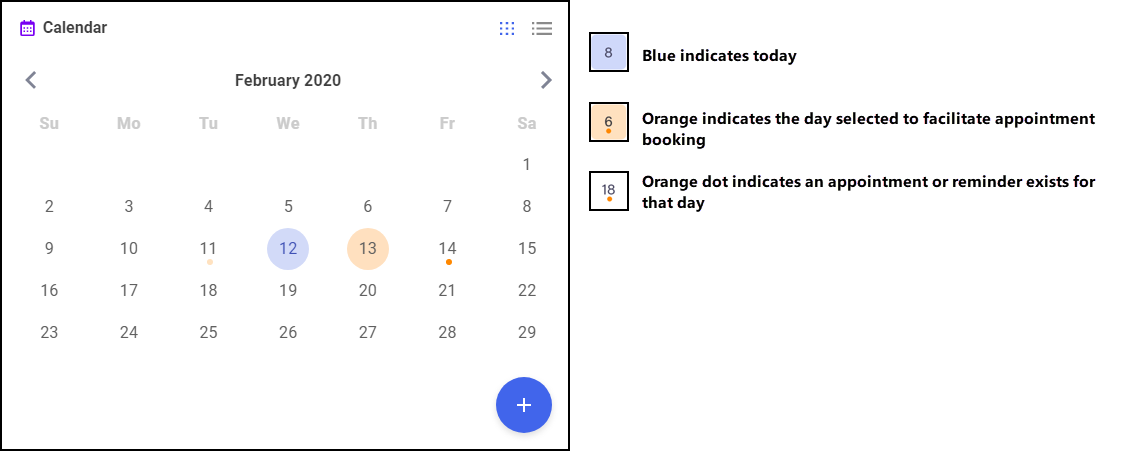
The Calendar tile gives you a pharmacy wide date book. This can be used for appointments and reminders by any member of staff with Pharmacy Manager access.
Adding to the Calendar
To add an entry to the calendar:
- From the Pharmacy Manager dashboard - Calendar, select Add
 .
. - The Add Appointment screen displays:
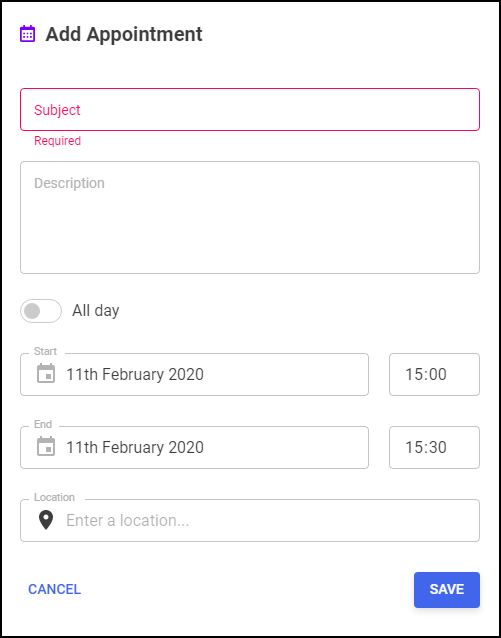
- Complete the details as required:
- Subject - Enter a name for this appointment, for example, John on annual leave
- Description - Enter any comments, for example, Locum booked
- All day - Select if appropriate
- Start - Select a date and if All Day is not selected, a start time
- End - Select a date and if All Day is not selected, an end time
- Location - Enter a location if appropriate
- Select Save.
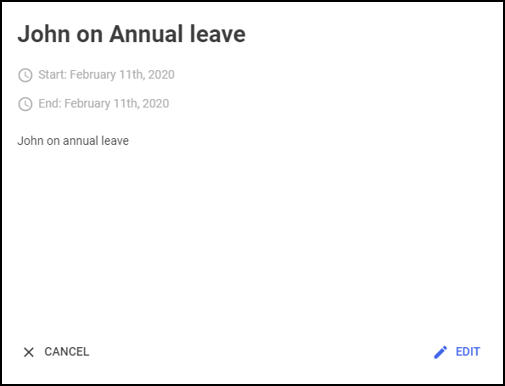
To view an entry in the calendar:
- From the Pharmacy Manager dashboard - Calendar, highlight the day required and select Options
 .
. - If there is only one appointment for the day selected the appointment displays in full:
If there is more than one appointment booked for the day selected, a list of appointments displays:
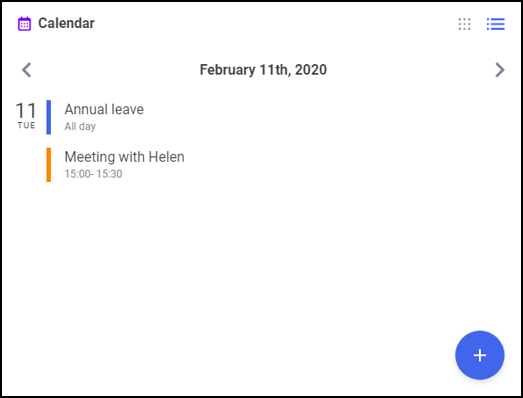
Select the appointment required to see the full details.
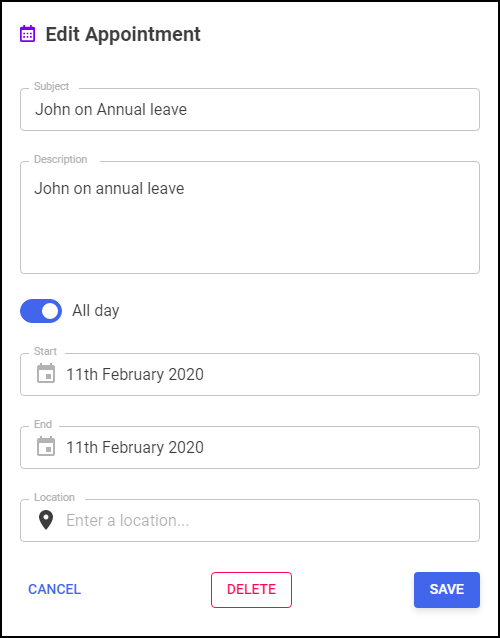
Editing/Deleting an Appointment
To edit or delete an entry in the calendar:
- View the appointment required as above and select Edit
 .
. - The Edit Appointment screen displays:
- Either:
- Update as required and select Save
 , or
, or - Select Delete
 to remove the appointment
- Update as required and select Save
Note - The Calendar can be seen by all Pharmacy Manager users.