Exporting Appointments
You can export an Appointments list to either PDF (printable) or CSV (spreadsheet) format.
To export the appointments for a clinic list on a specific day:
- From the Reception View screen, select the day required and filter to the clinic lists required.
- Select Options
 and then Export Appointments.
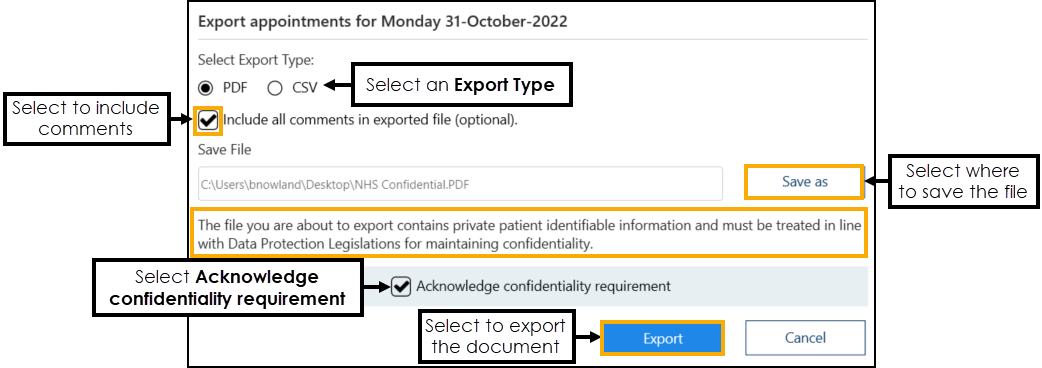
 - The Export appointments screen displays:

Complete as follows:
- Select Export Type – Select from:
- PDF - Tick to create a printed list.
- CSV - Tick to export the appointments into a spreadsheet, for example Microsoft Excel.
- Include all comments in exported file (optional) - Tick to include any appointment comments in the export.
- Select Export Type – Select from:
- Select Save as
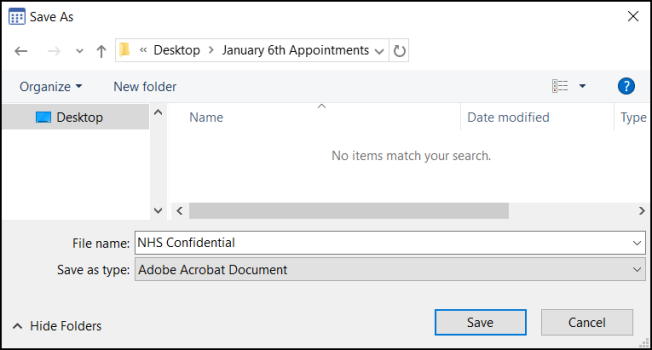
 and the Save As screen displays. Select where to save the file to and give it a name:
 -
Select Save
 to return to the Export appointments screen.
 -
Tick Acknowledge confidentiality requirement to agree that you understand the requirement:

-
Select Export
 and the Export Complete screen displays. Select OK
  to close:
