Appointment Reports
A suite of pre-defined reports to run directly from Appointments are available. These are designed to help you manage your appointments process.
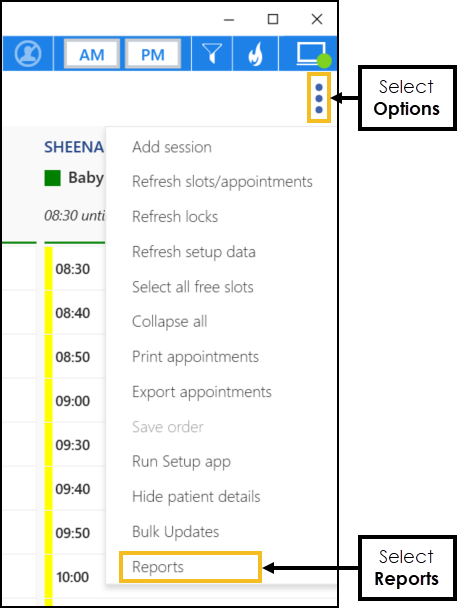
To select Reports:
-
From the Reception View or Weekly View, select Options
 - Reports:
-
The Reports screen displays:

Select a report from the available list:
-
Future booked appointments
-
Patient counts in time frame
-
3rd, 4th and 5th available appointments
-
Utilisation and DNA rates
-
Utilisation by booking method
-
Staff utilisation and DNA rates
-
Utilisation by patient age and sex
-
Online appointment availability
-
Online appointments booked
-
-
Choose Select
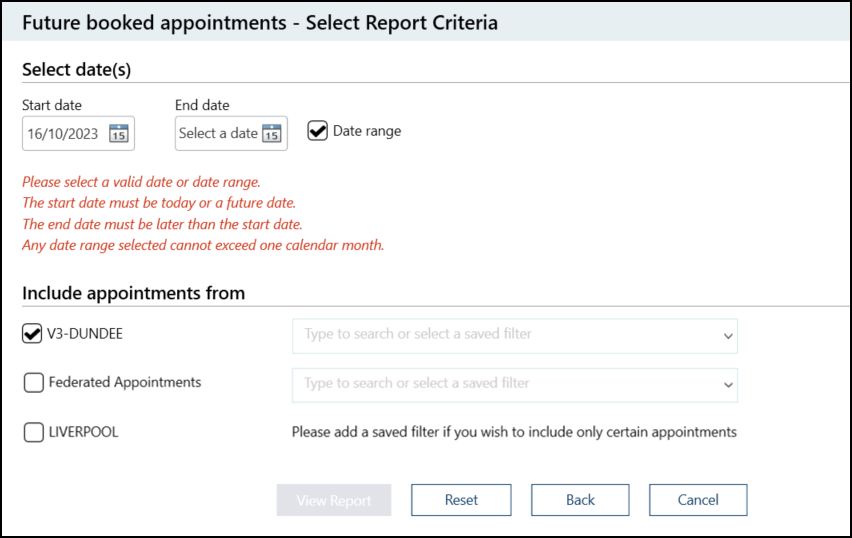
 to display the report criteria:
Complete as required:
-
Select date(s) - Select a date or tick Date range to select a date range.
Note - You must select a valid date range. The date range criteria vary by report, however instructions display below the date range advising on the requirements for each report. -
Include appointments from - If you are in a shared care setting, select the organisations to include appointments data from.
-
Saved filters - When you select an organisation, you can select an organisation specific appointment filter if required.
Note - If a filter has not been created for an organisation, you are advised that one needs to be created to include only certain appointments. See Applying or Editing Filters for more information.
-
-
Select View Report
 to run the report. The following options are also available:
-
Reset - To reset the report criteria.
-
Back - To return to the Reports screen.
-
Cancel - To return to the Reception View or Weekly View.
-
-
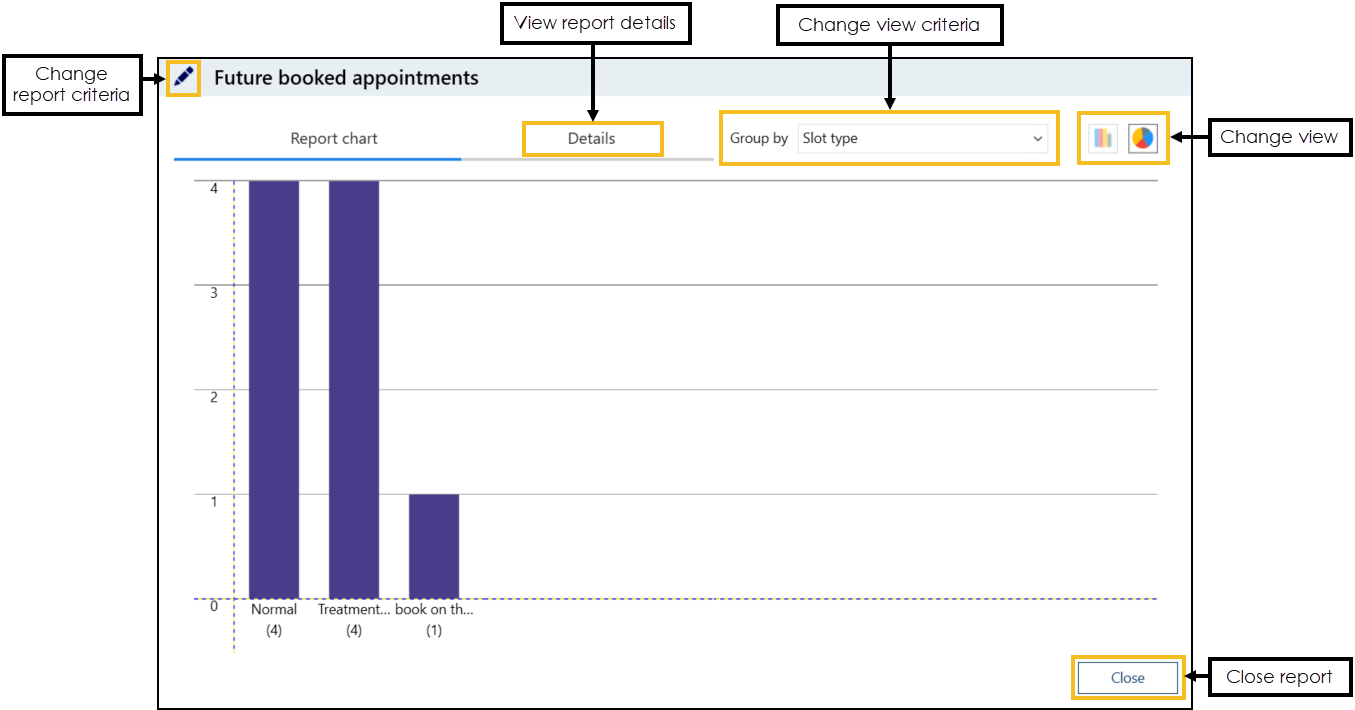
The report displays:

The report data display and options vary by report, select from the following where appropriate:
-
Group by - Select Group By to change the view criteria.
-
Change view
 - Select to view the report as a bar chart or pie chart.
 -
Details - Select to view the report details.
-
Change report criteria
 - Select to return to the previous screen and change the report criteria.
 -
Copy details to windows clipboard
 - Select to copy the report details to the Windows Clipboard.
 -
Export
 - Select to export the report to a PDF or CSV file.
-
-
Select Close
 to close the report and return to the Reception View or Weekly View.