Import to Appointments Clipboard
To import a CSV (Microsoft Excel) file, for example a list of patients due to be vaccinated, to the Appointments Clipboard:
-
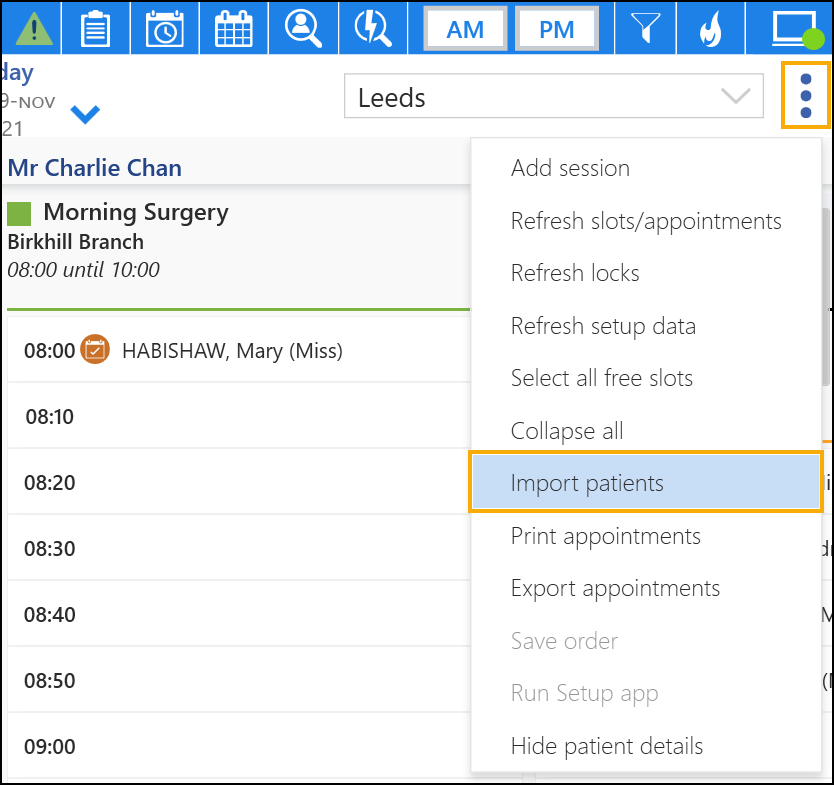
From the Reception View, select Options
 :
:
-
Select Import patients.
-
The Open screen displays, navigate to the CSV file required.
-
Highlight the CSV file required and select Open.
-
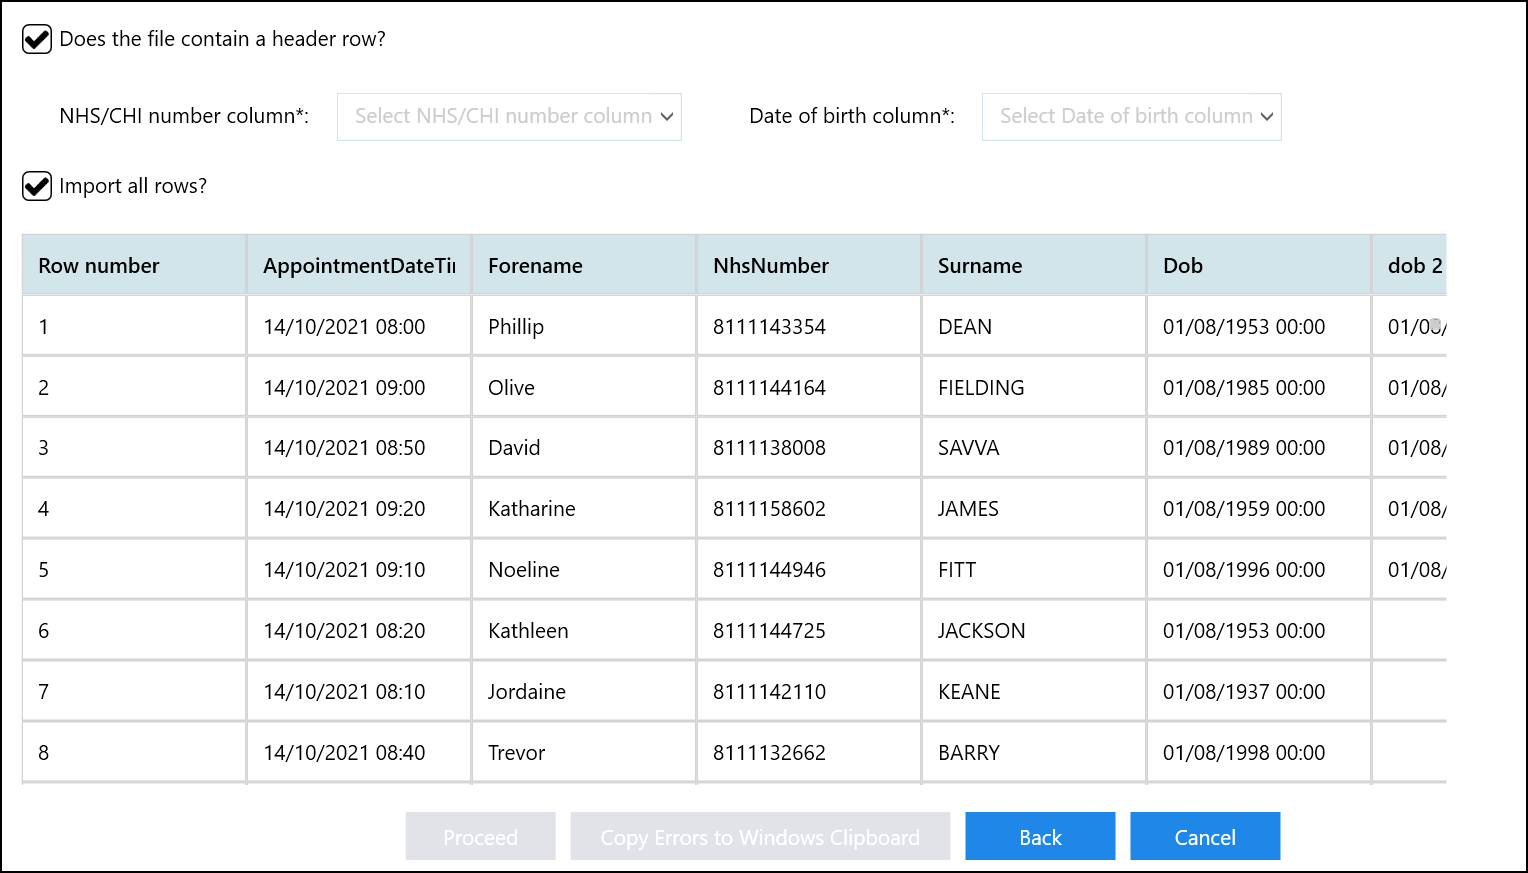
The Import screen displays:

Does the file contain a header row? - Tick if the file contains a header row, remove the tick if there is no header row in the CSV file.
NHS/CHI number column - Select the header row title or the column identifier that contains the NHS/CHI number data (mandatory) from the available list.
Date of birth column - Select the header row title or the column identifier that contains the Date of birth data (mandatory) from the available list.
Import all rows? - Tick to import all rows or remove the tick to select individual rows:
Import from row - Select the first line number to import.
To row - Select the last line number to import.
-
Select Proceed
 .
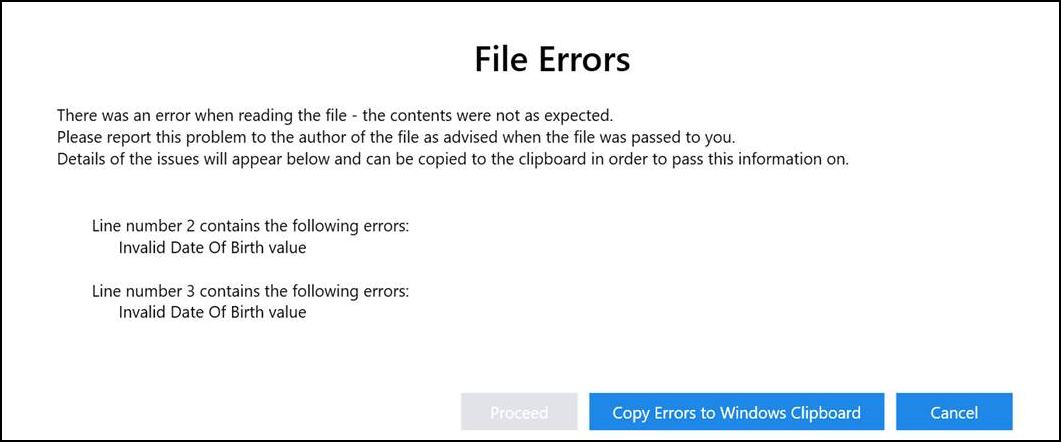
.The system checks all patients, should an error occur when reading the file the File Errors screen displays.
-
Select Copy Errors to Windows Clipboard to copy the file errors to the windows clipboard:

-
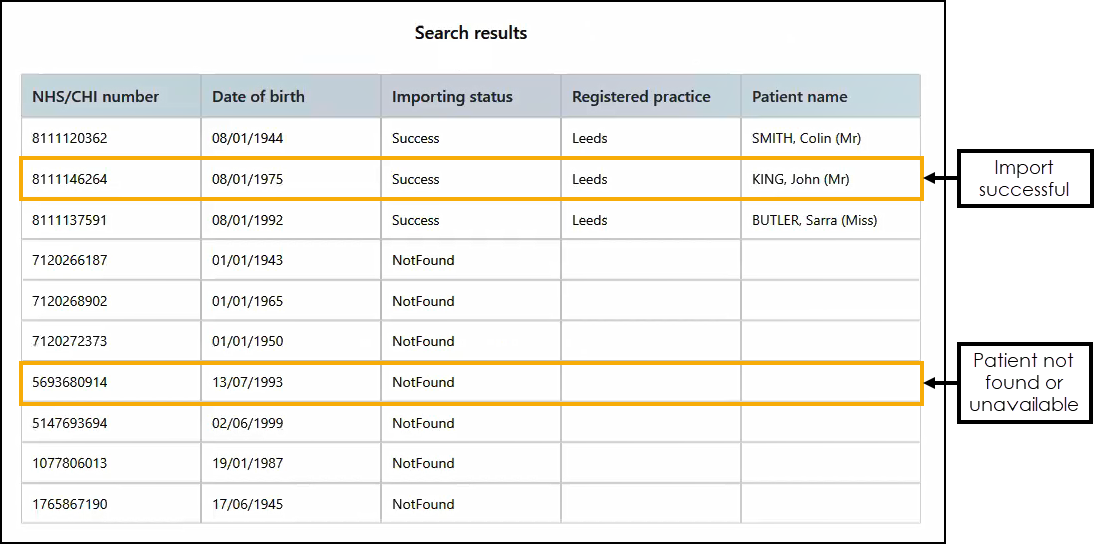
If no errors occur the Search results screen displays:
 Training Tip - A federated user can import and view patients from various practices however if a practice user views the list, they can only see the patient's from their own practice, all others display as NotFound.
 -
Select Add patient to Appointments clipboard
 to add all successfully imported patients to the Appointments Clipboard.
 -
You can now book patients into free appointment slots as required.
Important - When patients are booked from the imported list they remain on the list. -
Book an additional appointment if required or select Delete
 to remove the patient from the Appointments Clipboard or select Clear All to remove all patients from the list.
Complete as required: