Preferences - General
You can set practice wide settings from the General screen:
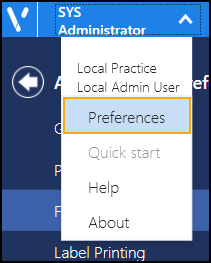
- From Appointments, select the arrow next to your name and select Preferences:
- The Appointments Preferences list displays with the General screen open:
- Complete as required:
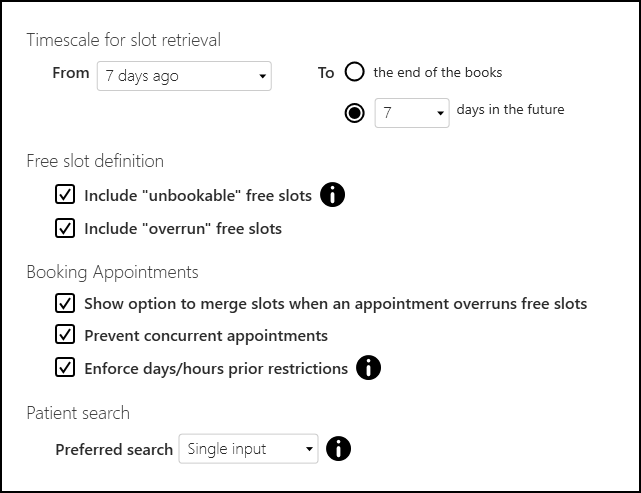
- Timescale for slot retrieval - Complete:
- From - Defaults to 7 days ago. Select how many days in the past the back arrow
 on Reception View displays.Note - You can go further back using the calendar. Any slot over 7 days old cannot be edited.
 - To - Select how far forward you want the books to display:
- To the end of the books or,
- days in the future, select between 7 and 42 days.
- From - Defaults to 7 days ago. Select how many days in the past the back arrow
- Free slot definition:
- Include "unbookable" free slots - Tick to include free slots with a slot type that cannot be booked on the current day.
- Include "overrun" free slots - Tick to include overrun slots in the free slot search.
Note - The free slot definition affects the count in Free slot search. - Booking Appointments:
- Show option to merge slots when an appointment overruns free slots - Tick the to display the option to combine slots.
- Prevent concurrent appointments - Tick to prevent appointments being booked for the same patient, at the same time with more than one clinician.See Booking Consecutive Appointments for details.
- Enforce days/hours prior restrictions - Tick to enforce the days/hours prior restrictions.
Patient Search - Preferred Search - Select your preferred default Patient Search screen view:

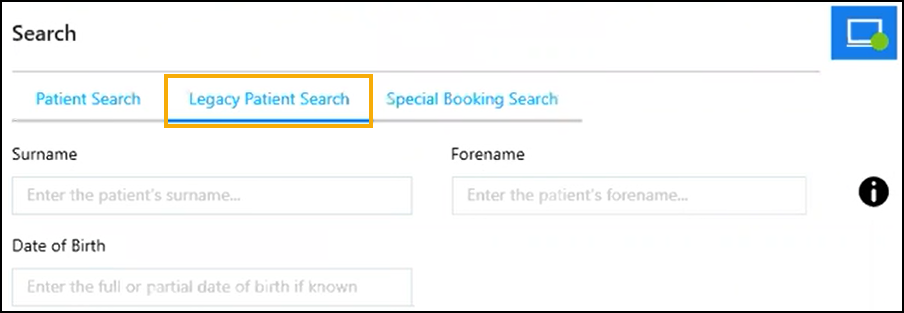
Select one of the following methods of input:
Single input - When you search for a patient, the Patient Search screen displays by default:

Multiple inputs - When you search for a patient, the Legacy Patient Search screen displays by default:
Note - Only available to users who access Appointments from the Vision 3 front screen.
See Searching for a Patient for more details. - Timescale for slot retrieval - Complete:
- Select the back arrow
 to close the Appointments Preferences screen and save any changes made.
Note - To quickly reverse any unsaved changes made, select Reset  .
.
.Note - To print this topic select Print  in the top right corner and follow the on-screen prompts.