Applying or Editing Filters
Filters enable you to define the information that displays on your screen. Within Appointments, the Filter  is available from the following screens:
- Reception View
- Dashboard
- Weekly
- Current appointments
- Free slot search
Filters can be saved, for either personal or practice wide use and can be turned into Saved Views, see Creating Views for your Practice for details.
You can set a default filter to display when you access Appointments, see Preferences - Filter for details.
To set a filter:
- From any screen with a filter option, select Filter. If a filter is already active, it displays in orange
 , hover over the filter to see the details or right click and choose Clear filter.
- Select a category heading to expand, for example, Languages:
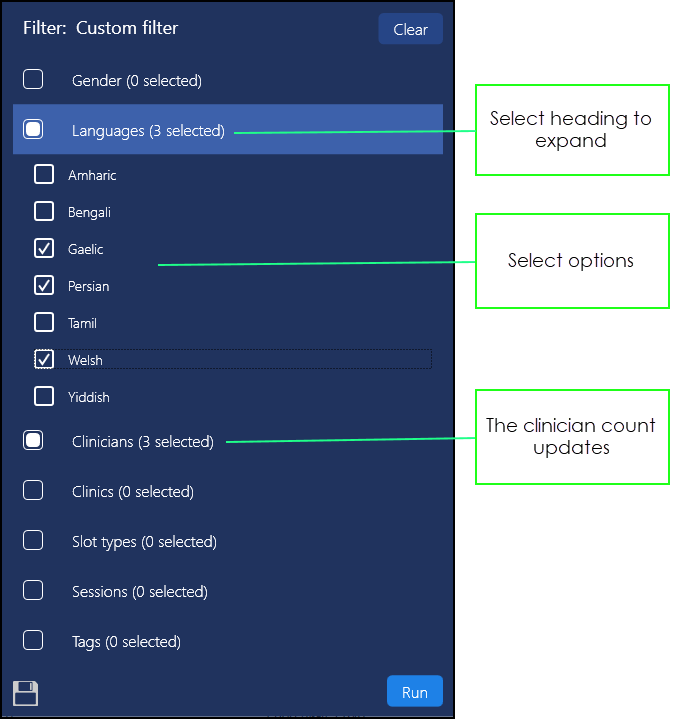
- Select the specific detail you want to filter on.Note - Any clinics or clinicians that are marked as inactive book owners, and have appointments, are indicated by a "strike through". Any inactive book owners without appointments are not displayed.
-
Now, if required, select additional categories.
- Select Run
 to apply the filter.
You can save a filter for future use, or to create a Saved View.
To save a filter:
- From any screen with a filter option, select Filter.
- Select a category heading to expand,
- Select the specific detail you want to filter on.
- Now, if required, select additional categories.
- Select Save
 .
. - The Filter - Save screen displays:
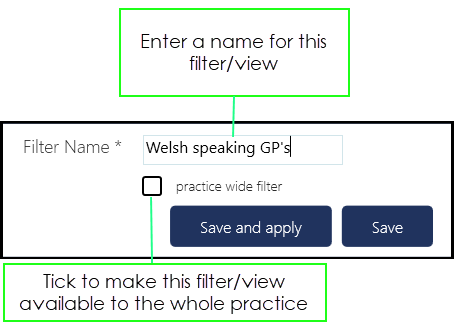
- Complete as required:
- Filter Name - Give this filter/view a name
- practice wide filter - Tick to make this filter/view available to the whole practice
- Select Save and apply to use and save the filter.
If required you can reorder the columns in the Reception view, by dragging the columns.
- To save the new column order, you must save the filter - see Saving a Filter.
- Select the columns and drag into the preferred order.
- Select the Command Menu in the top right corner.
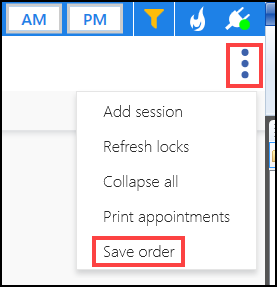
- Choose Save Order.
The order applies to the filter.
Applying and Saving Filters (1:22)