Classic Printer Setup
Note - Selections here apply to this workstation and user.
Training Tip - You can set up multiple printers in Control Panel - File Maintenance - Staff Configuration Utility.
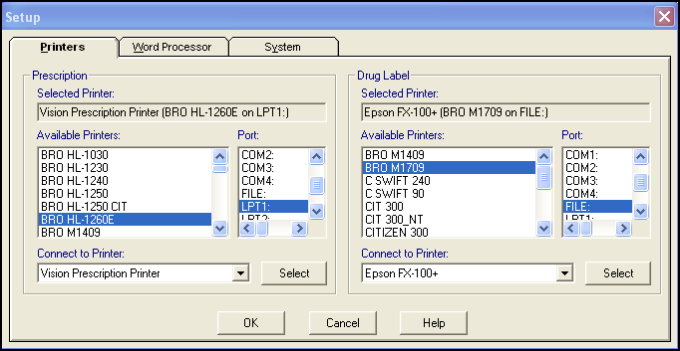
- Choose the selected printer for prescription output. If you are a dispensing practice or wanting to print drug labels, you need to select the printer used with label stationery. Note that printers are recorded by workstation.
- From the Vision 3 Front Screen, select Options - Setup and then Printers.
- From Prescription - Selected Printer, highlight the printer you want to print prescriptions on. The selection depends on the initial engineer setup.
- From Port, select the port required, a parallel printer is usually in LTP1, and a serial printer in LTP2 . If you are not sure, contact the Help Line, see Contacting Us for Support for details.
- ChooseSelect.
- Under Drug Label, repeat steps 4 - 6 to print dispensing labels within the practice.
-
Select OK to save:
Scotland only
Prescriptions in Scotland must be printed in Courier 11 font, which can be read by the scanners at the pricing bureau. To set this criteria:
- Right click anywhere on the Printers screen.
- Select Use Courier 11 for all scripts.
- Select OK to save.
Training Tip - Check the setup of the Repeat Reorder Form in Consultation Manager - Consultation - Options - Repeat Reorder Form Setup. The change in font may affect the lay out of your messages.
Note - To print this topic select Print  in the top right corner and follow the on-screen prompts.