Keyboard and Mouse Use in Vision 3
Menu Options

- Pressing <Alt> and the underlined letter, for example, <Alt+V> for View, or <Alt+C> for Consultation, reaches options from the menu.Note - The underlined letter is not necessarily the initial letter.
Menu conventions
- Dimmed or greyed out options are not available for selection.
- A tick to the left of a command means the command is selected.
- Key combination to right of command display the shortcut key(s),for example, <F4>.
- An arrow
 to the right of command indicates an additional menu.
 - '...' to the right of the command indicates further options.
Screen Options
- Options on a screen can be selected by typing their underlined letter (usually the initial), though note that not all lists or options have underlined letters. For example, from the Select Patient screen, press the <Alt> key then type O for Options, or F for Find.
Function Keys
- You may prefer to use the keyboard instead of the mouse, and in this section are listed some general points about keyboard use in Vision 3.
- In Consultation Manager, function keys are allocated for specific functions. These are mentioned within the Consultation Manager on-screen help and User Guides. For example, <F3> acts as Find, it displays the Select Patient screens within Consultation Manager and Registration, it also displays the Drug Select screen from Therapy - Add.
- <F1> function key triggers the on-screen help anywhere within Windows. This function is universal.
Mouse use
- To select - Single click on the left mouse button.
- To display additional options - Single click on the right mouse button
- To trigger action - Double click on the left mouse
- Dragging and dropping items - Hold down the left mouse button, drag the mouse to the required position and then release the mouse button.
Scroll Bar
A scroll bar indicates further information off the screen:
- Vertical or horizontal
- Scroll box indicates the relative position of the currently displayed information in the whole window
- Only displays when needed
- Moving
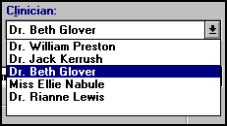
Where there is a picklist for selection you see selection arrows 
 :
:
- Select the up and down arrows to move up and down line by line
- Select the scroll bar above scroll box to move up one page or below scroll box to move down one page
- Drag the scroll box
- To select an option from a list with no underlined letters, use the up/down arrow keys to highlight your choice, then press Return or Enter, or point and click with the left mouse button.
Tool Bar
- A toolbar consists of symbols, which often correspond to menu options. Select a symbol to launch it. If it is greyed out, it is currently inactive and you cannot select it.
Status Bar
The status bar is at the bottom of the screen above your Task Bar:
- Explains current open window
- Gives additional information / help
- Can be switched off from the View menu in Vision 3
![]()
Dialog Boxes
Dialog boxes are the boxes that appear where you should enter data, for instance, the History-Add screen. You exit from these either by selecting OK after entering data; or by selecting Cancel to abandon the data entry.
On a dialog box:
Further information needs to be supplied
- Every data entry form in Vision 3 is a dialog box
- Move within a dialog box by using the mouse or <Tab> key for clockwise, <Shift+Tab> for anti-clockwise movement or use <ALT> key and underlined letter simultaneously
Other dialog boxes display as warning or information prompts, for example, close consultation or drug interaction warnings. Some of these prompts have a notes option where you can add free text which displays in this screen for all Vision 3 users. Please be aware that such notes are not attached to any patient record.
Tab Key
- Use the <Tab> key to move the cursor forward one field at a time.
- Use <Shift+Tab> to move back a field.
Sometimes, when completing a screen, you don't want to press Enter until you are ready to complete the screen, and using the <Tab> key is a good way to move around.
Commands, OK, Cancel
An option with an emboldened border is the selected option or the default. A simple press on the Return or Enter key selects it:
- OK
 - Pressing Return/Enter accepts the current screen and exits the form.
 - Cancel
 - Select to exit without making changes, you can also press <Esc> to cancel an entry.
Entering Dates
Dates can often be entered using a shortcut abbreviated format:
- Use minus - for previous dates
- Use + for future dates
If you leave the + out, a future date is assumed:
- T - Today's date
- D - Days, for example -1D (yesterday), 5D (five days' hence)
- W - Weeks, for example -6W (six weeks ago), 7W (seven weeks' hence)
- M - Months, for example -9M (nine months ago), 10M (ten months' hence
- Y - Years, for example -3Y (three years ago), 5Y (five years' hence)
Other Text Boxes
-
To display a picklist - use <ALT+
 > and then move up and down the list using the up and down keys.
-
Tick boxes - On a keyboard, use the Spacebar to toggle on and off.
Other keyboard use
- Use menu bar - ALT key
- Select a menu - ¬ or ® and ENTER when required option is highlighted or type underlined letter
- Move to the next field - <Tab> key
- Move to the previous field - <Shift+Tab> keys
- Move to a dialogue box item - <ALT+underlined letter>
- Move highlight - Arrow keys
- Choose highlighted option - <Enter> key
- Display the task list - <CTRL+ESC>
- Switch between applications - <Alt+Tab>
- Open control menu (application window) - <Alt+Spacebar >
- Open a picklist for a dialog box - <ALT+>
- Toggle a tick on and off - Spacebar
- Quit a program - <Alt+F4>