Creating a Session
A session is a period of time that contains all of your appointment slots. You must create and allocate a session to a clinician or clinic before you can book an appointment.
To create a session:
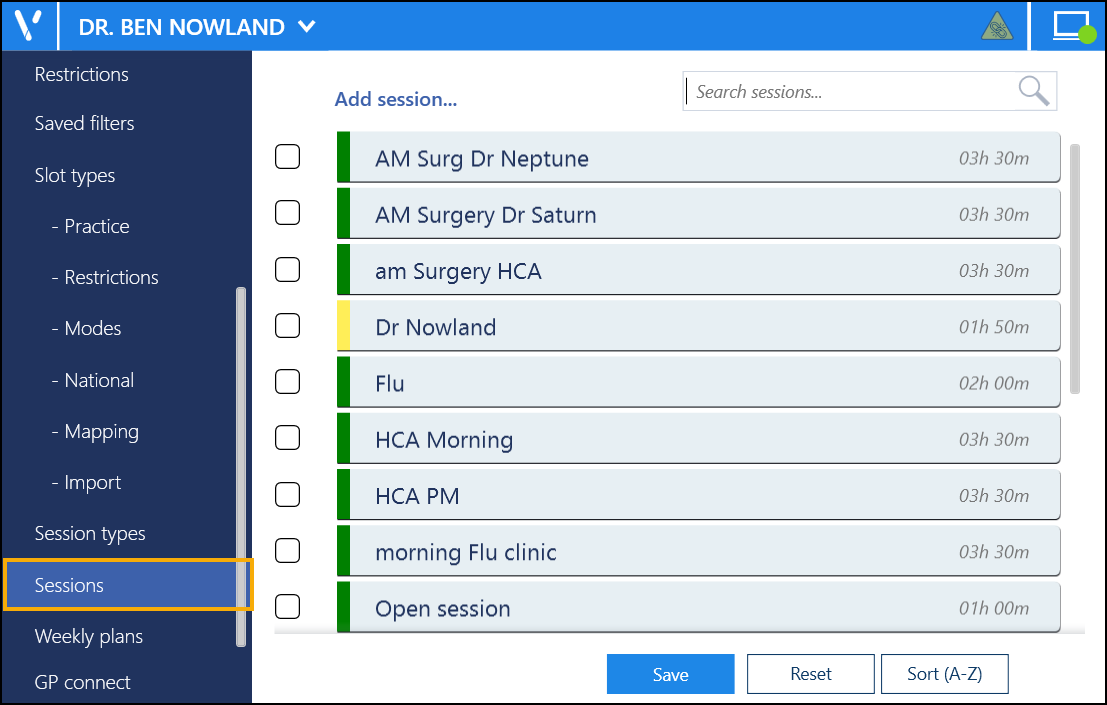
- From the select Sessions
 and the list of existing sessions displays:
 -
Select Add session...
 and the Session Options screen displays:
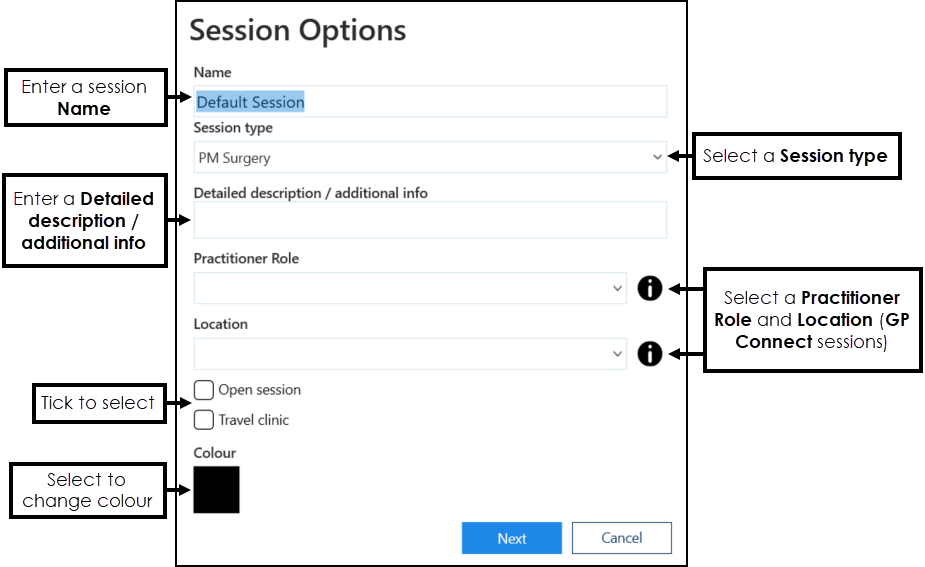
Complete as required:
- Name - Enter an appropriate session name, for example Dr Smith AM, Nurses PM surgery, Ante-Natal Clinic. This name displays when listing available sessions and on the Reception View so should be appropriate, a maximum of 30 characters.
- Session type - Select a session type from the list, see Session Types for further details.
- Detailed description / additional info - Enter any additional information to display fully in a tooltip when you hover over a session in Appointments Reception View, a maximum of 500 characters.
- Practitioner Role - Mandatory for GP Connect Appointments in England, tells any third party, booking an appointment in this session, the type of clinician they are booking, select from the available list.
- Location - Mandatory for GP Connect Appointments in England, tells any third party, booking an appointment in this session, where this appointment will take place, for example a branch surgery.
- Open session - Tick to mark this session as an open session, for example a first come first served clinic.
- Travel clinic - Tick to mark this session as a travel clinic, especially useful for appointments booked online by your patients.
- Colour - Select the black square to choose a colour for the session header, the Session Colour screen displays:
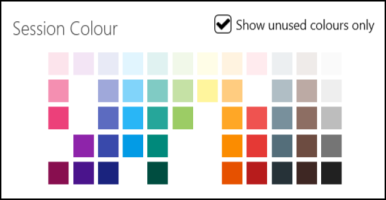
Optionally, tick Show unused colours only, to avoid duplicating header colours.
Note - The session name must be unique. - Select Next
 and the Create Session screen displays:
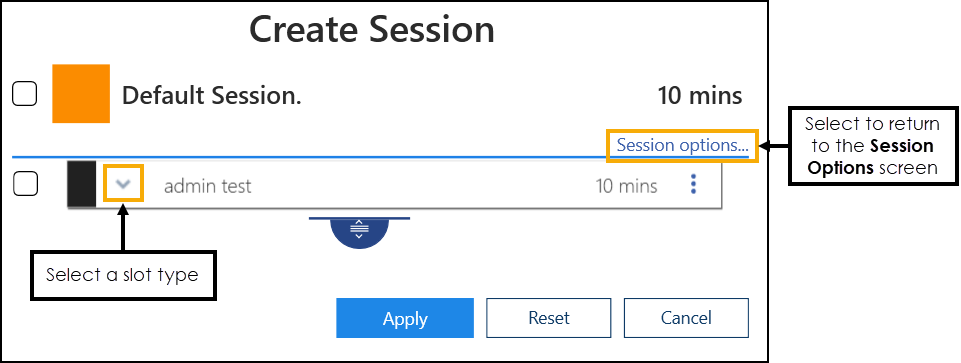
Complete as required:
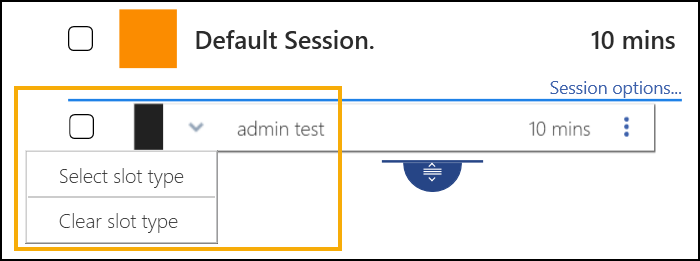
- Slot Type - The default slot type is the first slot type on your Slot types screen see Slot Types Overview for more information. Select the arrow
 to the left of the slot name, select Select slot type, and then the slot type required for the first slot.
Select Clear slot type to insert an empty non-bookable slot, these can be used as 'catch up' slots:
to the left of the slot name, select Select slot type, and then the slot type required for the first slot.
Select Clear slot type to insert an empty non-bookable slot, these can be used as 'catch up' slots: - If you are creating a session built mainly of the same slot, click, hold and drag the drag handle
 to extend the surgery using the chosen slot type. The session duration automatically updates as you move the drag handle. You can now update any slot types if required, you can also change more than one slot type at once, see Editing Sessions for further details.
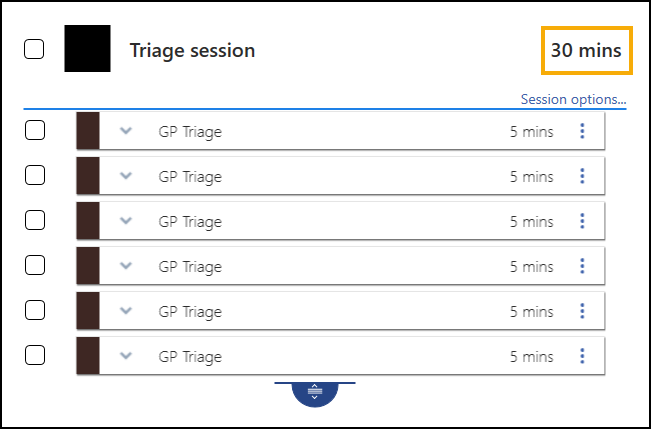
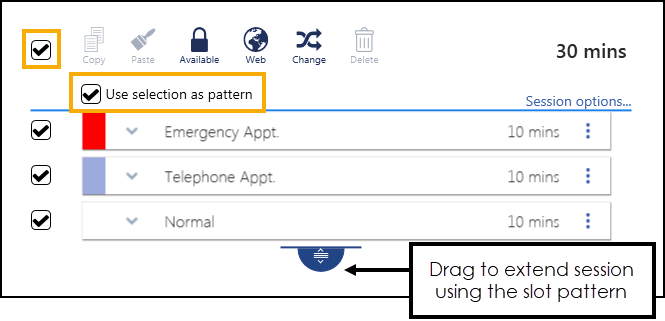
 - If you are creating a pattern of slots, for example, two normal and one telephone, extend the session to three slots, select the slot combination, tick Use selection as pattern, and then click, hold and drag the drag handle to the duration required. The pattern repeats as you extend, see Slot Patterns for further details:
- Duration - You can specify a duration in minutes, or just click, hold and drag the drag handle to the correct time frame:
 Note - You can always update the slot types in a session.Important - To facilitate reporting on vaccination appointments any COVID vaccination appointment slots should have a Slot Type of COVID VACS. This is essential in England however it is recommended elsewhere to help manage your appointment books. See Slot Types Overview for more information.
 - Slot Type - The default slot type is the first slot type on your Slot types screen see Slot Types Overview for more information. Select the arrow
-
Select Apply to save your changes, Reset to return to the Session Options screen, or Cancel to cancel the new session.
View the following video to see more on creating sessions:
Sessions (5:03)