Sending Letters
You can use the following instructions during the Seasonal Influenza Campaign to help guide you through the process of creating letter templates, identifying patients, sending letters and recording clinical terms in bulk on patient records. Expand either the Vision+ or Vision 3 drop down to read more.
The following details how to send a letter in Vision+:
Creating a Letter Template
You can send a flu invite letter from your Vision+ Practice Lists. First you need to create a letter template if one does not already exist.
To create a letter template:
- From Vision+ Practice Reports select Practice Lists.
- Select Merge Templates
 :
: - From the Merge Templates screen, select Letter
 .
. - From the Merge Templates toolbar, select the word processing application you are using, for example Word
 or LibreOffice
  :
: Important - The template options displayed are dependent on what word processing applications you have installed. Due to possible file conflicts, you should avoid installing both Microsoft Word and LibreOffice on the same computer.
 -
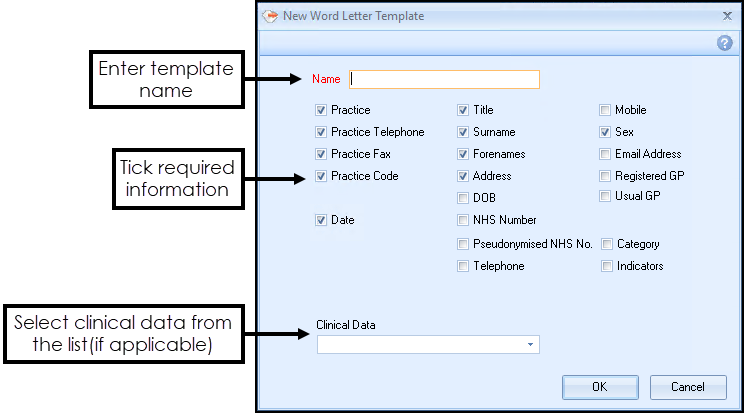
Enter the Name of the Template and select the information required in the letter:
-
Name - Enter a descriptive title for the new template.
-
Patient Information - Tick against each item of information from the patients records that you would like to merge into the letter, or untick any items you do not require.
Note - For Practices in Scotland the NHS Number merge field is replaced with CHI Number and for practices in Northern Ireland H+C Number is shown. -
Clinical Data - If applicable, select the clinical data from the list to be included in the mail merge. When clinical data is selected, the merge fields available in the extract are made available to the word processing application. This is an extremely useful way of getting patient data into letter form.
-
- Select OK and the word processing application opens up in a new window with a basic template layout.
 If you are using Microsoft Word:
- Use Microsoft Word to make any changes to the template layout that you require.
Any mail merge fields display with << >> around them, you can move them around or copy them to other areas of the document as required. Alternatively, you can insert additional merge fields from within Microsoft Word by selecting Mailings - Insert Merge Field:

You can use all of the familiar word processing features in Microsoft Word to make the layout of the letter more attractive.
Important - We highly recommend you add a disclaimer to any reports or letters you produce, for example, ‘This document may contain sensitive or confidential data, please treat accordingly’. - Once you have finished, from Microsoft Word, select Save
 .
. - Close Microsoft Word.
 If you are using LibreOffice:
- Use LibreOffice to make any changes to the template layout that you require. The mail merge fields selected display on the screen with a < > around them, you can move them around or copy them to other areas of the document as required.:
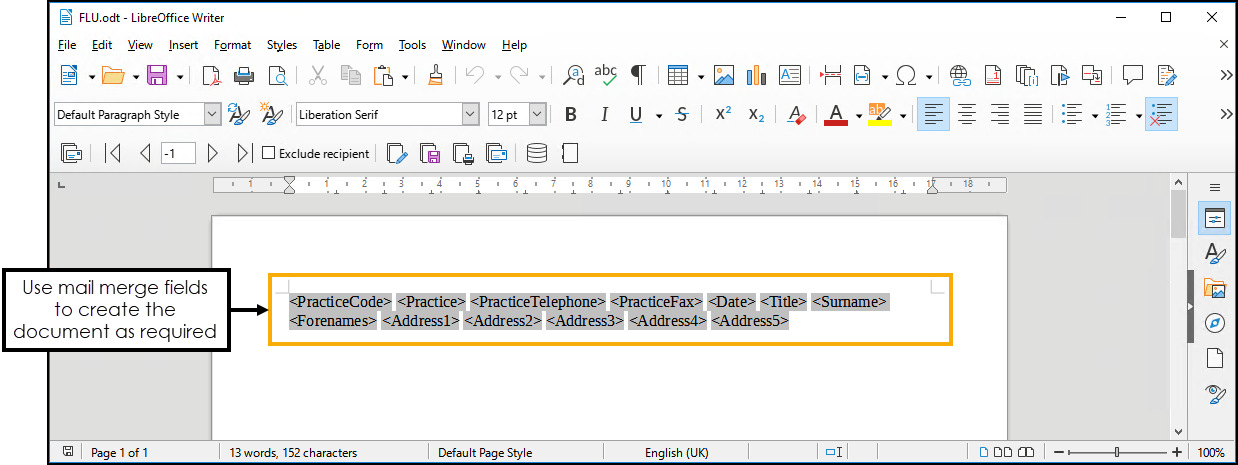
Alternatively, you can insert additional merge fields from within LibreOffice, select View - Data Sources or select Data Sources from the toolbar. Expand VisionPlus - Tables, select VisionPlus and the additional merge fields display to the right. Drag and drop additional merge fields onto the document as required:
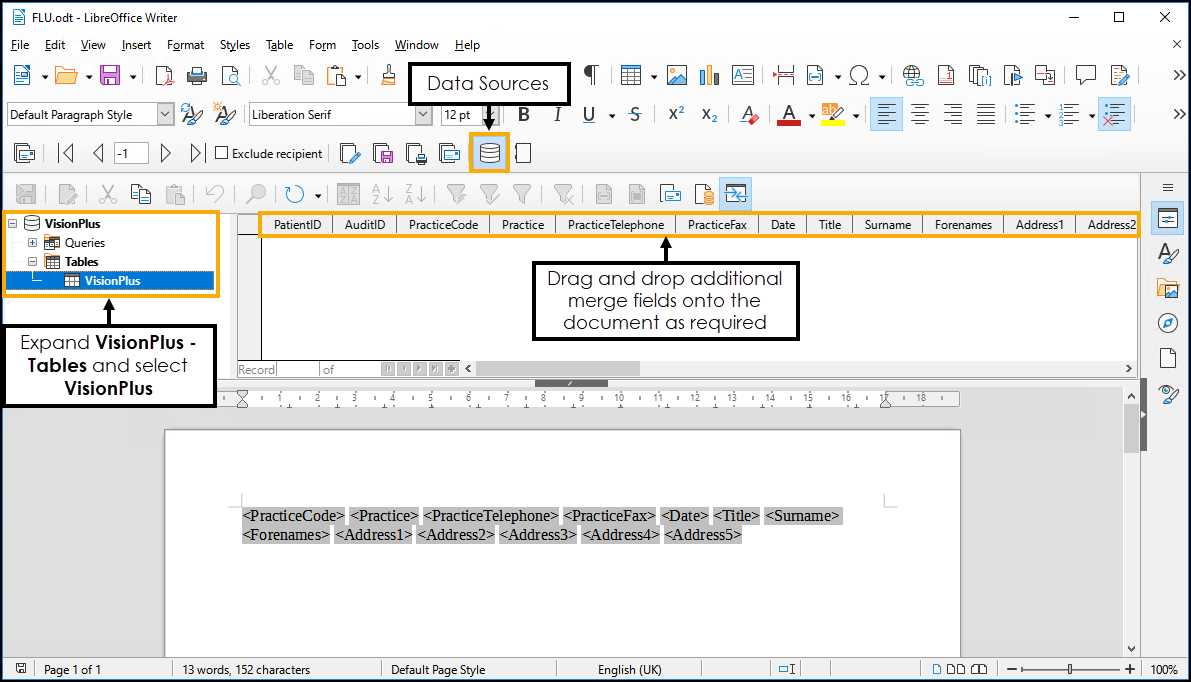
You can use all of the familiar word processing features in LibreOffice to make the layout of the letter more attractive.
Important - We highly recommend you add a disclaimer to any reports or letters you produce, for example, ‘This document may contain sensitive or confidential data, please treat accordingly’. - Once you have finished, select Save
 .
. - Close LibreOffice.
- Use Microsoft Word to make any changes to the template layout that you require.
You should now see the new letter template displayed in the list on the Letter Templates screen.
Attaching a Letter Template
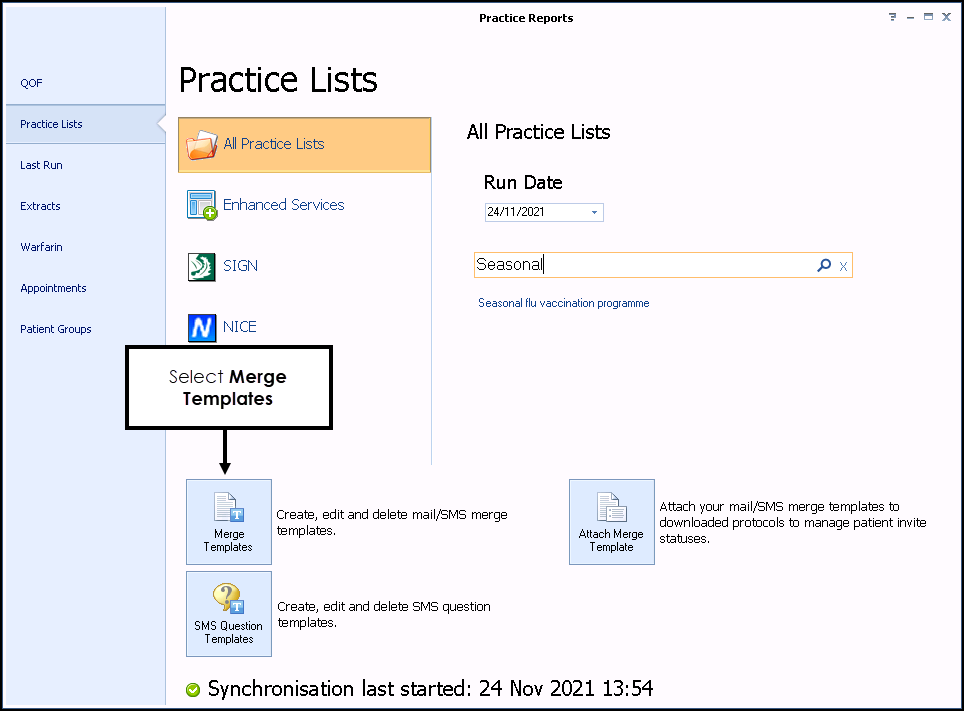
If using Practice Lists the template must be attached to the relevant practice list.
- From the Practice Lists screen, select Attach Merge Template
 :
: - Select Seasonal flu vaccination programme and then select Attach
 :
:
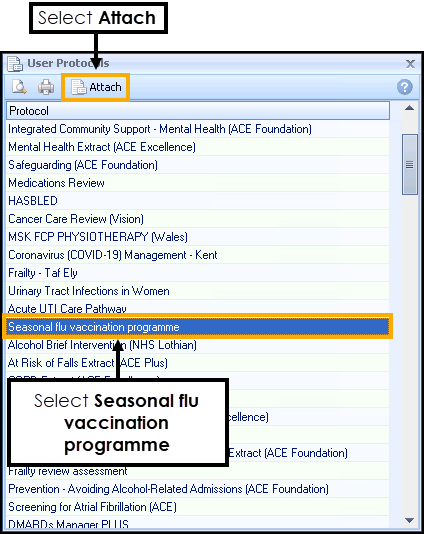
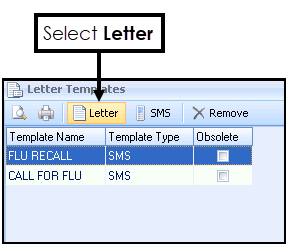
- The Letter Templates screen displays. Select Letter
 :
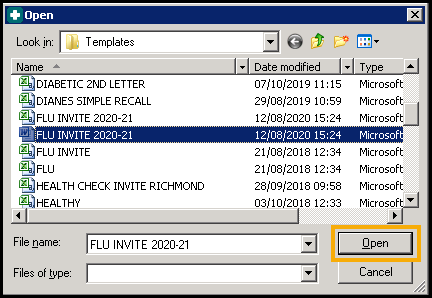
: - Choose the letter template you wish to use and then select Open:
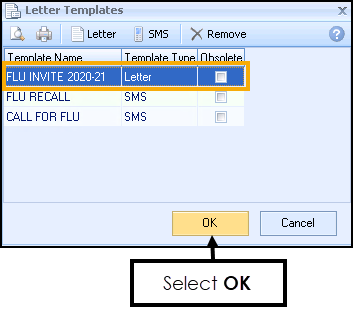
- The letter template is now added to the Letter Templates screen and attached to the Flu Clinic:
- Select OK to close. Note - You must do this for each new Seasonal Influenza Campaign letter template you create.
Selecting Patients
- Log in to Vision 3 as normal.
- From the Windows Notification Area, right click Vision+
 and select Practice Reports - Practice Lists.
 - In Search, type Seasonal and select Search
 .
. - Select the Seasonal flu vaccination programme report.
- A confirmation screen displays, select Run now to run the report:

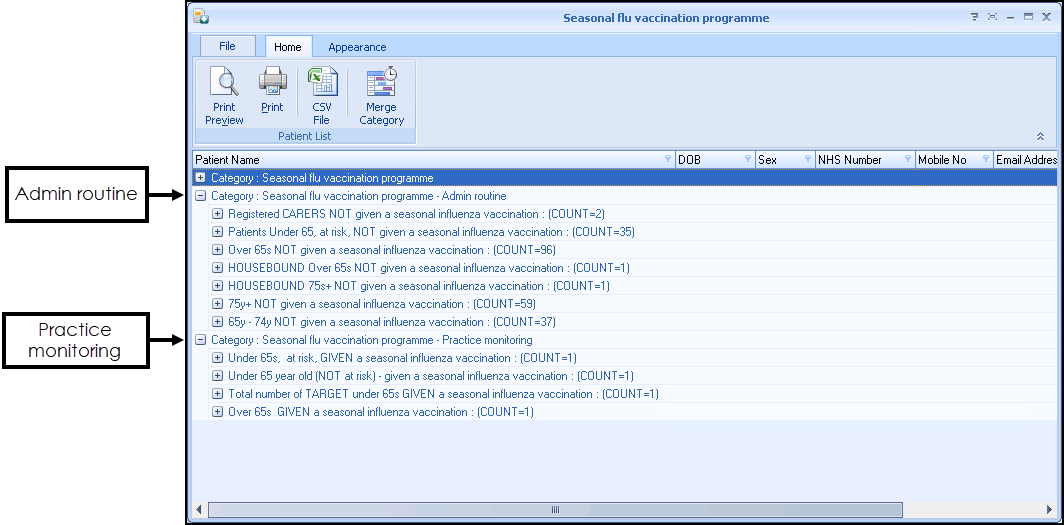
- On completion, a list of reporting categories and indicator lines display:
- Admin routine – Expand
 this section to display patients who require an invite.
 - Practice monitoring – Expand
 this section to display a list of patients who have had the vaccination.
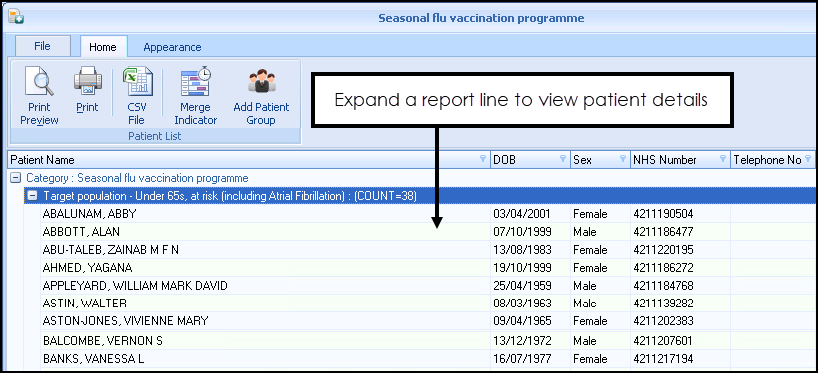
 - To view patient details, select Expand
 on a report line to expand it:
 - From the Practice List Report highlight the group that you want to send a text message to and select Merge Category
 .
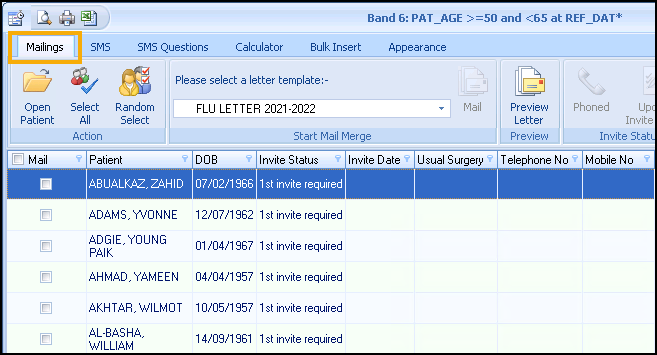
. - The Mailings screen displays, from this screen you can send letters, send SMS messages or bulk insert clinical codes to the patients' records, letters are sent from here:
Sending Letters
To send letters:
-
From Mailings, select the Mail checkbox for each patient that you want to recall:
 Training Tip - If you want to select or clear all the checkboxes, use Select All from the toolbar, this is useful for managing larger lists.
 -
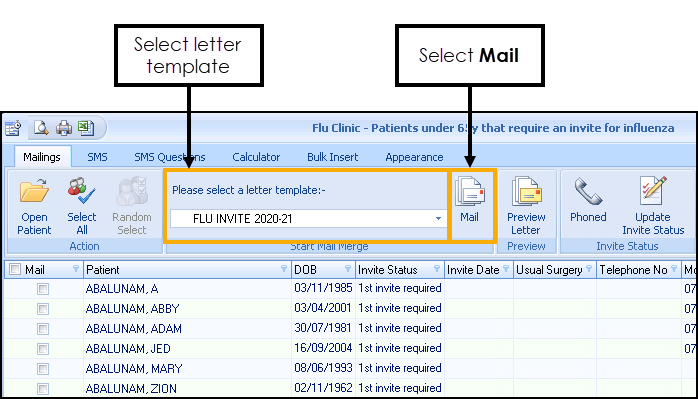
From Please select a letter template on the toolbar, select the required template and then select Mail:
- The recall letters open in a single document, ready for printing.
- Print the recall letters and select Update. The patient records update with the letter as an attachment:

Adding a Clinical Term to all Patients Sent an Invite
Bulk Insert enables you to record a clinical term directly into the patient's record, for example, to record that the patient has been sent an invite. To add a clinical term to all patients sent an invite:
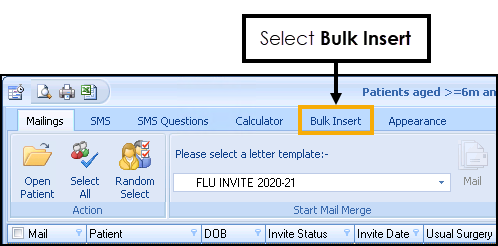
- From Mailings, select the Bulk Insert tab:
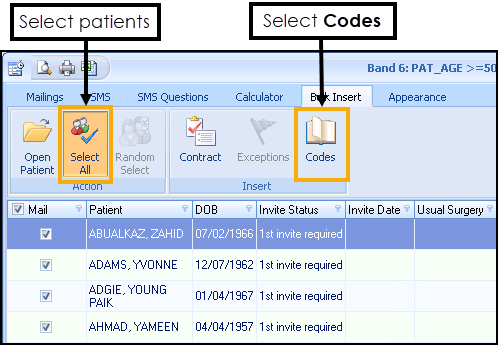
- Select the required patients by either choosing Select All or ticking the individual patients required.
- Select Codes:
- The SNOMED CT/ Read term Code Search page displays.
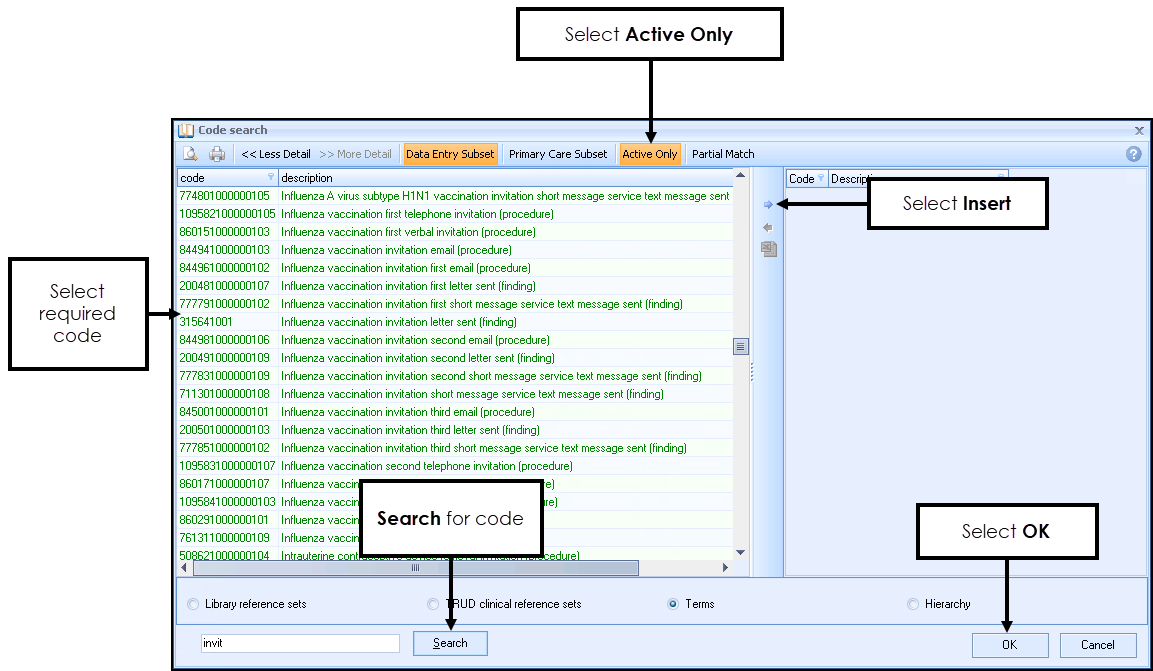
- England only - From SNOMED CT code search, select Active Only to only display active codes. If you do not know the code, enter the search term for example 'text' into the search at the bottom of the screen and select Search:
Scotland, Wales and Northern Ireland only - From Readcode search enter the search term and select Search:
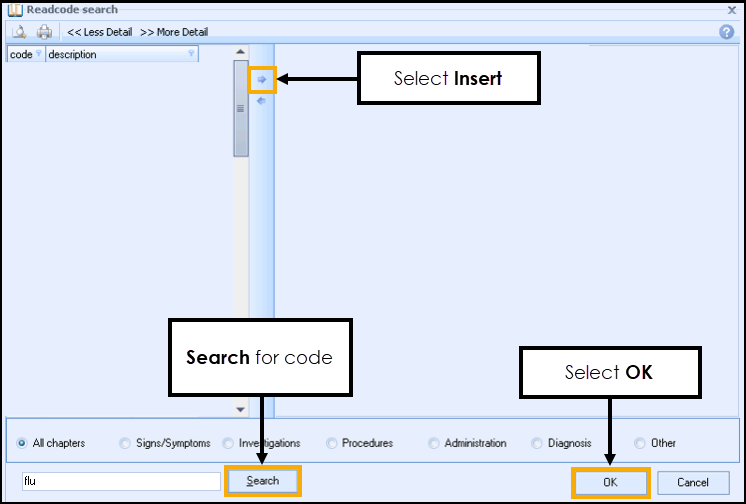
- Highlight the clinical term required and select Insert
 .
. - Select OK.
- Codeset Codes displays:
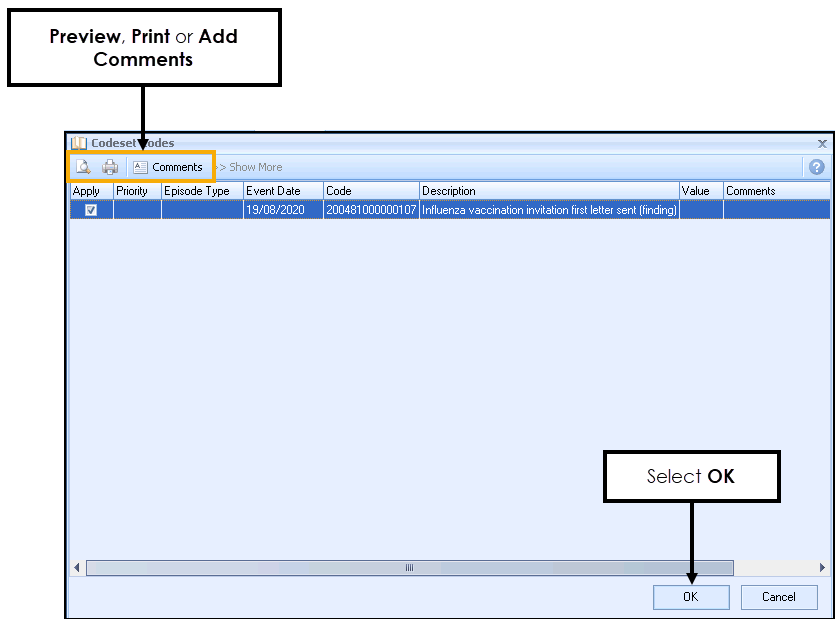
You can now select:
- Preview - to preview the entry you are about to add to the patient record.
- Print - to print the entry you are about to add to the patient record.
- Add Comments - to add comments to the entry you are about to add to the patient record.
- Select OK to apply the clinical term. The clinical term is added to the selected patient records:

The following details how to send a letter in Vision 3:
Creating a Letter Template
Creating and Sending Letters in Clinical Audit - Setting up Template Letters (2:44)
To create a template:
- From the Vision 3 front screen, select Utilities - Word Processor
 .
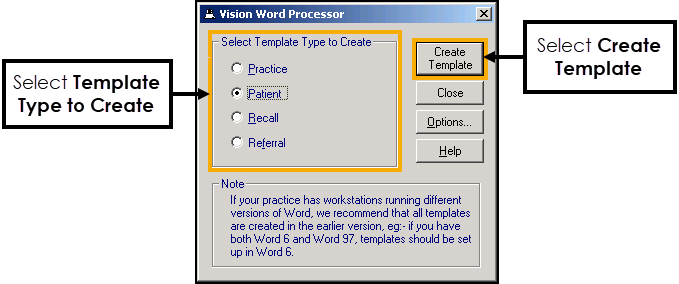
. - The Vision Word Processor screen displays:
- Select the template type required:
- Practice - For practice only merge field details.
- Patient - For a template including practice and patient merge fields.
- Recall - For a template including practice, patient, and recall merge fields.
- Referral - For a template including practice, patient and referral merge fields.
- Select Create Template.
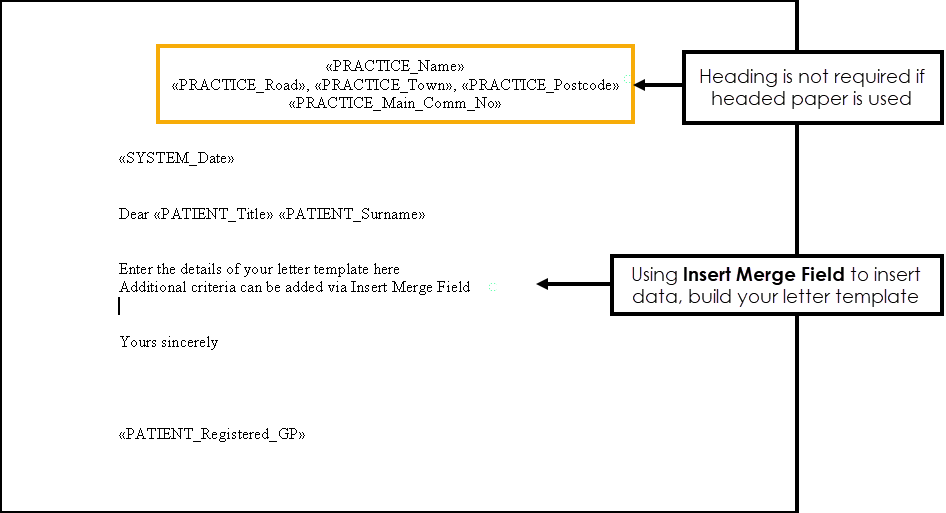
- A new document opens ready for you to create your template. Design your template utilising the Insert Merge Field option as required:
- We recommend you 'save as you go' when creating a new template, select Save
 .
. - Enter a file name and select a directory. Vision automatically saves all template letters in P:\WORDPROC\TEMPLATE\.
Sending Letters from Patient Groups
- From the Vision 3 front screen, select Reporting - Patient Groups:
 See Navigating Patient Groups for more information.
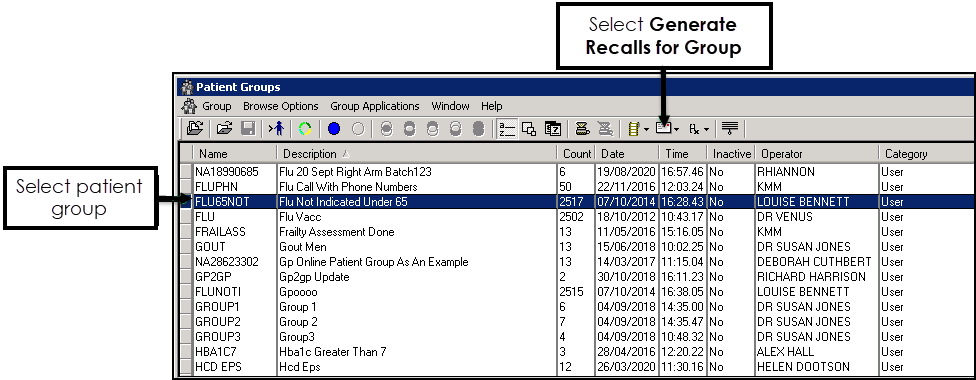
 - Highlight the group of patients you want to send letters to and select Generate Recalls for Group
 :
:
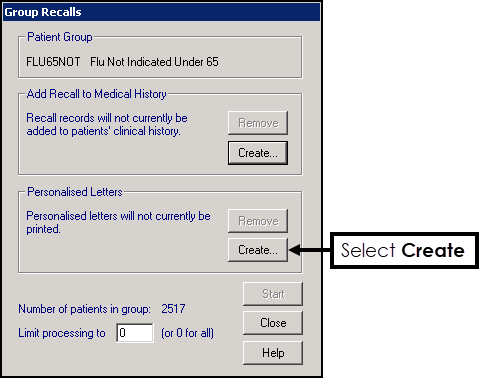
- From Group Recalls - Personalised Letters select Create:
- The Document Merge screen displays, complete as follows:
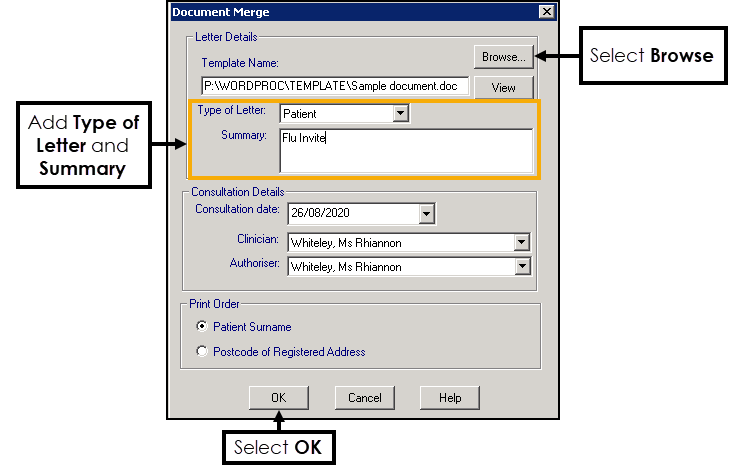
- Browse - Select to find the template required.
- Type of Letter - Defaults to Patient, update as required.
- Summary - Enter a brief summary of the template letter.
- Consultation Details - Update if required.
- Print Order - Defaults to Patient Surname, update as required.
- Select OK.
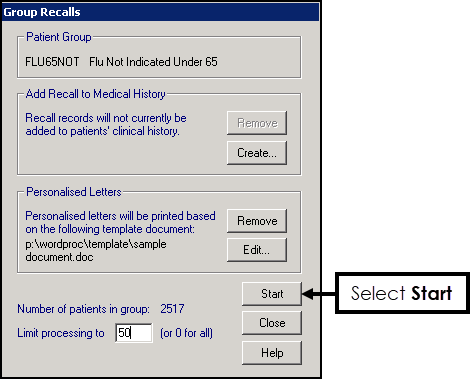
- From Group Recalls select Start to start the print run:
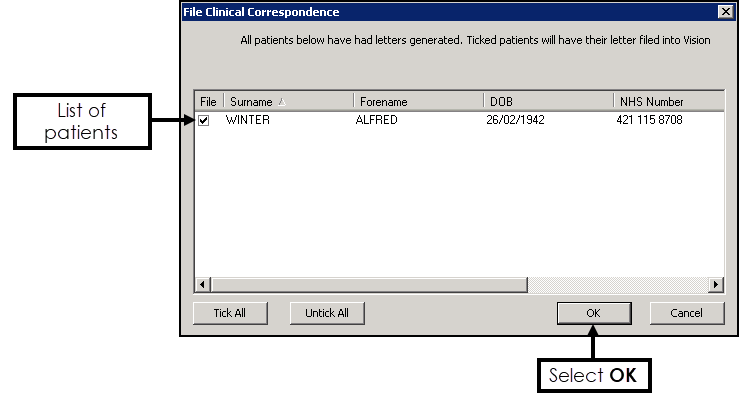
- On completion the File Clinical Correspondence screen displays. Tick the patient records to update with the letter sent and select OK:
Generating Medical History Items for a Group
To record a clinical term directly into multiple patient records:
- From the Vision 3 front screen, select Reporting - Patient Groups:
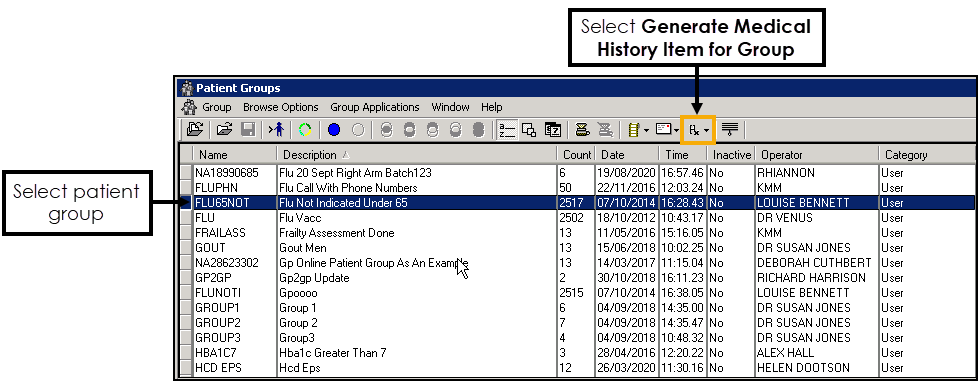
- Highlight the group of patients you have sent letters to and select Generate Medical History Item for Group
 :
: - In Read Term for Characteristic type the keyword or code (using a # in front of the code) if you know it:
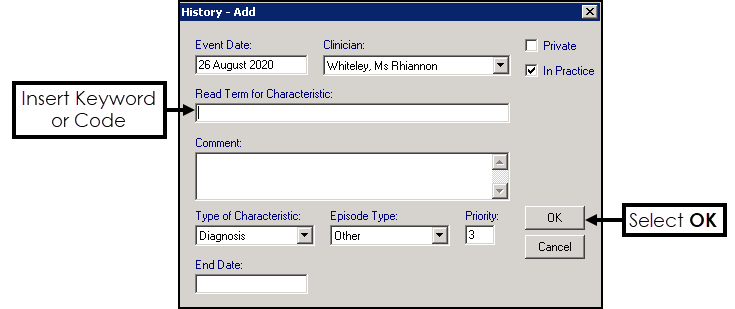
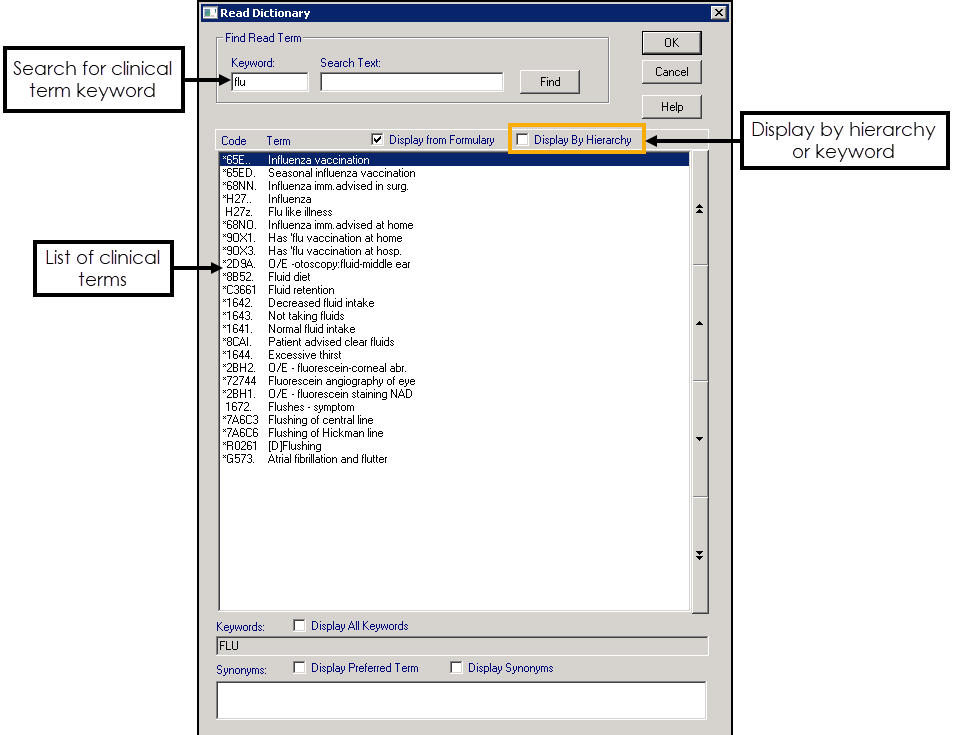
Alternatively, double click in the Read Term for Characteristic section to open the Read Dictionary screen:
- Select the required clinical term and select OK to return to the History-Add screen.
- Add any free text in the Comment section, and if required change the Priority.Important - Please check the clinical terms and comments carefully, this process must be revered manually if the wrong information is added.
- Select OK.

