Accuracy Check Label Settings
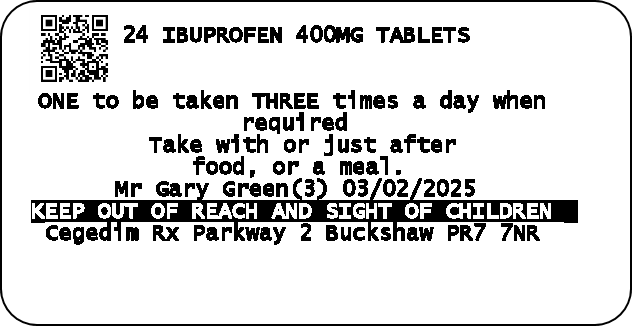
When using the Accuracy Check module, a QR code prints on your item and bag labels, as well as the new picking list. You may need to adjust the standard position of the QR codes if you use pre-printed labels.
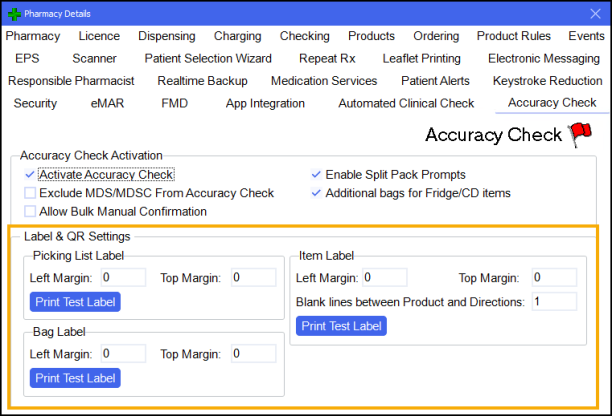
You can adjust the position of the QR codes from the Pharmacy Details - Accuracy Check.
Set your QR Code Positions
-
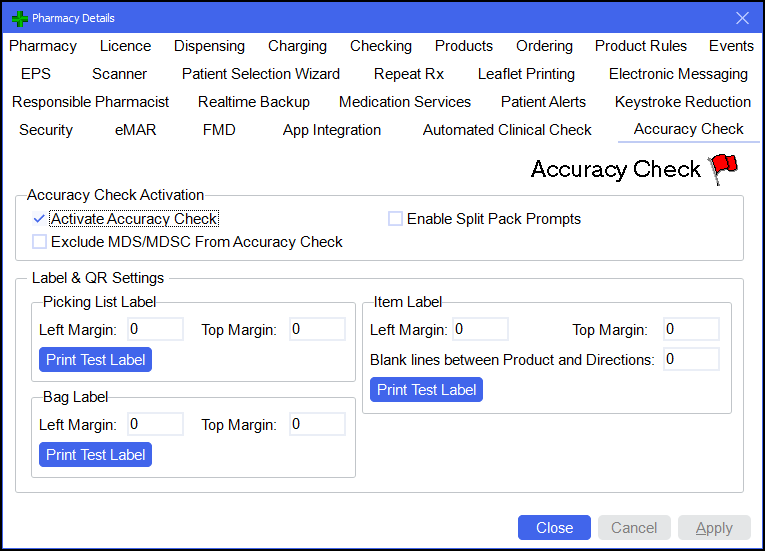
From the Pharmacy Manager Toolbar, select Tools - System Settings - Pharmacy Details - Accuracy Check to display the Accuracy Check settings screen.
-
Label & QR Settings displays the current QR code positions for the picking list, item and bag labels. From here you can adjust the top and left margins to adjust the position of the code by pixels.
Please note a value of 0 for both the top and left margin defaults the QR code to the following position.
Label Default Position of QR
code when set to 0,0Picking List Top right Bag Top right Item Top left Adjusting the left margin value from 0 to 10 moves the QR code to the right by 10 pixels, or adjusting the top margin from 0 to 10 moves the QR code down by 10 pixels. Alternatively, negative numbers move the QR code in the opposite direction, to the left or up.
-
Select Print Test Label
 to print a test label for each label to check your settings.
Check your Item Labels
Due to the addition of the QR codes and using the Windows Printer Driver to print your labels, you may need to adjust your label printer configuration.
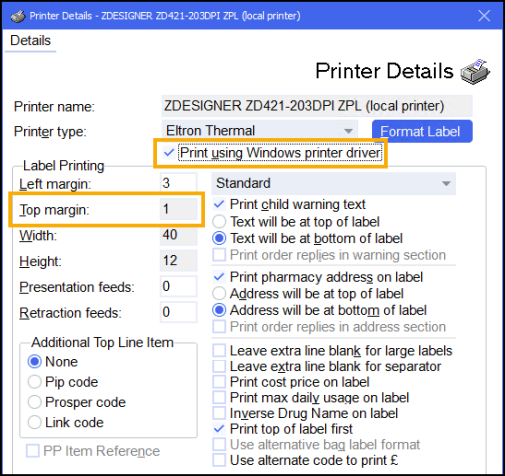
The label top margin is the gap between the top of the label and the start of the text. This needs to be changed if your text is disappearing off the top of the label or the label is pre-printed at the top and your text needs moving down.
-
From the Pharmacy Manager Toolbar, select Tools - System Settings - Printer Configuration - Pharmacy Manager.
-
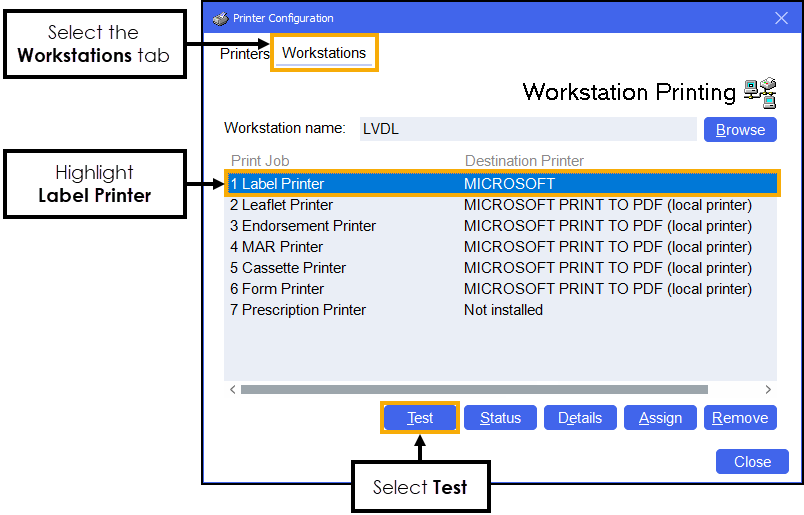
Select the Workstations tab, highlight the Label Printer and then select Test
 to print a test item label.
-
Should you need to adjust the settings, with the label printer still highlighted, select Details
 to open the Printer Details screen.
 -
The Printer Details screen displays.
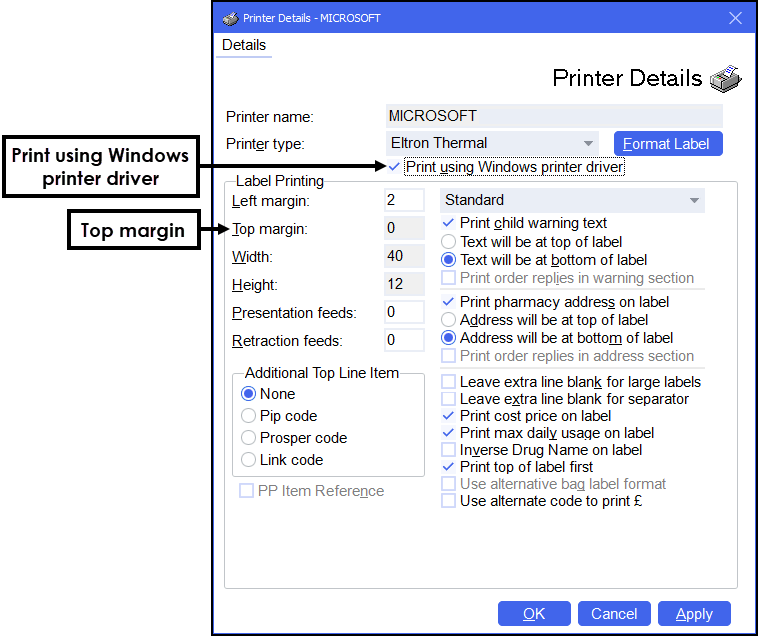
To change the top margin, Print using Windows printer driver must be unticked.
-
Edit Top margin as required. As an example, adjusting the value 0 to 1 adds a margin of 1 line of text.
-
Tick Print using Windows printer driver and then select Apply
 and Close
  .Important - No additional label formatting is possible with Accuracy Check enabled, therefore the label defaults to the Pharmacy Manager standard.
 -
From the Printer Configuration screen, select Test
 to print another test label to check the settings and repeat as required.
Example Labels
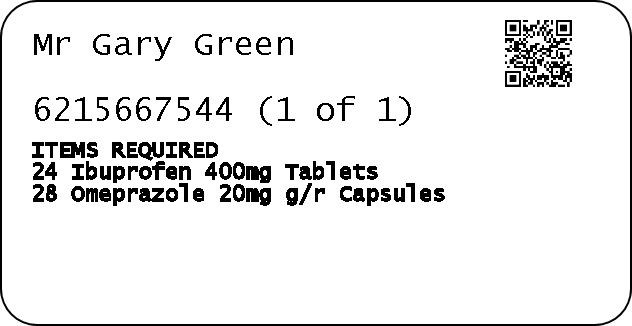
The label examples below have used blank labels and the following settings:
|
Pharmacy Details - Accuracy Check Picking List Label
Bag Label
Item Label
|
Printer Details
|
|
Picking List Label
Bag Label
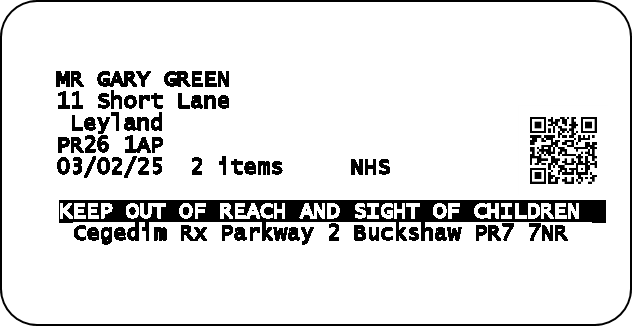
Item Label
