Archiving data
What does archiving mean?
Typically, archiving is the process of removing excess data from your Pharmacy Manager system. In the same way you make a routine backup, the archive is saved to an external backup medium e.g. a USB flash drive or a rewriteable DVD.
Archiving is not something that takes place frequently. We recommend that you should keep at least 24 months' worth of historical data on your Pharmacy Manager system.
If for any reason you want to keep less historical data
than this, you will need to obtain today's System
Administration Key from Service Desk.
Data stored in the archive will include the following events only:
- dispensed
items
- deleted items
- outstanding
owings
- written off
owings.
Each event includes:
- the date
and time dispensed
- dispensed
product
- written as
product – if different from dispensed product (i.e. generically linked
items),
- item cost
- directions
and cautions
- form type
- prescriber.
In the case of emergency supplies, the system records additional
details of the reason for issue and the date that the prescription was
received (if issued at the prescribers request); OR if you selected emergency
supplies form type.
Interaction/Condition acknowledgements are NOT stored, as it is not
envisaged that these would be required.
For backup configuration see backup
device setup.
When the backup has completed, you must insert a separate Patient archive
disk that does NOT contain any Pharmacy Manager backup data. The archive
will fail if any SRB
files are present on the backup device. This means that any attempt to
archive the data to the same drive where the Pharmacy Manager data is
stored will fail.
![]() Due
to the amount of time it takes to purge the data and re-index the files,
we recommend that you run the Purge Legacy and Archive utilities overnight.
Due
to the amount of time it takes to purge the data and re-index the files,
we recommend that you run the Purge Legacy and Archive utilities overnight.
Step 1 - Purge Legacy
If you have legacy data on your system, this data is older than your Pharmacy Manager operational data. Therefore, purge legacy data from your system first, before you do an Archive.
Before you can run the Purge Legacy utility, you will need to obtain today's System security keyfrom the Service Desk. The key will only be valid on the day you obtain it.
Legacydata is data that has been converted from another pharmacy system.
Once your Pharmacy Manager system is running smoothly, you can purge legacy
data from the system.
If Pharmacy Manager contains any legacy data, the
process will run a backup first then it runs the Purge
Legacy utility.
This will create a CIF
file on the backup device, containing all Legacy events. The filename
will be LegacyArchive.cif.
When you start the Purge Legacy utility, it will initially check
for a backup cartridge in the backup device, as defined in the backup
tab of the System Configuration settings, in Pharmacy Manager. If it does
not find one, it will give you a message saying 'The device is not
ready, retry or cancel'. Selecting Retry will attempt to access the
same backup device again; selecting Cancel will go into a browser, allowing
you to select an alternative backup device.
backup cartridge location: go to Menu
> Tools > System configuration > backup tab
Step 2 - Archive
Before you can run the Archive utility, you will need to obtain today's System security key from the Service Desk. The key will only be valid on the day you obtain it.
The Remove Archive utility is available without entering the key because you would only use it to remove any previously archived data that you re-imported into Pharmacy Manager.
res
To access the archive function:
-
Exit from Pharmacy Manager.
-
Click on the Start button, click on Programs, then CegedimPharmacy and finally Pharmacy Central.
-
Press the
 key to unlock further
options.
 -
Call Service Desk and ask for today's system administration key.
-
Type this number into the Password box and click on the OK button.
The Pharmacy Central screen should now show many more options.
-
Double click the Archive
 icon.
icon. -
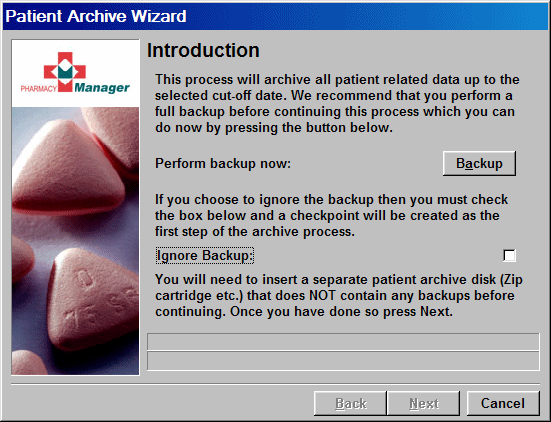
The Patient archive wizard starts

-
Click the backup button to make a full data copy.
![]() This backup is strongly
recommended as it gives you a return point in the event that the archive
process fails due to unforeseen circumstances e.g. a power cut. Furthermore,
we advise that this backup is safely retained off the premises in the
event that restoration is required for any reason.
This backup is strongly
recommended as it gives you a return point in the event that the archive
process fails due to unforeseen circumstances e.g. a power cut. Furthermore,
we advise that this backup is safely retained off the premises in the
event that restoration is required for any reason.
-
Once the backup is complete, remove the backup cartridge i.e. the USB flash drive or rewriteable DVD.
-
Click the Next button.
-
The next stage of the wizard appears.
-
Insert a blank backup device/cartridge/disk into the drive or USB port.
![]() You
cannot archive data to the same device/cartridge as the Pharmacy Manager
backup data.
You
cannot archive data to the same device/cartridge as the Pharmacy Manager
backup data.
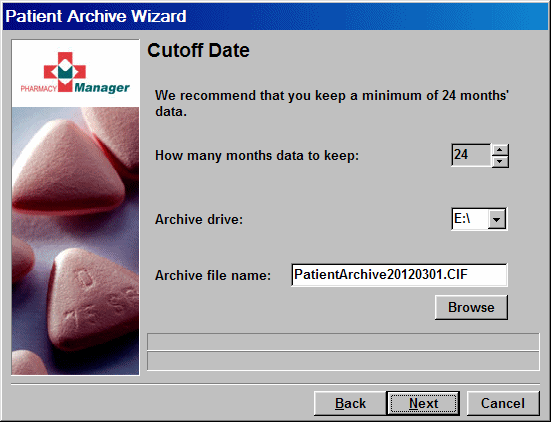
How many months? 24 months minimum...
The number of months' data to keep will default to 24,
but you can increase it if required.
If you confirm No to the warning message, you will need a System security key to change the
number of months' data to keep less than 24 months. The minimum period
is 12 months i.e. you cannot archive your data so there is less than a
year's live data on the system.
The actual cut off is made to the preceding 1st of the month. For example, if today is 15th April 2014, 24 months would equate to data since 15th April 2012. However, all data recorded from 1st April 2012 will be retained.
-
Select the Archive drive to use and the Archive window will appear. The default drive is the drive used for your regular backup.

-
The default archive file name is displayed.
-
The process will create a CIF file on the archive/backup device, containing all archived events prior to the specified number of months.
-
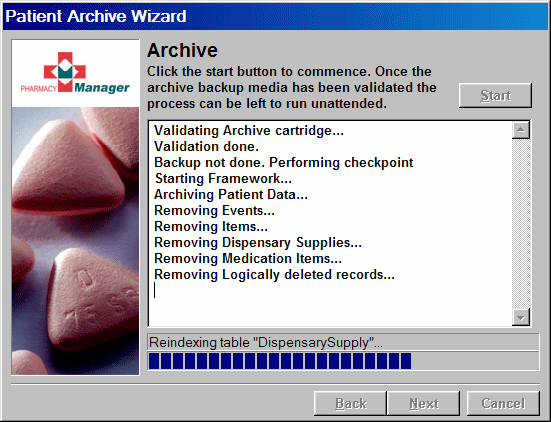
Once you click the Start button, the system validates the archive backup media.

-
The process first validates that you have inserted a blank backup cartridge/disk and will only proceed further if that is the case.
-
When the Validation done message appears in the window, you can leave the process to finish unattended.

-
When the Archive process is complete, click the Next button.
-
Finally, click the Finish button on the last stage of the wizard.
-
Store both the backup and the archive copy safely. There may be instances where you need to restore the archived data e.g. to resolve a query.
See also Restoring archives.
Updated 30th March 2009