Patient Details - Patient
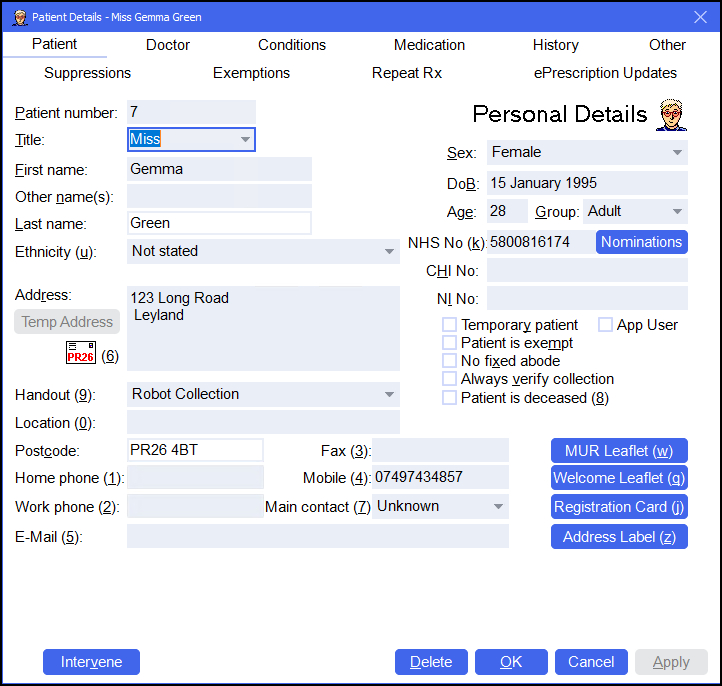
You can use the Patient Details - Patient tab to view or update a patient's details:
To access the Patient Details - Patient screen, either:
-
From the Find Patient screen, find the patient and then select Details
 or press Alt + D on your keyboard.
 -
From the Dispensary screen, select either:
- Information
 next to the patient's name:
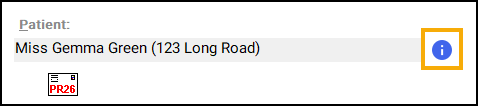
-
F3 on your keyboard, this opens the Patient Details screen on the Other tab.
-
F6 on your keyboard, this opens the Patient Details screen on the Medication History tab.
- Information
Navigate to the Patient tab if required.
From here you can view or update the following:
-
Patient number - You can search for a patient using their patient number, simply enter P and the patient number (no spaces) into the Patient search.
-
Services status (Scotland only) - Highlights whether a patient is registered for Scottish services such as Medicines: Care & Review (MCR):

-
 Red Cross, indicates the patient is not
registered.
Red Cross, indicates the patient is not
registered. -
 Amber exclamation mark, indicates pending registration.
 -
 Green tick, indicates registered.
-
-
Title - Select this patient's title from the list.
-
First name - Enter or update this patient's first name.
-
Other name(s) - Enter or update this patient's other names.
-
Last name - Enter or update this patient's last name.
-
Ethnicity - Select this patient's ethnicity from the list.
-
Address - Enter or update this patient's address. Select PR26
 to search the address database, see Adding Addresses for more details.
 -
Handout - Select the handout method for this patient, either In store collection, Delivery or Robot Collection.
-
Location - Enter or update any addition location information, for example 'Top Floor'.
-
Postcode - Enter or update this patient's postcode.
-
Fax - Enter or update this patient's fax contact number.
-
Home phone - Enter or update this patient's home contact number.
-
Mobile - Enter or update this patient's mobile number.
-
Work phone - Enter or update this patient's work contact number.
-
Main contact - Select which contact is this patient's main contact, select from Unknown, Home, Work or Mobile.
-
E-Mail - Enter or update this patient's email address.
-
Nursing Home - If this patient lives in a nursing home the home displays here, select Details to view the Monitored Dosage System screen for the nursing home.
-
MDSC Patient - If this patient is a community patient the details display here, select Details to view the Monitored Dosage System screen for this patient.
-
Sex - Select the sex of this patient, select from Male, Female or Unknown.
-
DoB - Enter or update this patient's date of birth.
-
Age - Automatically completes based on this patient's date of birth.
-
Group - Automatically completes based on this patient's date of birth. To update, select from Child, Adult, Elderly or Unknown.
-
NHS No - Enter or update this patient's NHS number.
-
CHI No - Enter or update this patient's CHI number.
-
NI No - Enter or update this patient's NI number.
-
Temporary patient - Select Temporary patient if this patient does not live in your area and is unlikely to return.
-
Patient is exempt - Select to mark that this patient is exemption from prescription charges. See Patient Details: Exemptions tab for more details.
-
No fixed abode - Select if this patient does not have an address, the Address and Postcode options inactivate.
-
Always verify collection - Select to record the handout for this patient.
-
Patient is deceased - Select to set this patient as deceased.
-
App User - Select to set this patient as an application user. See Marking a patient as an App user for more details.
-
MUR Leaflet - Select to print an MUR leaflet. This explains the purpose of MURs and enables this patient to complete the consent form.
-
Welcome Leaflet - Select to print a welcome leaflet for this patient. To set welcome leaflets to print automatically, see Pharmacy Details - Dispensing.
-
Registration Card - Select to print a registration card label for this patient.
Training Tip - Registration labels can be stuck to cards and provided to patients. They can then be used as a means of identifying patients when they return to the pharmacy with subsequent prescriptions. To set registration card label to print automatically, see Pharmacy Details - Dispensing. -
Address Label - Select or press Alt + Z on your keyboard to print an address label for this patient. If configured this label can include a barcode or a QR code.
From the bottom of the Patient Details - Patients screen you can select:
-
Intervene - Select to initiate an intervention, see The intervention wizard for more details.
-
Delete - Select to delete this patient. A Delete Patient warning displays:
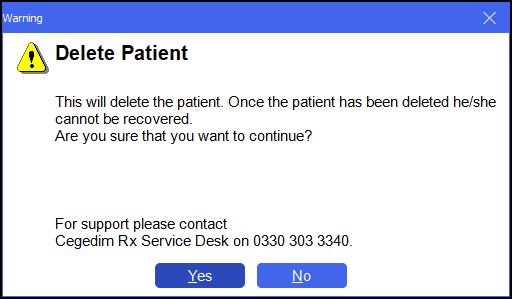
Select Yes to continue with the deletion, or No to retain this patient.
Important - This permanently removes this patient from your system. -
OK - Select to save the changes and close the Patient Details screen.
-
Cancel - Select to close the Patient Details screen without saving any changes.
-
Apply - Select to save any changes made. You can then select Close to close the Patient Details screen.