Manually Adding Barcodes
Cegedim Rx strives to add as many product barcodes into the product file as possible however there may be occasions where some barcodes are missing.
Where a barcode is missing, it can be manually added against a product, to do this:
-
Identify which product is missing a barcode, this may be while carrying out an accuracy check. On scanning an item with no barcode a message displays 'Scanning Error - The item that you have scanned has not been recognised. Please confirm that the item is correct and try again. If you are still unable to scan, then use the Manually Confirm Check option'.
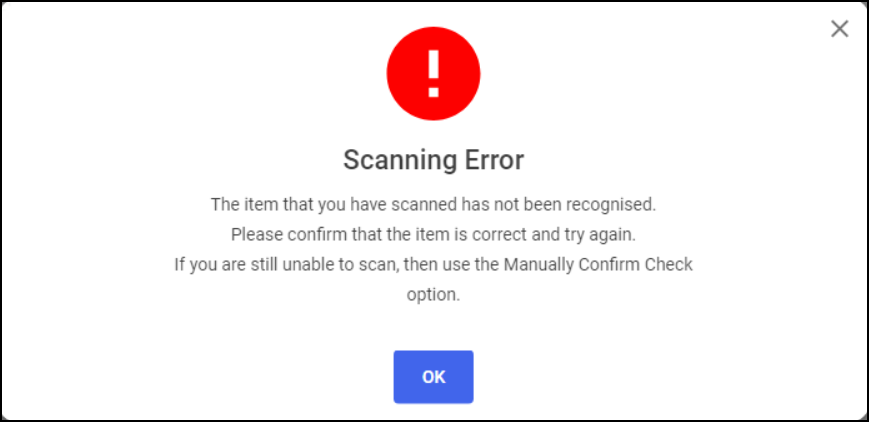
Select OK
 to continue.
 -
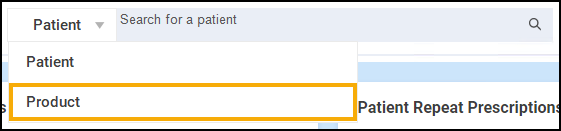
From the Pharmacy Manager Search bar select the drop-down arrow and select Product.
-
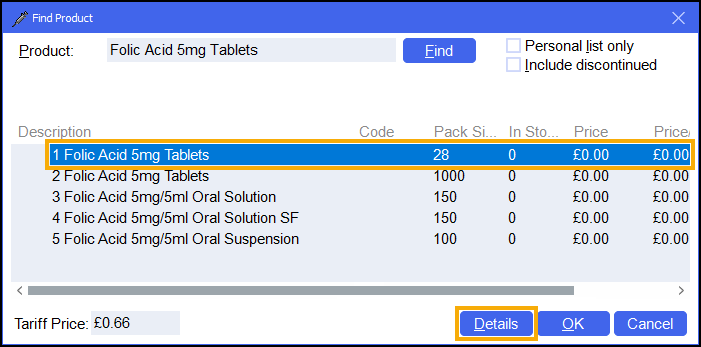
Enter the Product Name and select Search
 .
.
-
The Find Product screen displays. Select the required product and pack size and then select Details.
-
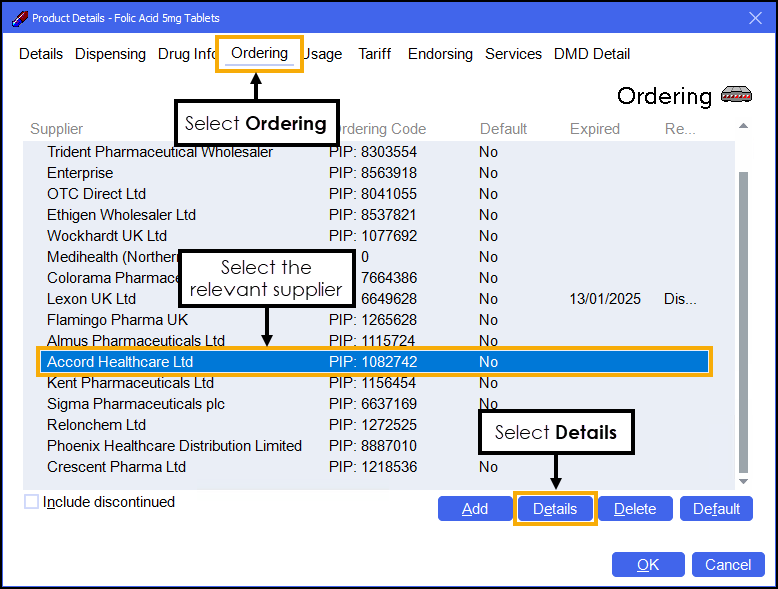
The Product Details screen displays. Select the Ordering tab.
-
Select the supplier and then select Details
 .
. -
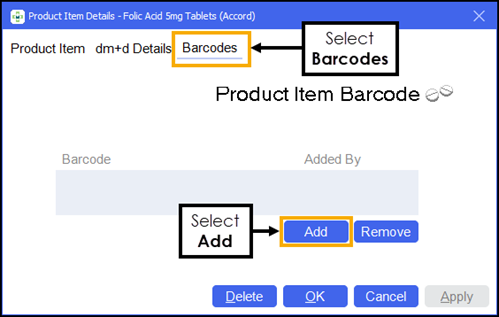
The Product Item Details screen displays for the selected product and supplier. Select the Barcodes tab and then select Add
 .
.
-
The Add Barcode Manually screen displays. Either type the barcode number or, if you have a scanner, scan the barcode on the product.
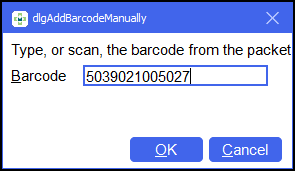
-
Select OK to add the barcode to the selected product. The Product Item Details screen displays the new barcode with the Added By column stating This Site.
-
Select OK
on each screen to close them.
You can now perform an accuracy check using the newly added barcode. Future checks using this barcode are successful if the item scanned matches.