Work Groups
If you create a Work Group, you can then use a secondary group to merge, combine, include or exclude patients.
Making a Group into a Work Group
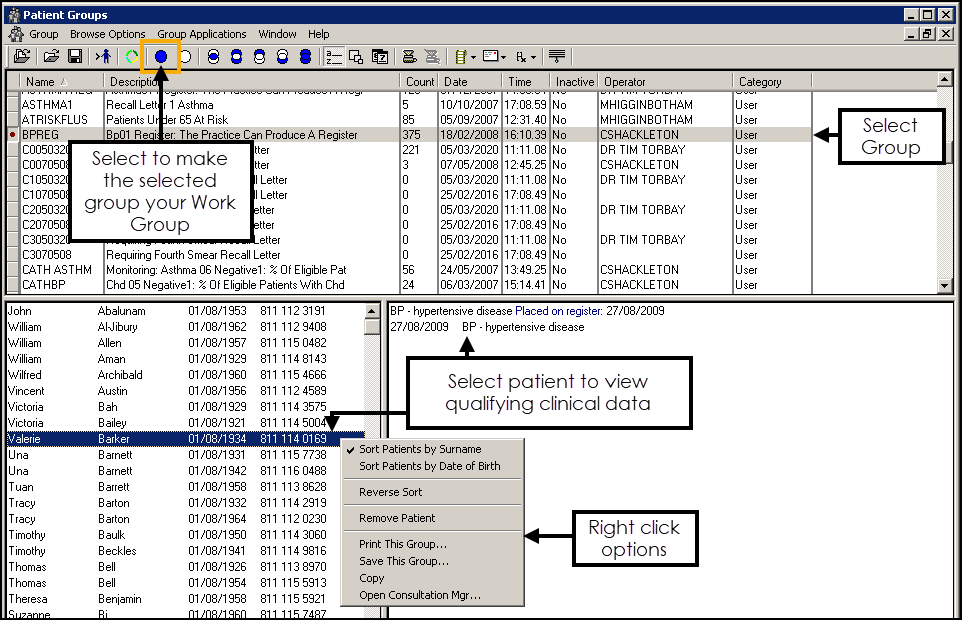
To make a group into a Work Group:
- From Patient Groups, select a group.
- Select Make Work Group
 and the list of patients in the group displays.
 - Right click on the group and select from the following as required:
- Sort - There are various options to display the patients in a group, select as required.
- Print - Select to print a list of the patients in the group.
- Save - Select to save the group.
-
Optionally, select a patient name to view relevant clinical details, these display to the right.
To view the patient record, right click and select Open Consultation Manager:
Work Group Menu
When you have an active Work Group, the following options are available:

-
 Save
Save -
 Clear Work Group
 -
 Keep patients common to both groups - See Keeping Common Patients for details.
 -
 Remove Common Patients - See Remove Common Patients for details.
 -
 Keeps patients exclusively in the joining (second) group - Removes all patients from the first group, including any patients who are in both groups, see Keep Patients only in the Secondary Group for details.
 -
 - Keep patients exclusively in the first (work) group
- Removes any patients that are in the both groups and does not import any patients in the joining group, seeKeeping Patients only in the Work Group for details.
 -
 - Add all patients - Merges the two groups together, see Merging Groups for details.
Clear and Close Work Group
Highlight a group and select Clear Work Group  if you no longer want a group to be the Work Group.
Note – To print this topic select Print  in the top right corner and follow the on-screen prompts.