Reactivating a User
If a staff member of who has left your practice returns, and you had inactivated them in Vision 3, instead of adding them as a new user you should reactivate their User Details.
To reactivate a staff member:
- From the Vision 3 front screen, select Management Tools - Control Panel - File Maintenance.
- Select Staff
 , or the Staff tab to list existing staff. Staff display under two folders, Active and Inactive:
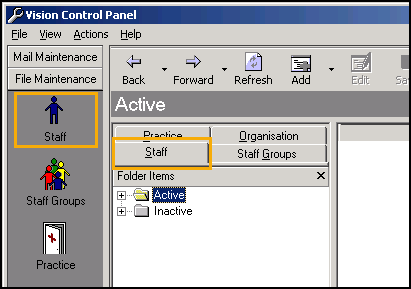
-
Select Expand
 next to Inactive to display the list of inactive staff.
 - Right click on the staff member to be reactivated and select Reactivate.
- The user is moved to the Active folder and the User Details - Update screen displays, check the details on each tab are still correct. If anything needs to be updated, select Edit
 and update as appropriate.
 - Select OK to save.
- Now, from the left-hand pane, select Security.
- Select Actions - View Inactive Users:

-
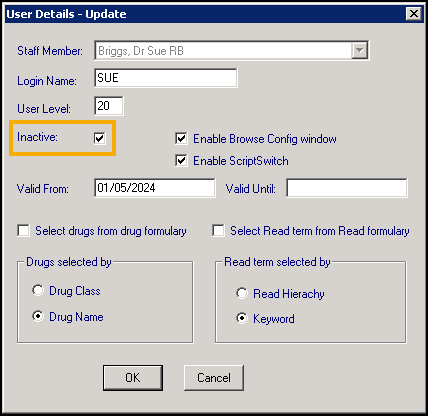
Right click on the staff member required and select Edit User.
-
The User Details - Update screen displays, remove the tick in Inactive:
-
Select OK to save.
-
Finally, right click on the staff member again and select Reset Password.
-
The Change Password screen displays, complete as follows:
- New Password - Enter a password, between 6 and 12 characters long. At least one character must be non-alphabetic. For security purposes, nothing displays on screen as you type, not even asterisks. Press the Tab key on your keyboard to move on.Important - There is no warning if you enter more than 12 characters, but additional characters are not retained.
- Confirm New Password- Re-enter the password in exactly the same way. A warning message displays if you have not included at least one number, or if the Confirm New Password entry does not match the New Password entry.Note - Every user needs a password to sign on to Vision 3, this initial password must be changed the first time the user logs on.
- New Password - Enter a password, between 6 and 12 characters long. At least one character must be non-alphabetic. For security purposes, nothing displays on screen as you type, not even asterisks. Press the Tab key on your keyboard to move on.
-
Select OK to save.
The returning member of staff can now log in.
Note – To print this topic select Print  in the top right corner and follow the on-screen prompts.