|
|
|
To Set Dispensing Label Print Sizes and Options
To specify your practice dispensing labels:
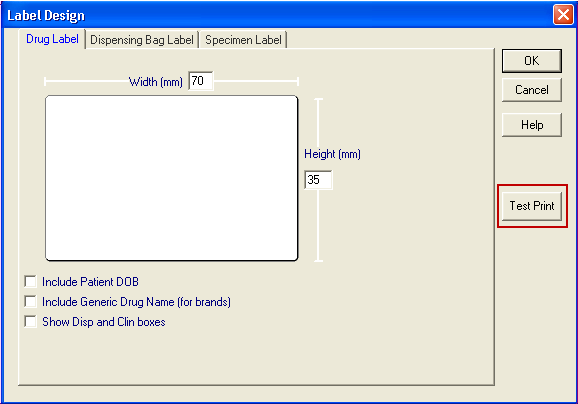
- From the main Vision screen, select Modules - Label Design - Drug Label.

- Increase the Width (mm) if required by clicking and over typing with the width of the labels you are using. Maximum width is 99mm.
- Increase the Height (mm) if required by clicking and over typing with the height of the labels you are using. Maximum height is 99mm.
- You have the following options to select from:
- Include Patient DOB - The patient’s Date of Birth can print under their name.
- Include Generic Drug Name (for Brands) - The full generic name for a drug can be printed under the brand name if a brand is prescribed.
- Show Disp and Clin boxes - The ability to print boxes for internal work flow monitoring.
- Click Test Print to check the resultant label.
- If the position of the text on the label needs adjusting, click
 .
. - Select Settings and then Printers and Faxes.
- Highlight your label printer, right click and select Printing Preferences.
- Click on Advanced.
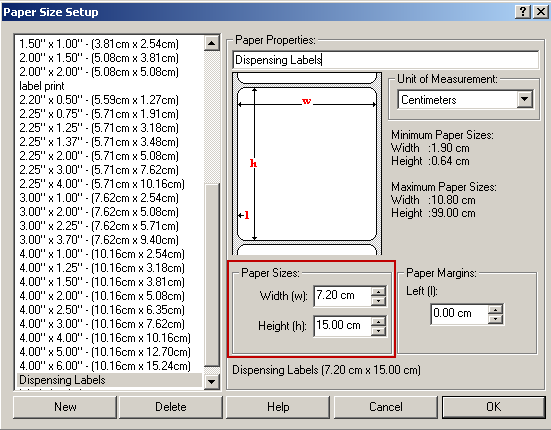
- Next to Paper Size, Click on Customise.

- Change the Width and Height of the paper as required.
 Tip - If the text on the label slips on to two labels, reduce the height. If the text does not use the whole height of the label, increase the height. If the text does not fill the width, increase the width. If the text falls off the sides of the label, reduce the width.
Note - The sizes here do not relate to the real size of your labels.
- Click OK to save and close the Paper Size Setup screen, the Advance Options screen and the Printing Preferences screen.
- Close the Printers and Faxes screen using
 .
. - Test the new settings by returning to Vision - Modules - Label Design - Drug Label and clicking Test.
- Repeat steps 6. To 14. until the label is printing correctly.
- Click OK to save and close Label Design.
Note - Dispensing Bag Label and Specimen Label design are not affected by these dispensing label enhancements.