Adding Test Results Manually
To enter test results manually:
- From Consultation Manager
 , select the patient required and start a consultation if required.
 - Select Add - Test Results, and then the management plan required. Remember you can use <Alt+A> then <Alt+U> if using the keyboard followed by:
- <Alt+I> for Diagnostic Imaging
- <Alt+R> for Biochemistry (Routine)
- <Alt+H> for Biochemistry (Hormones)
- <Alt+O> for Biochemistry (Other)
- <Alt+HH> for Haematology
- <Alt+M> for Microbiology
- <Alt+S> for Serology
- <Alt+P> for Other Pathology
- <Alt+D> for Diagnostic Tests
- The Management Plan selected displays.
- Select the appropriate tab required for the test you are recording.
- Right click on the test and select Add.
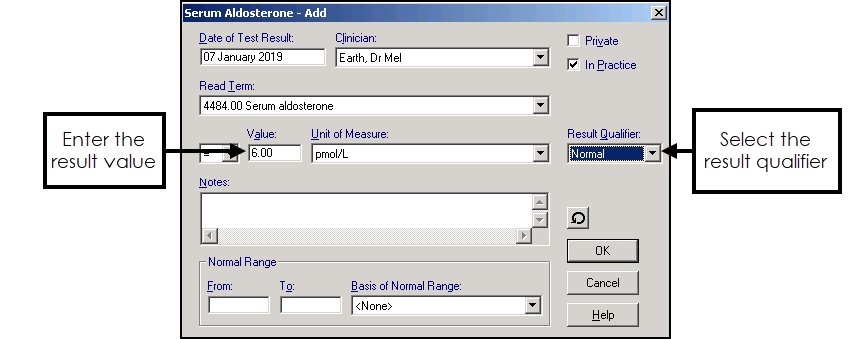
- Complete the - Add screen as appropriate. The following is a general guide, each form differs slightly:
- Date of Test Result - Defaults to today's date, update as required.
- Clinician - Defaults to the staff member or GP signed on for the current session, update as required.
- Private - Defaults to unticked, tick if you are recording a private consultation.
- In Practice - Ticked by default, remove tick to record result was recorded out of the practice.
- Read Term- Defaults to the generic Read Term for the test you are adding, select from the available list as required.
- Value - Enter the test result.
- Unit of Measure - Defaults to the recommended unit of measure for the type of test, update as required.
- Result Qualifier - Select as appropriate, for example Normal, High, Low. If anything other than Normal is selected, the result displays in red.
Notes
 - Select to add free text if required.
- Recall
 - Select to add recall dates if required.