|
|
|
|
|
Read Code Data Entry in Vision+
The Read Code Data Entry screen is the most used tool in Vision+. From this screen you can list and select individual or multiple Read codes. To access the Read code Data Entry screen:
- From Consultation Manager, select a patient and open a Consultation.
- If your practice uses problems, open or create the relevant problem.
- The alerts screen displays showing data that is missing from the patient record (see Alert Indicators).
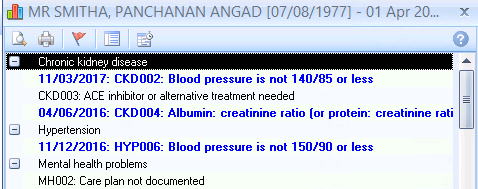
Alert Indicator Screen
- From the alerts screen either:
- Double click on the indicator line
- Highlight the Indicator line and choose the Contract
 icon on the toolbar
 - Right click and choose Contract
Note - Do not use the Read Code Data Entry Screen to record measurements such as BP, weight and height and smoking as they have their own data entry screens with specific boxes to enter values.
- The Read Codeset screen displays.
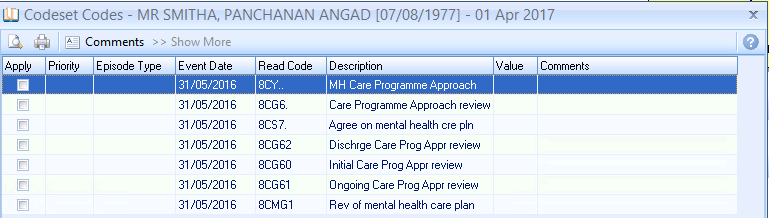
Read Code Data Entry screen
- In the Apply column, select the Read code you wish to use. You can also make selections from the other columns:
- Priority - Select from the drop down list. If left blank the Priority will be the same as your default setting. Where the entry does not require a Priority eg tests, this box is ignored and not written back to the patient's journal.
- Episode - Select the Episode type from the drop down list. If not selected the Episode defaults to the same as that in your setup. Where the entry does not require an Episode type eg tests, this box is ignored and not written back to the journal. The default Episode type is blank.
- Date Recorded - A date can be entered or a calendar appears if you choose from the drop down list.
- Read Code - This is QOF compliant and shows the commonly used contract codes. It is for information only and cannot be changed.
- Description - This is for information only and cannot be changed.
- Value - This box is for data requiring numeric values. If not required e.g. for history entries this box should be ignored.
- Comments - Optional free text comments can be accessed from a pre-defined list. Alternatively, you can start typing free text comments.
 Comments Button - Click on the Comments button to setup a pre-defined list. To enter a new comment start typing. If you press return you move to a new line as if you are creating a new comment. Click OK to save the changes.
 Show More Button - The QOF Read code list is quite exhaustive which is why the Read code list displays the most commonly used codes. Clicking Show More allows you to expand the Read selection.
 Note - The Apply column is automatically ticked if you change any of the other columns.
- Click OK to enter the data on the patient record. The alert for the missing data is now removed from the alert screen.
Adding data in Vision+
Entering data in Vision+