|
|
Image
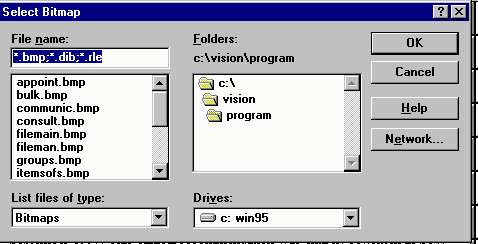
This allows you to choose a picture, called an image (previously called a bitmap), which can be embedded in the Guideline.
Note - In selecting a bitmap you are only establishing a reference to that bitmap on your hard disk or network. This operation does not take a copy of the bitmap and in order for your guideline to work correctly, the bitmap must always be available in a common area for all users of the system.
This means you should not try to insert a bitmap from a floppy disk - copy the bitmap to a directory first and import it from there.
- With a guideline in design mode, click Image (Bitmap)
 on the floating toolbar.
 - Select the bitmap to be included, and click OK.
- The bitmap itself will be displayed in the main guideline window.

The size of the bitmap may be adjusted by using the + and - keys on the main guideline window; the effect of this will be to adjust the height and width of the bitmap proportionally. Bitmaps have their own internal size and on selecting a bitmap a fixed width column large enough to contain this bitmap will be created.


You may want to use the carriage return icon to insert a new line
 after a bitmap. If not, the second bitmap will be placed beside the first.