Creating a Medical Insurance Report
An Insurance Report template allows you to create a medical report for insurance purposes as a Word document. It automatically extracts data from your patient records to produce a report that can then be edited.
To create a medical insurance report:
- From Consultation Manager
 , select the patient and if required start a consultation.
 - Select Add - Correspondence
- The Clinical Correspondence - Add screen displays:
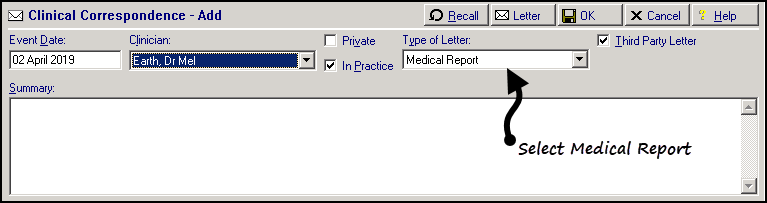
- Complete as follows:
- Event Date - Defaults to today's date, update as required.
- Clinician - Defaults to the staff member or GP signed on for the current session, update as required.
- Private - Defaults to unticked, tick if you are recording a private consultation.
- In Practice - Ticked by default, remove tick to record result was recorded out of the practice.
- Type of Letter - Select Medical Report.
- Summary - Enter for Insurance Purposes and the name of the insurance company requesting the report.
Important - Ensure you only have one instance of Consultation Manager open when generating a report, to prevent generating a report for the wrong patient.
- Select Letter
 and the Select Patient Template to Open screen displays.
 - Select Insurance_Report and then select Open.

- The insurance report opens, while the report compiles an hourglass displays. The cursor shape returns to normal once the report is ready, this can take a while on patients with a lot of data.
- The report is now ready for editing. Some of the sections in the report have Yes/No printed at the end, one of these needs deleting each time and then further comments added if necessary. The data that is imported from Vision can be edited and deleted as required:
- To edit text - Highlight it and enter the required text.
- To delete text within a table - Right click on the line and then select Delete Cells and then Delete entire row. This then does not leave a blank line.
- To delete several rows - Highlight the rows, right click and select Delete Rows.
- To delete text - Highlight it and use the Delete key.
- Select Print
 to print the report ready for sending.
 - Select Close
 .
. - The 'Do you want to save the changes to nnnnnnnn.CLI?' message displays, where nnnnnnnn is the automatically generated title, select Yes.
Remember - This saves the report for the selected patient, it does not update the template.
-
Finally, select OK.
See Medical Insurance Report Text and Criteria for details of the report.